In this tutorial, we will learn how to set up and configure the ROS Navigation Stack for a mobile robot. The video below shows the final output you will be able to achieve once you complete this tutorial.
What is the ROS Navigation Stack?
The ROS Navigation Stack is a collection of software packages that you can use to help your robot move from a starting location to a goal location safely.
The official steps for setup and configuration are at this link on the ROS website, but we will walk through everything together, step-by-step, because those instructions leave out a lot of detail. Where possible, I will link to other tutorials that I’ve written that have detailed instructions on how to implement specific pieces of the Navigation Stack.
IMPORTANT: For your reference, all our code will be located in this folder, which I named jetson_nano_bot.
Real-World Applications
This project has a number of real-world applications:
- Indoor Delivery Robots
- Room Service Robots
- Mapping of Underground Mines, Caves, and Hard-to-Reach Environments
- Robot Vacuums
- Order Fulfillment
- Factories
Prerequisites
- You have already set up your NVIDIA Jetson Nano (4GB, B01) with ROS. You can also use an Ubuntu-enabled Raspberry Pi that has ROS installed.
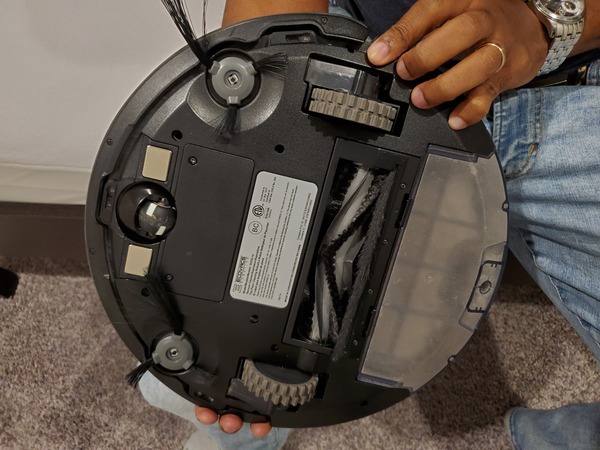
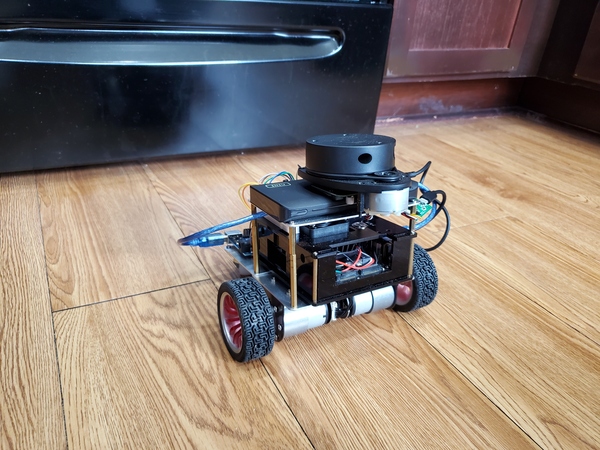
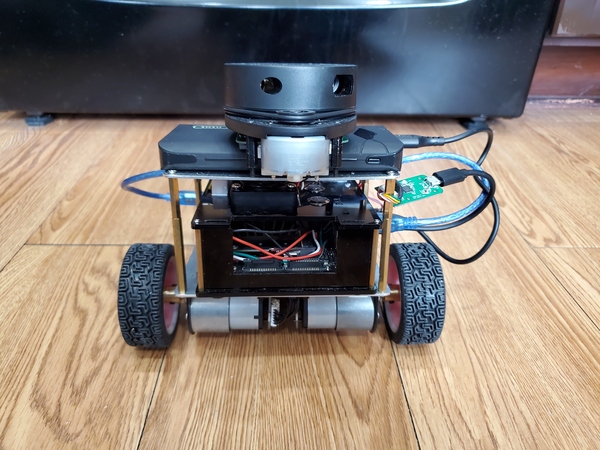
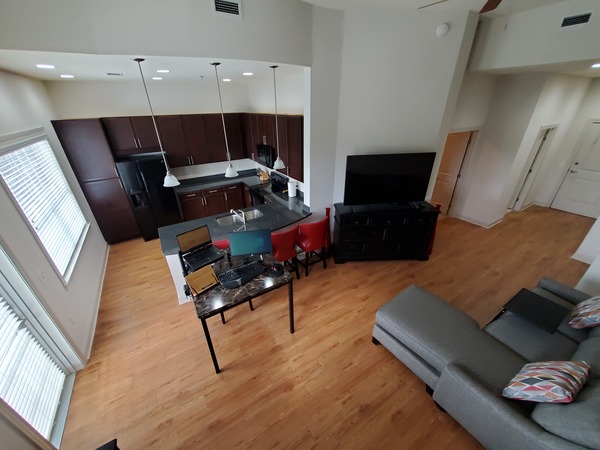
- You have a robot. I will continue with my two-wheeled differential drive robot. Here is how my robot looks:
Install the ROS Navigation Stack
Let’s start by installing the ROS Navigation Stack.
Open a new terminal window, and type the following command to install the ROS Navigation Stack.
sudo apt-get install ros-melodic-navigation
If you are using ROS Noetic, you will type:
sudo apt-get install ros-noetic-navigation
To see if it installed correctly, type:
rospack find amcl
You should see the following output:
/opt/ros/melodic/share/amcl
Create a Package
Let’s create a package inside the jetson_nano_bot folder. This package will contain our work for the ROS Navigation stack.
If you don’t already have a folder named jetson_nano_bot, create that now. Open a terminal window, and type:
cd ~/catkin_ws/src/
mkdir jetson_nano_bot
Open a new terminal window, and type:
cd ~/catkin_ws/src/jetson_nano_bot
Create a package named navstack_pub.
catkin_create_pkg navstack_pub rospy roscpp std_msgs tf tf2_ros geometry_msgs sensor_msgs nav_msgs move_base
Go inside your navstack_pub package.
roscd navstack_pub
Add a folder called param.
mkdir param
Go back to your package.
roscd navstack_pub
Open CMakeLists.txt.
gedit CMakeLists.txt
Remove the hashtag on line 5 to make sure that C++11 support is enabled.
cmake_minimum_required(VERSION 3.0.2)
project(navstack_pub)

## Compile as C++11, supported in ROS Kinetic and newer
add_compile_options(-std=c++11)

## Find catkin macros and libraries
## if COMPONENTS list like find_package(catkin REQUIRED COMPONENTS xyz)
## is used, also find other catkin packages
find_package(catkin REQUIRED COMPONENTS
  geometry_msgs
  move_base
  nav_msgs
  roscpp
  rospy
  sensor_msgs
  std_msgs
  tf
  tf2_ros
)

## System dependencies are found with CMake's conventions
# find_package(Boost REQUIRED COMPONENTS system)


## Uncomment this if the package has a setup.py. This macro ensures
## modules and global scripts declared therein get installed
## See http://ros.org/doc/api/catkin/html/user_guide/setup_dot_py.html
# catkin_python_setup()

################################################
## Declare ROS messages, services and actions ##
################################################

## To declare and build messages, services or actions from within this
## package, follow these steps:
## * Let MSG_DEP_SET be the set of packages whose message types you use in
##   your messages/services/actions (e.g. std_msgs, actionlib_msgs, ...).
## * In the file package.xml:
##   * add a build_depend tag for "message_generation"
##   * add a build_depend and a exec_depend tag for each package in MSG_DEP_SET
##   * If MSG_DEP_SET isn't empty the following dependency has been pulled in
##     but can be declared for certainty nonetheless:
##     * add a exec_depend tag for "message_runtime"
## * In this file (CMakeLists.txt):
##   * add "message_generation" and every package in MSG_DEP_SET to
##     find_package(catkin REQUIRED COMPONENTS ...)
##   * add "message_runtime" and every package in MSG_DEP_SET to
##     catkin_package(CATKIN_DEPENDS ...)
##   * uncomment the add_*_files sections below as needed
##     and list every .msg/.srv/.action file to be processed
##   * uncomment the generate_messages entry below
##   * add every package in MSG_DEP_SET to generate_messages(DEPENDENCIES ...)

## Generate messages in the 'msg' folder
# add_message_files(
#   FILES
#   Message1.msg
#   Message2.msg
# )

## Generate services in the 'srv' folder
# add_service_files(
#   FILES
#   Service1.srv
#   Service2.srv
# )

## Generate actions in the 'action' folder
# add_action_files(
#   FILES
#   Action1.action
#   Action2.action
# )

## Generate added messages and services with any dependencies listed here
# generate_messages(
#   DEPENDENCIES
#   geometry_msgs#   nav_msgs#   sensor_msgs#   std_msgs
# )

################################################
## Declare ROS dynamic reconfigure parameters ##
################################################

## To declare and build dynamic reconfigure parameters within this
## package, follow these steps:
## * In the file package.xml:
##   * add a build_depend and a exec_depend tag for "dynamic_reconfigure"
## * In this file (CMakeLists.txt):
##   * add "dynamic_reconfigure" to
##     find_package(catkin REQUIRED COMPONENTS ...)
##   * uncomment the "generate_dynamic_reconfigure_options" section below
##     and list every .cfg file to be processed

## Generate dynamic reconfigure parameters in the 'cfg' folder
# generate_dynamic_reconfigure_options(
#   cfg/DynReconf1.cfg
#   cfg/DynReconf2.cfg
# )

###################################
## catkin specific configuration ##
###################################
## The catkin_package macro generates cmake config files for your package
## Declare things to be passed to dependent projects
## INCLUDE_DIRS: uncomment this if your package contains header files
## LIBRARIES: libraries you create in this project that dependent projects also need
## CATKIN_DEPENDS: catkin_packages dependent projects also need
## DEPENDS: system dependencies of this project that dependent projects also need
catkin_package(
#  INCLUDE_DIRS include
#  LIBRARIES navstack_pub
#  CATKIN_DEPENDS geometry_msgs move_base nav_msgs roscpp rospy sensor_msgs std_msgs tf tf2_ros
#  DEPENDS system_lib
)

###########
## Build ##
###########

## Specify additional locations of header files
## Your package locations should be listed before other locations
include_directories(
# include
  ${catkin_INCLUDE_DIRS}
)

## Declare a C++ library
# add_library(${PROJECT_NAME}
#   src/${PROJECT_NAME}/navstack_pub.cpp
# )

## Add cmake target dependencies of the library
## as an example, code may need to be generated before libraries
## either from message generation or dynamic reconfigure
# add_dependencies(${PROJECT_NAME} ${${PROJECT_NAME}_EXPORTED_TARGETS} ${catkin_EXPORTED_TARGETS})

## Declare a C++ executable
## With catkin_make all packages are built within a single CMake context
## The recommended prefix ensures that target names across packages don't collide
# add_executable(${PROJECT_NAME}_node src/navstack_pub_node.cpp)

## Rename C++ executable without prefix
## The above recommended prefix causes long target names, the following renames the
## target back to the shorter version for ease of user use
## e.g. "rosrun someones_pkg node" instead of "rosrun someones_pkg someones_pkg_node"
# set_target_properties(${PROJECT_NAME}_node PROPERTIES OUTPUT_NAME node PREFIX "")

## Add cmake target dependencies of the executable
## same as for the library above
# add_dependencies(${PROJECT_NAME}_node ${${PROJECT_NAME}_EXPORTED_TARGETS} ${catkin_EXPORTED_TARGETS})

## Specify libraries to link a library or executable target against
# target_link_libraries(${PROJECT_NAME}_node
#   ${catkin_LIBRARIES}
# )

#############
## Install ##
#############

# all install targets should use catkin DESTINATION variables
# See http://ros.org/doc/api/catkin/html/adv_user_guide/variables.html

## Mark executable scripts (Python etc.) for installation
## in contrast to setup.py, you can choose the destination
# catkin_install_python(PROGRAMS
#   scripts/my_python_script
#   DESTINATION ${CATKIN_PACKAGE_BIN_DESTINATION}
# )

## Mark executables for installation
## See http://docs.ros.org/melodic/api/catkin/html/howto/format1/building_executables.html
# install(TARGETS ${PROJECT_NAME}_node
#   RUNTIME DESTINATION ${CATKIN_PACKAGE_BIN_DESTINATION}
# )

## Mark libraries for installation
## See http://docs.ros.org/melodic/api/catkin/html/howto/format1/building_libraries.html
# install(TARGETS ${PROJECT_NAME}
#   ARCHIVE DESTINATION ${CATKIN_PACKAGE_LIB_DESTINATION}
#   LIBRARY DESTINATION ${CATKIN_PACKAGE_LIB_DESTINATION}
#   RUNTIME DESTINATION ${CATKIN_GLOBAL_BIN_DESTINATION}
# )

## Mark cpp header files for installation
# install(DIRECTORY include/${PROJECT_NAME}/
#   DESTINATION ${CATKIN_PACKAGE_INCLUDE_DESTINATION}
#   FILES_MATCHING PATTERN "*.h"
#   PATTERN ".svn" EXCLUDE
# )

## Mark other files for installation (e.g. launch and bag files, etc.)
# install(FILES
#   # myfile1
#   # myfile2
#   DESTINATION ${CATKIN_PACKAGE_SHARE_DESTINATION}
# )

#############
## Testing ##
#############

## Add gtest based cpp test target and link libraries
# catkin_add_gtest(${PROJECT_NAME}-test test/test_navstack_pub.cpp)
# if(TARGET ${PROJECT_NAME}-test)
#   target_link_libraries(${PROJECT_NAME}-test ${PROJECT_NAME})
# endif()

## Add folders to be run by python nosetests
# catkin_add_nosetests(test)

INCLUDE_DIRECTORIES(/usr/local/lib)
LINK_DIRECTORIES(/usr/local/lib)

add_executable(send_goals src/send_goals.cpp)
target_link_libraries(send_goals ${catkin_LIBRARIES})
Save and close the file.
Now let’s compile the package.
cd ~/catkin_ws/
catkin_make --only-pkg-with-deps navstack_pub
Now we’re going to put together our launch file.
Open a new terminal window, and move to your navstack_pub package.
roscd navstack_pub
mkdir launch
cd launch
Create your launch file.
gedit jetson_nano_bot.launch
Add the following code:
<launch>
</launch>
Save the file, and close it.
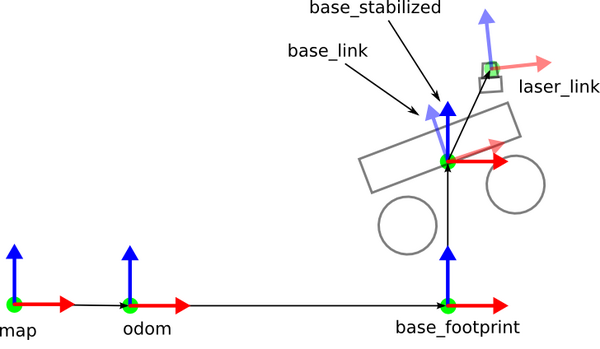
Transform Configuration
The ROS Navigation Stack requires that we publish information about the relationships between coordinate frames of the robot using the tf ROS package.
Open a terminal window and type:
roscd navstack_pub
cd launch
Open your launch file.
gedit jetson_nano_bot.launch
Add the “Transformation Configuration…” block of this code (you will need to download the launch file in order to copy the code) to your launch file. You will need to modify it for your own robot. A full explanation of how to do that can be found on this post.
Sensor Information
The ROS Navigation Stack uses sensor information to help the robot avoid obstacles in the environment. It assumes that the sensor publishes either sensor_msgs/LaserScan or sensor_msgs/PointCloud messages over ROS.
LIDAR Information
Open a terminal window and type:
roscd navstack_pub
cd launch
Open your launch file.
gedit jetson_nano_bot.launch
Add the “Lidar Data Publisher Using RPLIDAR…” block of this code to your launch file. This code requires no modifications. A full explanation of how to set up your LIDAR so the launch file can read it properly can be found on this post. The full tutorial for setting up your LIDAR from scratch can be found on this post.
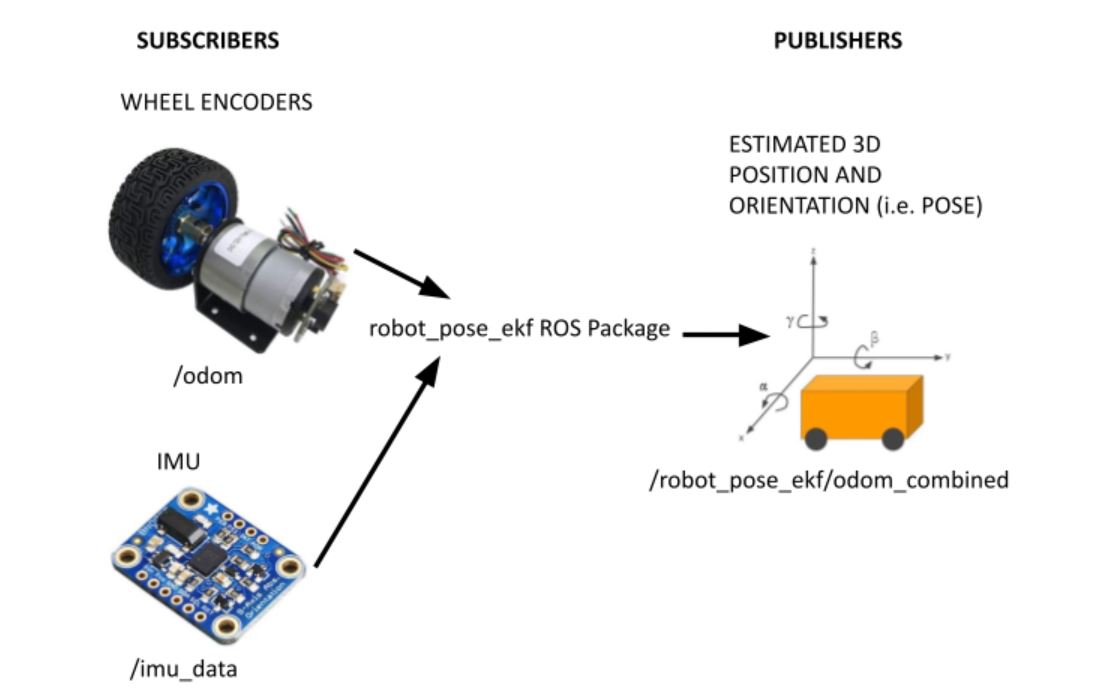
Odometry Information
The navigation stack requires that odometry information be published using tf and the nav_msgs/Odometry message. To set this up, you will need to have completed the following three tutorials:
- Data from wheel encoders
- Data from the BNO055 IMU Sensor
- The robot_pose_ekf package, which uses an Extended Kalman Filter to fuse the data provided by the wheel encoders and the BNO055 IMU sensor.
Once you have completed the three tutorials above, you can move to the next step to add the appropriate code to your main launch file.
Open a terminal window and type:
roscd navstack_pub
cd launch
Open your launch file.
gedit jetson_nano_bot.launch
Add the “Wheel Odometry Publisher” block of this code to your launch file.
Add the “IMU Data Publisher Using the BNO055 IMU Sensor” block of this code to your launch file.
Add the “Extended Kalman Filter from robot_pose_ekf Node” block of this code to your launch file.
Base Controller
The ROS Navigation Stack requires a node that subscribes to the “cmd_vel” (i.e. velocity command) topic that takes velocities and converts them into motor commands. To set this up, you will need to have completed the following tutorial:
Once you have completed the tutorial above, you can move to the next step to add the appropriate code to your main launch file.
Open a terminal window and type:
roscd navstack_pub
cd launch
Open your launch file.
gedit jetson_nano_bot.launch
Add the “Wheel Encoder Tick Publisher and Base Controller Using Arduino” block of this code to your launch file.
Mapping Information
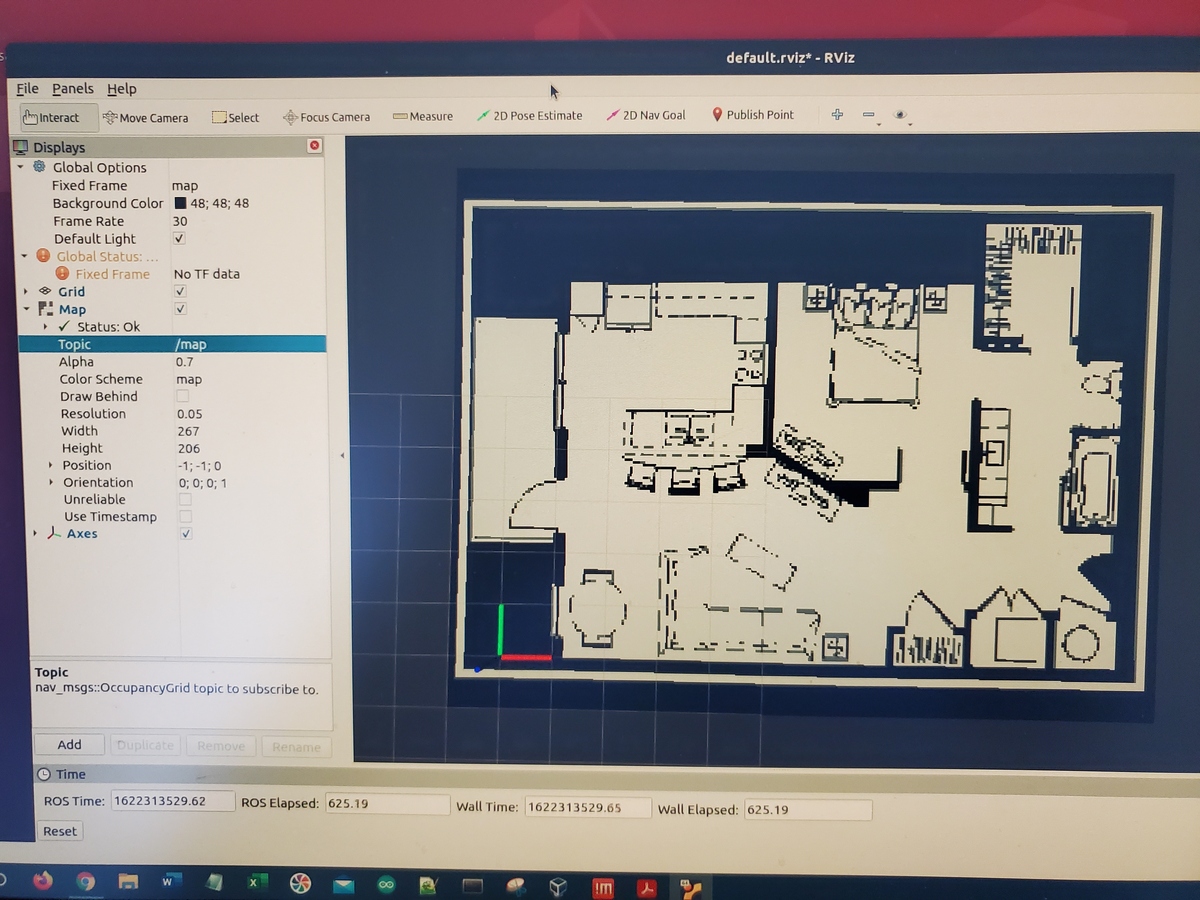
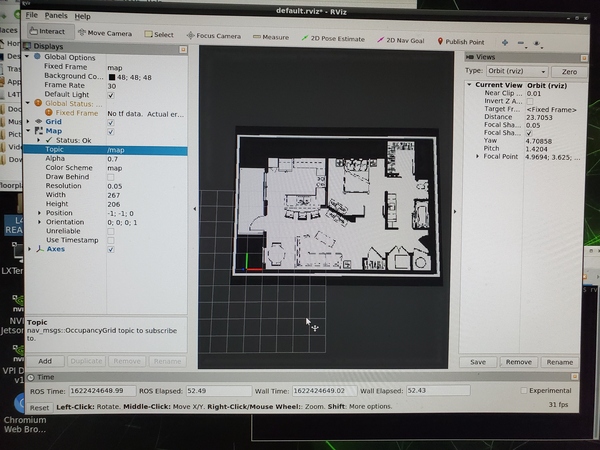
You do not need to have a map to run the ROS Navigation Stack, but I will assume we have a static map of our environment. The map enables us to set an initial pose for our robot and to give it a goal destination.
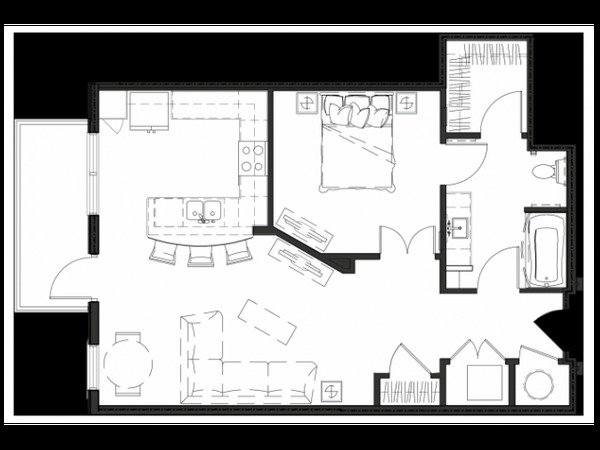
You can create your map:
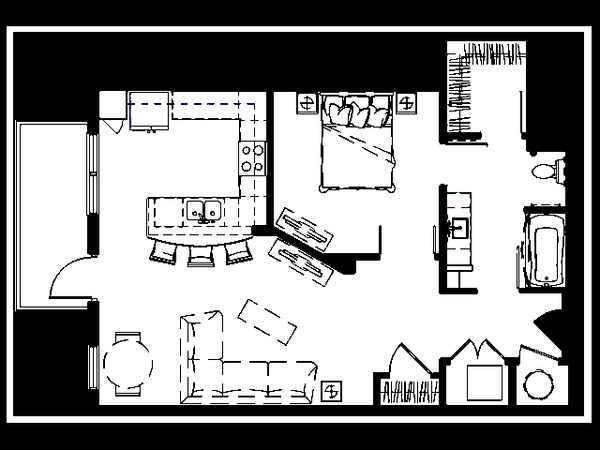
I created my map using the floorplan of my apartment. The full tutorial on how to do this is on this post.
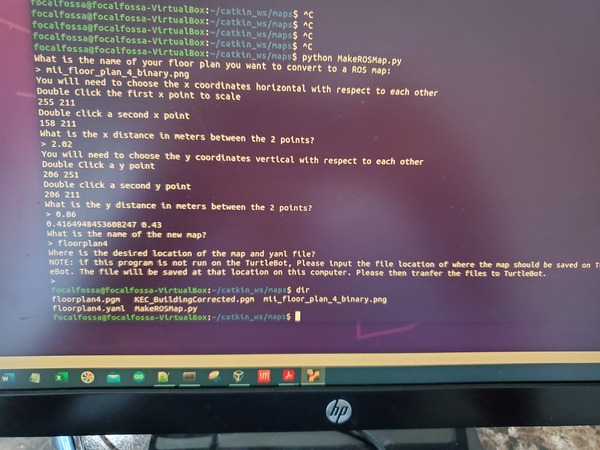
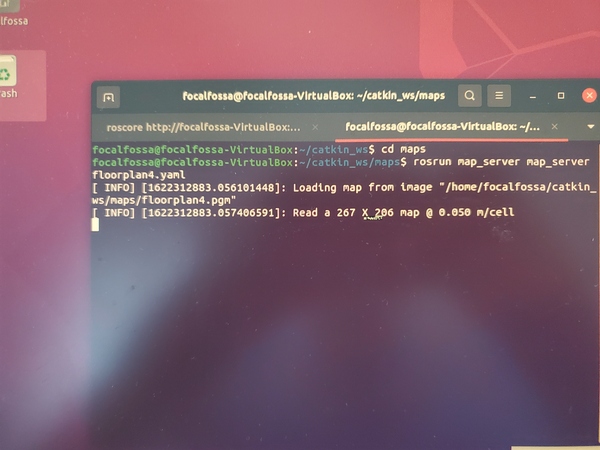
Your map will consist of two files: a pgm file and a yaml file. My files are named floorplan4.pgm and floorplan4.yaml.
You will also need a way to convert the initial pose of the robot and your desired goal destination into a usable format. I show you how to do that in the tutorial below:
Once you have the two map files and your initial pose and goal publisher, you can add the relevant code to your launch file.
Open a terminal window and type:
roscd navstack_pub
cd launch
Open your launch file.
gedit jetson_nano_bot.launch
Add the “Map File” block of this code to your launch file. This code loads the saved map files.
Add the “Map Server” block of this code to your launch file. This code calls on ROS to serve the map.
Add the “Initial Pose and Goal Publisher” block of this code to your launch file. This code enables you to launch RViz. You will need to delete the following argument:
args="-d /home/automaticaddison/catkin_ws/src/jetson_nano_bot/navigation_data_pub/maps/floorplan4.rviz"So that the entire block looks like this:
<!-- Initial Pose and Goal Publisher -->
<!-- Publish: /initialpose, /move_base_simple/goal -->
 <node pkg="rviz" type="rviz" name="rviz" >
 </node>
Add the “Subscribe: /initialpose, /move_base_simple/goal” block of this code to your launch file. This code makes sure that, when you click the buttons in RViz to set the initial pose and the goal destination, the pose and goal get converted into a usable format.
Costmap Configuration (Global and Local Costmaps)
The ROS Navigation Stack uses two costmaps to store information about obstacles in the world.
- Global costmap: This costmap is used to generate long term plans over the entire environment….for example, to calculate the shortest path from point A to point B on a map.
- Local costmap: This costmap is used to generate short term plans over the environment….for example, to avoid obstacles.
We have to configure these costmaps for our project. We set the configurations in .yaml files.
Common Configuration (Global and Local Costmap)
Let’s create a configuration file that will house parameters that are common to both the global and the local costmap. The name of this file will be costmap_common_params.yaml.
Open a terminal window, and type:
cd ~/catkin_ws
roscd navstack_pub
cd param
gedit costmap_common_params.yaml
Add the costmap_common_params.yaml code to this file.
Save and close the file.
To learn more about each of the parameters and what they mean, check out this link.
Global Configuration (Global Costmap)
Let’s create a configuration file that will house parameters for the global costmap. The name of this file will be global_costmap_params.yaml.
Open a terminal window, and type:
cd ~/catkin_ws
roscd navstack_pub
cd param
gedit global_costmap_params.yaml
Add the global_costmap_params.yaml code to this file.
Save and close the file.
Local Configuration (Local Costmap)
Let’s create a configuration file that will house parameters for the local costmap. The name of this file will be local_costmap_params.yaml.
Open a terminal window, and type:
cd ~/catkin_ws
roscd navstack_pub
cd param
gedit local_costmap_params.yaml
Add the local_costmap_params.yaml code to this file.
Save and close the file.
Base Local Planner Configuration
In addition to the costmap configurations we did in the previous section, we need to configure ROS Navigation Stack’s base local planner. The base_local_planner computes velocity commands that are sent to the robot base controller. The values that you use for your base_local_planner will depend on your robot.
Open a terminal window, and type:
cd ~/catkin_ws
roscd navstack_pub
cd param
gedit base_local_planner_params.yaml
Add the base_local_planner_params.yaml code to this file.
Save and close the file.
Move Base Node
Now that we have created our configuration files, we need to add them to the launch file. The configuration files will be used by ROS Navigation Stack’s move_base node. The move_base node is the work horse behind the scenes that is responsible for planning a collision-free path from a starting location to a goal location for a mobile robot.
The move-base node subscribes to the following topics:
- /move_base_simple/goal : Goal position and orientation (geometry_msgs::PoseStamped). The messages on this topic are generated using the goal button on RViz.
The publisher will publish to the following topics:
- /cmd_vel : Linear and angular velocity command (geometry_msgs/Twist Message)
Open a terminal window, and type:
cd ~/catkin_ws
roscd navstack_pub
cd launch
gedit jetson_nano_bot.launch
Add the “Move Base Node” block of this code to your launch file. This code loads all the configuration files we have created so far. It also loads the move_base node.
AMCL Configuration
The ROS Navigation Stack requires the use of AMCL (Adaptive Monte Carlo Localization), a probabilistic localization system for a robot. AMCL is used to track the pose of a robot against a known map. It takes as input a map, LIDAR scans, and transform messages, and outputs an estimated pose. You can learn more about this package here on the ROS website.
The amcl node subscribes to the following topics:
- /scan : Laser scan messages from the LIDAR (sensor_msgs/LaserScan).
- /tf : Coordinate frame transformations (tf/tfMessage).
- /initialpose : The initial position and orientation of the robot using quaternions. (geometry_msgs/PoseWithCovarianceStamped) — RViz initial pose button publishes to this topic.
- /map : The occupancy grid map created using gmapping, Hector SLAM, or manually using an image (nav_msgs/OccupancyGrid).
The amcl node will publish to the following topics:
- /amcl_pose : Robot’s estimated pose in the map (geometry_msgs/PoseWithCovarianceStamped).
- /particlecloud: The set of pose estimates being maintained by the filter (geometry_msgs/PoseArray).
- /tf (tf/tfMessage): Publishes the transform from odom (which can be remapped via the ~odom_frame_id parameter) to map.
Let’s add the AMCL node to the launch file.
Open a terminal window, and type:
cd ~/catkin_ws
roscd navstack_pub
cd launch
gedit jetson_nano_bot.launch
Add the “Add AMCL example for differential drive robots” block of this code to your launch file. This code loads the ACML code for a differential drive robot.
Launch the Autonomous Mobile Robot!
We’re almost at the finished line!
Let’s compile the package. Open a new terminal, and type:
cd ~/catkin_ws/
catkin_make --only-pkg-with-deps navstack_pub
Turn the motors of your robot on.
Open a new terminal window and launch the launch file.
roslaunch navstack_pub jetson_nano_bot.launch
If necessary, set the topics for each of the RViz plugins so that you can see the axis of your robot on the screen along with the map and costmaps.
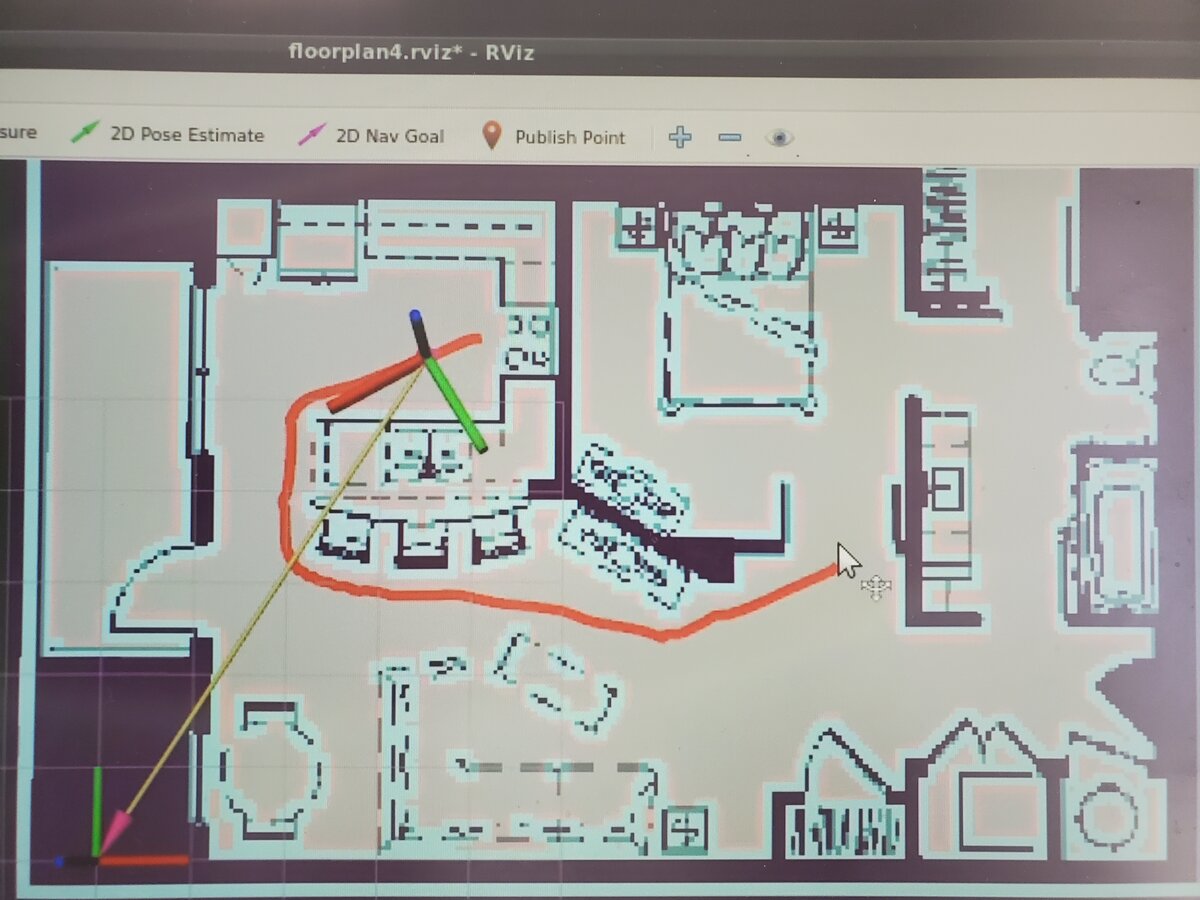
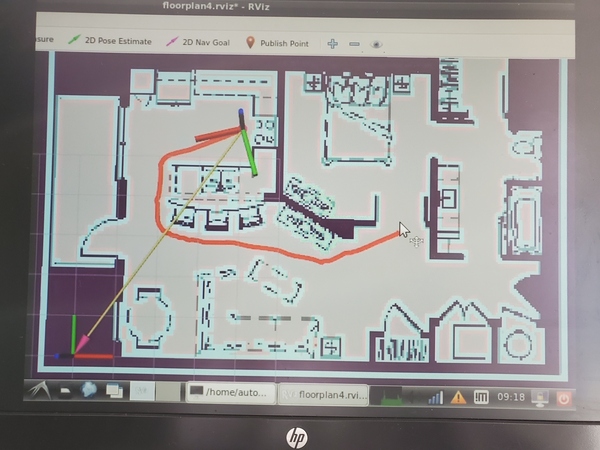
Set the initial pose of the robot by clicking the 2D Pose Estimate button at the top of RViz and then clicking on the map.
Give the robot a goal by clicking on the 2D Nav Goal button at the top of RViz and then clicking on the map.
You should see the planned path automatically drawn on the map. Your robot should then begin to follow this path.

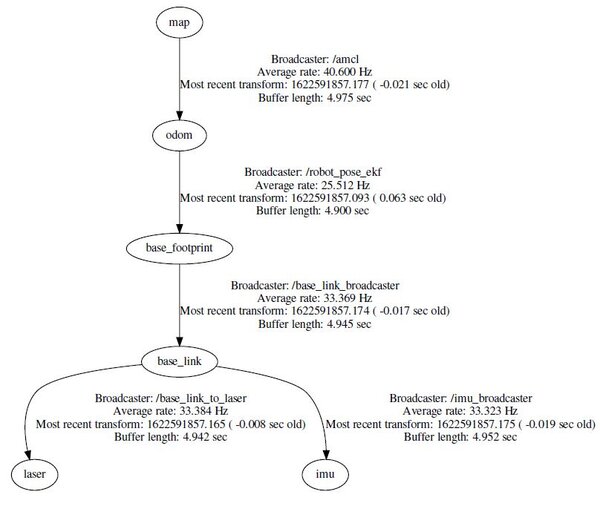
Open a new terminal, and see the tf tree.
rosrun tf view_frames
evince frames.pdf
Open a new terminal and see the node graph.
rqt_graph
Here is the link to my node graph.
That’s it! Congratulations on getting the ROS Navigation Stack up and running! Keep building!