
In this tutorial, I will show you how to use the BNO055 sensor (using i2c communication) to generate IMU data for a ROS-based robot.
I actually prefer the BNO055 over other IMU sensors like the MPU6050. I have found that the BNO055 generates more accurate and less noisy data than the MPU6050.
Real-World Applications
This project has a number of real-world applications:
- Indoor Delivery Robots
- Room Service Robots
- Mapping of Underground Mines, Caves, and Hard-to-Reach Environments
- Robot Vacuums
- Order Fulfillment
- Factories
Prerequisites
- You have already set up your NVIDIA Jetson Nano (4GB, B01) with ROS. You can also use an Ubuntu-enabled Raspberry Pi that has ROS installed, but the hardware setup will be different.
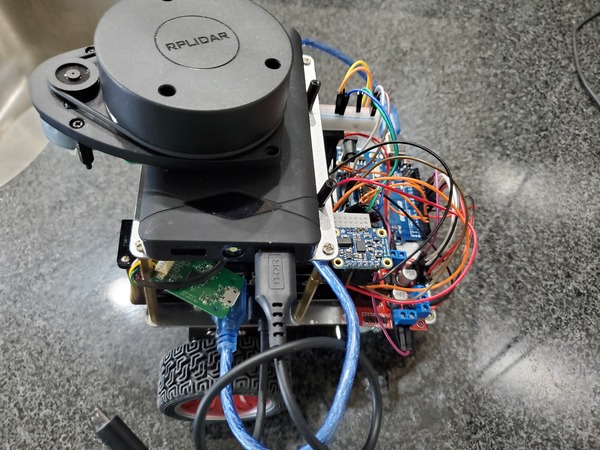
- You have a robot (optional). I will continue with my two-wheeled differential drive robot.
You Will Need
You will need the following components (#ad).
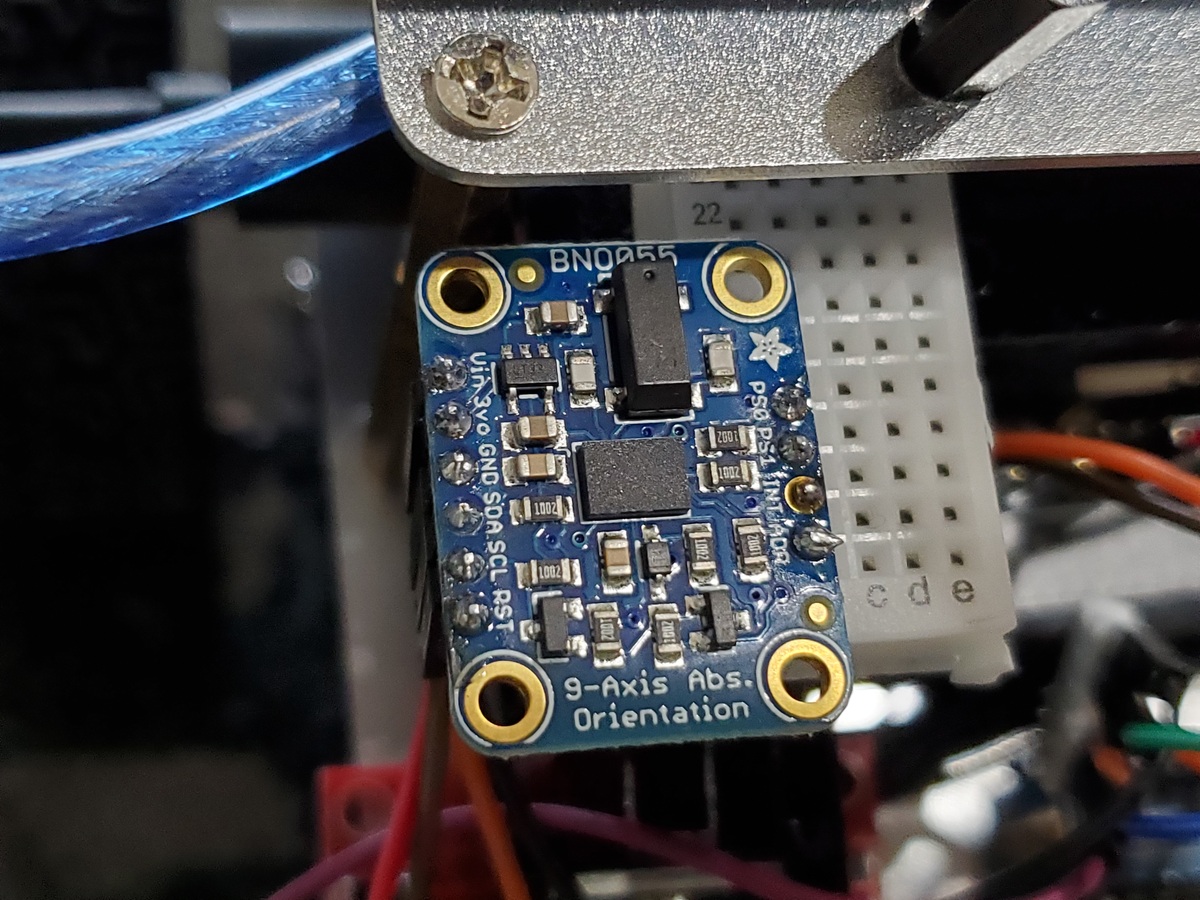
- BNO055 Absolute Orientation Sensor
- Assorted breadboard jumper wires
- 400-point solderless breadboard (Optional)
Disclosure (#ad): As an Amazon Associate I earn from qualifying purchases.
Set Up the Hardware
First, let’s set up the hardware. Remember you need to solder the pins to the BNO055.
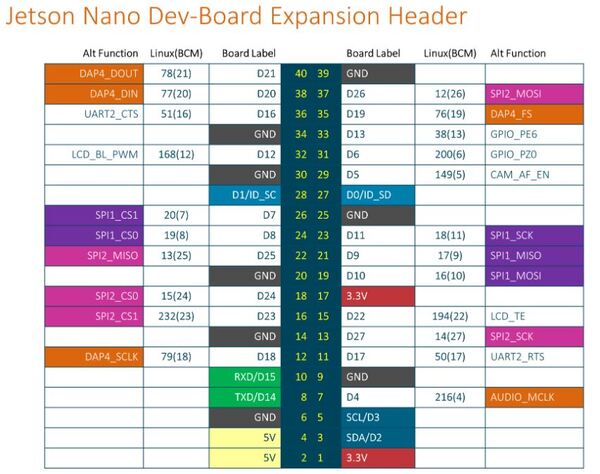
Make the following connections between the BNO055 and the NVIDIA Jetson Nano:
- Connect BNO055 Vin to pin 17 (3.3V) of the Jetson Nano.
- Connect BNO055 GND to pin 25 (GND) of the Jetson Nano.
- Connect BNO055 SDA to pin 3 (SDA) of the Jetson Nano.
- Connect BNO055 SCL to pin 5 (SCL) of the Jetson Nano.
Set Up the Communication Protocol
Our BNO055 will use the I2C serial communication protocol. What this means is that data will be transferred from the IMU to the Jetson Nano one bit at a time.
Turn on your Jetson Nano.
Open a terminal window.
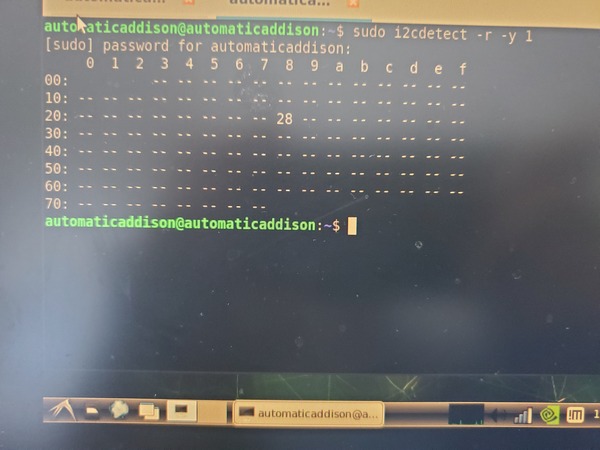
Type the following command to verify that you can see the BNO055.
sudo i2cdetect -r -y 1
Check that the bus of the BNO055 has an address of 0x28.
Install and Build the BNO055 ROS Package
Let’s get all the software set up.
Turn on your Jetson Nano.
Open a new terminal window.
Install the libi2c-dev library.
sudo apt-get update
sudo apt-get install libi2c-dev
Install the BNO055 ROS package.
cd ~/catkin_ws/src
Remove any existing package named ‘ros_imu_bno055’.
git clone https://github.com/dheera/ros-imu-bno055.git
Build the package.
cd ~/catkin_ws/
catkin_make --only-pkg-with-deps imu_bno055
Open a new terminal window, and see if our package depends on other packages, type these commands. Ignore any error messages you see in the terminal:
rosdep update
rosdep check <package_name>
We will do:
rosdep check imu_bno055
You should see a message that says “All system dependencies have been satisfied.”
Reboot your computer.
sudo reboot
View the IMU Data
Install the ROS IMU plugin so we can visualize the IMU data on rviz.
sudo apt-get install ros-melodic-rviz-imu-plugin
Open a terminal window, and type:
roslaunch imu_bno055 imu.launch
Open a terminal window and see the active topics.
rostopic list
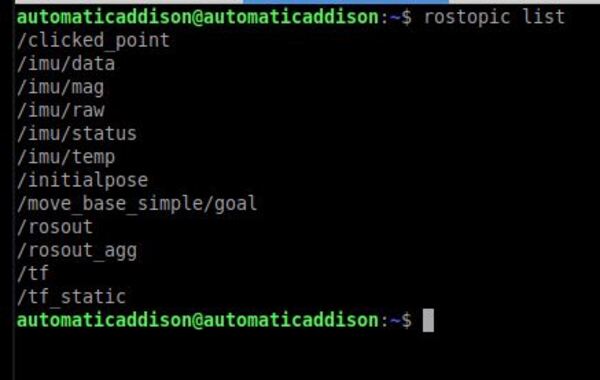
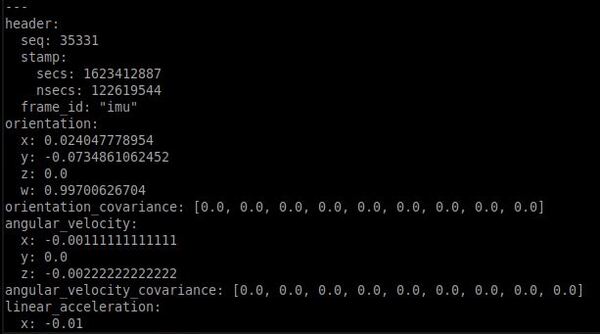
Let’s see the imu data on the topic named /imu/data.
rostopic echo /imu/data
If rviz has not already launched, open a new terminal and launch rviz.
rviz
Change the fixed frame to imu.
Click the Add button in the bottom left.
Click imu under rviz_imu_plugin.
Click OK.
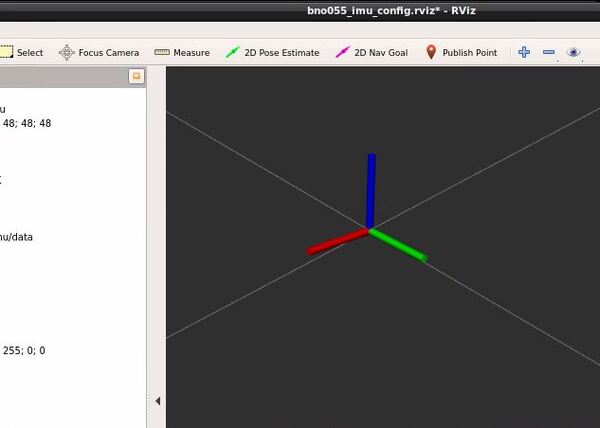
Change the topic of the imu to /imu/data.
Move your BNO055 around, and you will see the axes move. The red line is the x-axis, the green line is the y-axis, and the blue line is the z-axis.
Press CTRL + C in all terminal windows to close everything down.
Update Your Launch File (Optional)
I have a launch file I created in this post.
I will add the following lines to my launch file (which is in XML format).
  <!-- IMU Data Publisher Using the BNO055 IMU Sensor -->
  <!-- Publish: /imu/data -->
  <node ns="imu" name="imu_node" pkg="imu_bno055" type="bno055_i2c_node" respawn="true" respawn_delay="2">
    <param name="device" type="string" value="/dev/i2c-1"/>
    <param name="address" type="int" value="40"/> <!-- 0x28 == 40 is the default for BNO055 -->
    <param name="frame_id" type="string" value="imu"/>
  </node>
That’s it. Keep building!