

In this tutorial, we will go over how to install and configure Visual Studio Code for your ROS 2 projects.
Visual Studio Code, often shortened to VS Code, is a free and open-source code editor developed by Microsoft. It’s a popular choice for programmers of all levels, from beginners to professionals, because it’s:
- Lightweight and fast: It doesn’t take up much space on your computer and starts up quickly, so you can get coding right away.
- Versatile: It supports a wide range of programming languages, including JavaScript, Python, Java, C++, and more. You can also install extensions to add support for even more languages.
- Customizable: You can personalize VS Code with themes, extensions, and keyboard shortcuts to make it work the way you want.
- Feature-rich: It comes with built-in features like syntax highlighting, code completion, and debugging, which can help you write better code faster.
Let’s get started!
Prerequisites
- You have a computer that is running Ubuntu (I’m running my Ubuntu Linux inside a virtual machine on Windows).
- You have installed ROS 2.
Directions
If you prefer learning through video rather than text, check out the YouTube video below where I walk you through the entire process step by step. Otherwise, keep reading.
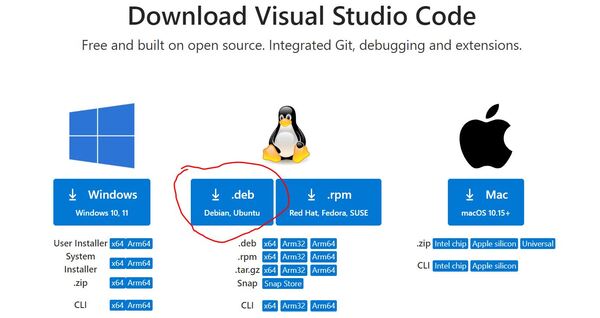
Go to the download page at Visual Studio Code.
Click the .deb button.
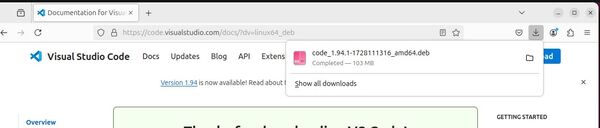
Open a terminal window, and type:
cd ~/DownloadsCheck the name of the file:
dir
Run the following command, replacing “filename.deb” with the actual name of your file:
sudo dpkg -i filename.debEnter your password when prompted.
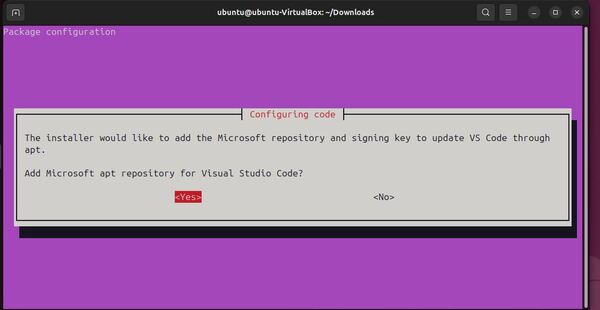
Click Yes if you see this screen.
The installation will start. Wait for it to complete.
Now, navigate to your workspace.
cd ~/ros2_ws/Open VS Code by typing this command in a terminal window:
code .Click the checkbox next to “Trust the authors of all files in the parent folder ‘ubuntu’”.
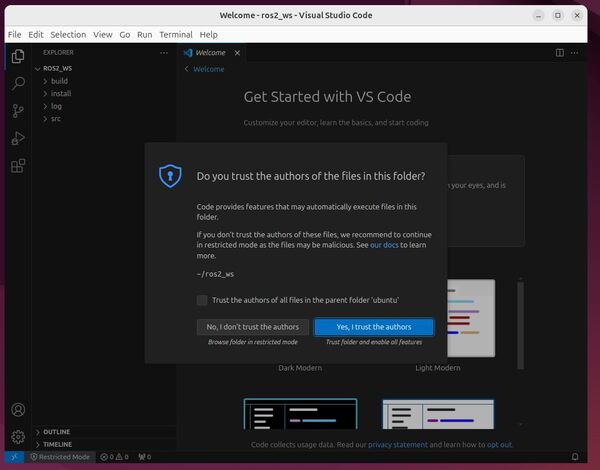
Click “Yes, I trust the authors” to continue.
Choose your desired color theme by clicking the “Browse Color Themes” button. You can also go to the File > Preferences > Theme > Color Theme menu item.

I will select Solarized Dark because it reduces blue light emission from my screen, which can help minimize disruption to my natural sleep-wake cycle. This theme is particularly beneficial for low-light environments and late-night coding sessions, as it reduces eye strain and makes extended work more comfortable.
A similar option if you prefer lighter themes is Solarized Light.
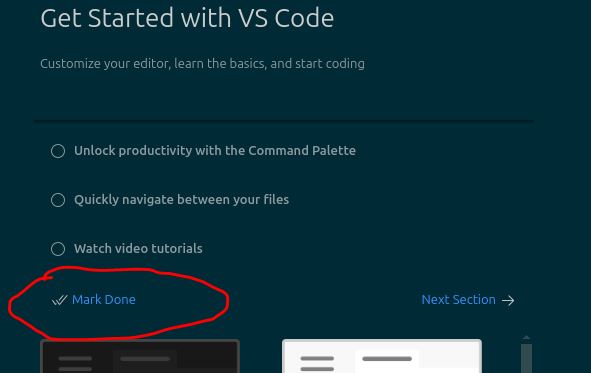
Now you need to scroll down on the top menu, and select “Mark Done”.
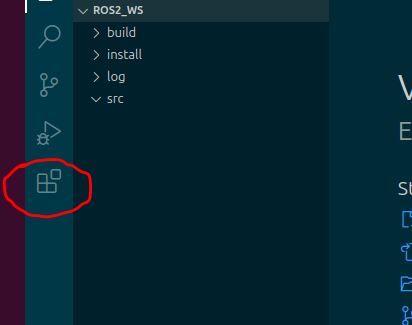
Double-click on the Extensions button on the left side of the window.
Search for the “C/C++” extension by Microsoft.
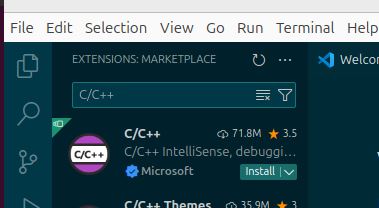
Install it by clicking the Install button.
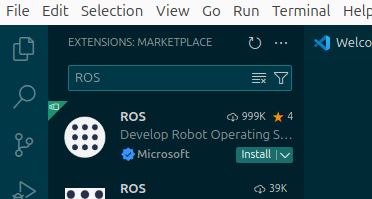
Search for the “ROS” extension.
Install the ROS extension from Microsoft by clicking the Install button.
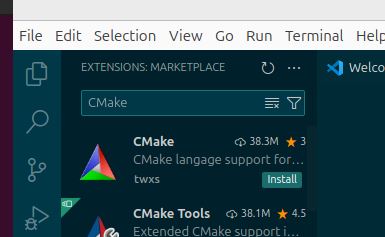
Now let’s install the CMake extension. Search for “CMake”, and install the version made by twxs.
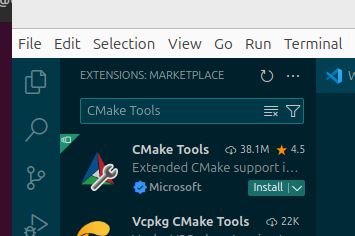
Install the CMake Tools extensions. Search for “CMake Tools”, and install the version made by Microsoft.
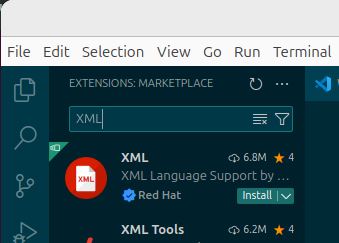
Install the XML extensions. Search for “XML”, and install the version made by Red Hat.
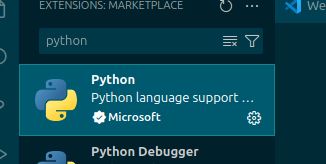
Now let’s install the Python extension. Search for “python”, and install the version made by Microsoft. Note: You may have already installed it.
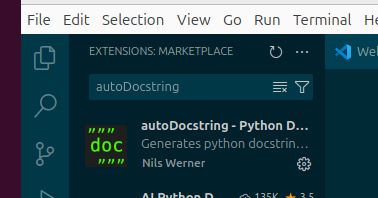
Install the autoDocstring extension. Search for “autoDocstring”, and install the version made by Nils Werner.
Let’s set our default indentation to 2 spaces.
Using the menu: Go to File > Preferences > Settings
Search for “Indentation” in the settings panel.
Change the following values:
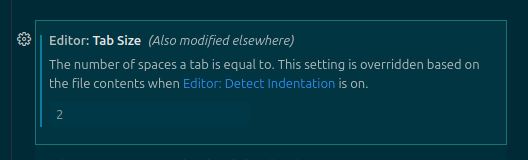
“Editor: Tab Size”: Set this to 2 to control the width of a tab character.
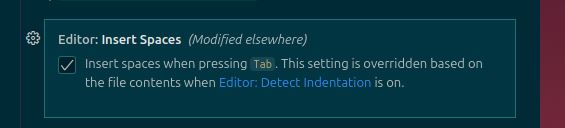
“Editor: Insert Spaces”: Set this to true to ensure that pressing Tab inserts spaces instead of a literal tab character.
The changes should take effect immediately.
Now you can close VS Code by going to File -> Close Window.
You can reopen VS code inside your workspace like this:
cd ~/ros2_ws/srccode .That’s it! I’ll see you in the next tutorial. Keep building!