
In this tutorial, we will learn how to use an NVIDIA Jetson Nano to read data from the BNO055 Absolute Orientation Sensor and connect that data to ROS using the ros_imu_bno055 package. Here is what you will be able to do by the end of this tutorial:
Real-World Applications
IMUs like the BNO055 enable us to measure the acceleration and orientation of a robotic system. IMUs are common in both wheeled robots and aerial robots.
Prerequisites
- You have already set up your NVIDIA Jetson Nano (4GB, B01) with ROS.
You Will Need
In addition to the parts listed in the article I linked to in the Prerequisites, you will need the following components (#ad).
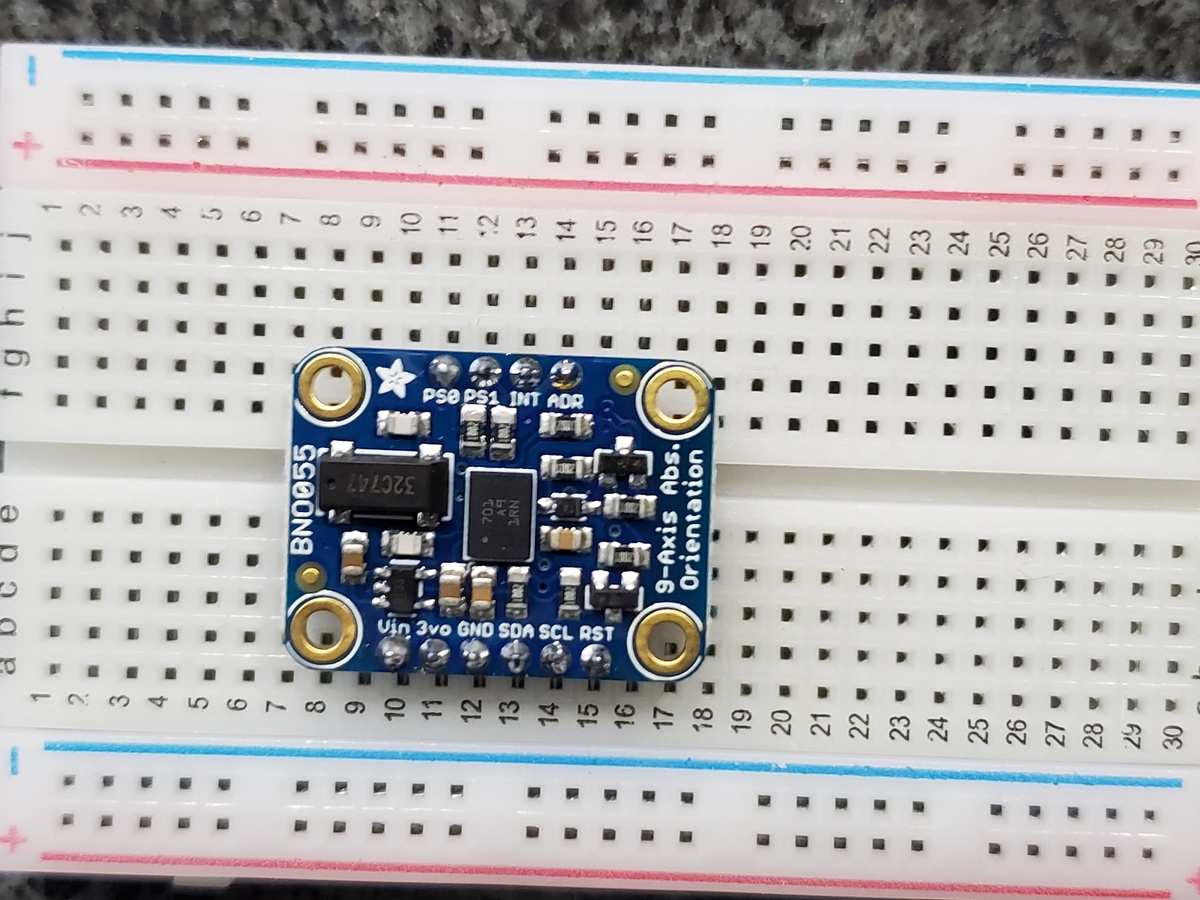
- BNO055 Absolute Orientation Sensor
- Assorted breadboard jumper wires
- USB to Serial Converter
- 400-point solderless breadboard (Optional)
Once you finish this project, you can mount the IMU on anything that moves (drone, robot car, etc.) so you can measure the system’s acceleration and orientation.
Disclosure (#ad): As an Amazon Associate I earn from qualifying purchases.
Soldering (Optional)
To make sure the electrical pins are stuck to the board, you can solder them like I did in this video here with the BNO055 board.
Set Up the Hardware
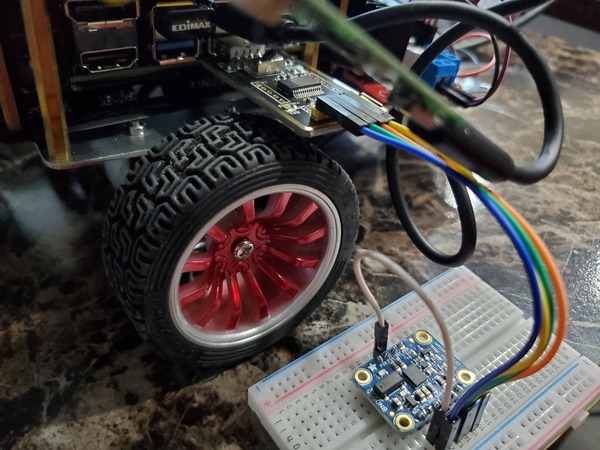
First, let’s set up the hardware.
Make the following connections between the BNO055 and the USB to Serial Converter:
- Connect BNO055 Vin to 3.3V (VCC) power.
- Connect BNO055 GND to ground (GND).
- Connect BNO055 SDA (UART transmitter TX) to receiver RXD.
- Connect BNO055 SCL (UART receiver RX) to transmitter TXD.
- Connect BNO055 PS1 to BNO055 Vin (3.3V).
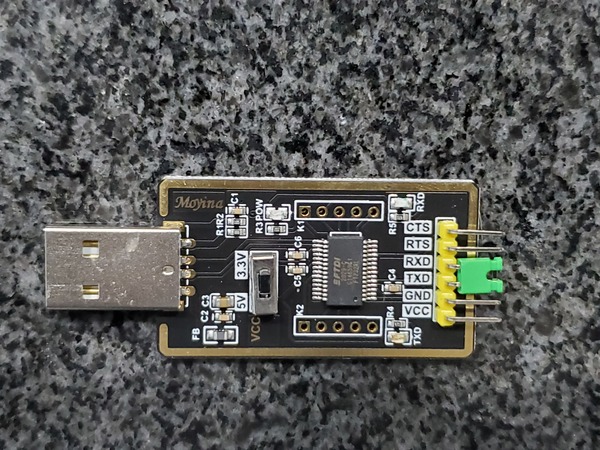

Now connect the other end of the USB to Serial Converter to the Jetson Nano.
If you have a LIDAR connected to your Jetson Nano, disconnect it from the USB port.
Install and Build the BNO055 ROS Package
Let’s get all the software set up.
Turn on your Jetson Nano.
Open a new terminal window.
Install the BNO055 ROS package.
cd ~/catkin_ws/src
git clone https://github.com/RoboticArts/ros_imu_bno055.git
Build the package.
cd ~/catkin_ws/
catkin_make --only-pkg-with-deps ros_imu_bno055
Source the environment.
source devel/setup.bash
Install the ROS IMU plugin.
sudo apt-get install ros-melodic-rviz-imu-plugin
Install pyserial.
pip3 install pyserial
Install the udev rule to identify the device as ttyUSB_IMU.
roscd ros_imu_bno055
sudo cp utils/99-bno055.rules /etc/udev/rules.
sudo udevadm control --reload-rules && sudo udevadm trigger
Reboot your computer.
sudo reboot
View the IMU Data
Open a terminal window.
Install some packages.
sudo apt-get install python-catkin-pkg
sudo apt-get install python3-catkin-pkg-modules
sudo apt-get install python3-rospkg-modules
Get a list of the connected USB devices (there should only be one, which is the BNO055).
ls -la /dev/ttyUSB*
Change permissions of the USB connection.
sudo chmod 666 /dev/ttyUSB0
Open a new terminal, and type the following command to launch visualization of the IMU data in Rviz.
roslaunch ros_imu_bno055 view_imu.launch
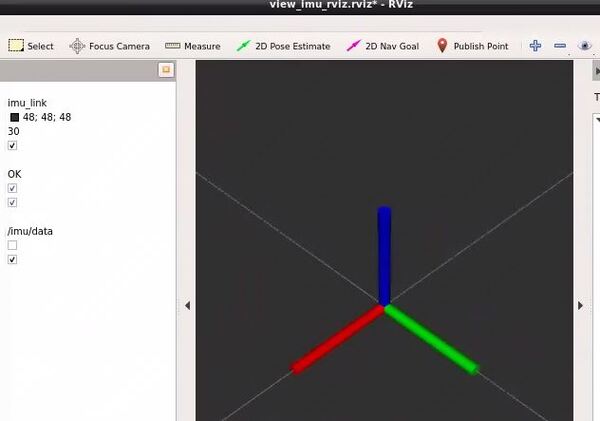
Move your BNO055 around, and you will see the axes move. The red line is the x-axis, the green line is the y-axis, and the blue line is the z-axis.
Let’s see the active ROS topics. Open up a new terminal and type:
rostopic list
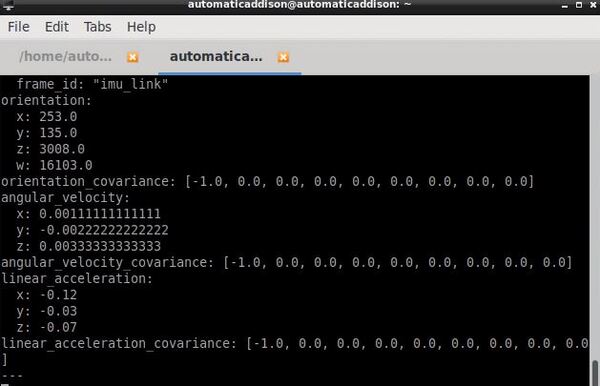
Now let’s see the data.
rostopic echo /imu/data
Press CTRL + C in all terminal windows to close everything down.
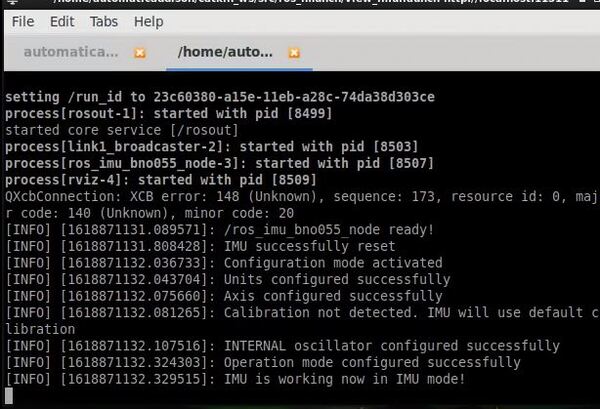
Another way to launch the BNO055 ROS driver is by using the following command. Notice how we specified the USB port name (ttyUSB0):
roslaunch ros_imu_bno055 imu.launch serial_port:=/dev/ttyUSB0
Let’s see the active ROS topics. Open up a new terminal and type:
rostopic list
Press CTRL + C in all terminal windows to close everything down.
Other Commands
Launch the IMU again.
roslaunch ros_imu_bno055 imu.launch serial_port:=/dev/ttyUSB0
Here are some other commands. To reset the IMU, you can use the following command:
rosservice call /imu/reset_device "{}"
When you type this command, your USB to Serial converter should blink a few times, and then hold steady.
To calibrate the IMU, type the following command:
roslaunch ros_imu_bno055 imu_calibration.launch serial_port:=/dev/ttyUSB0 operation_mode:=NDOF_FMC_OFF
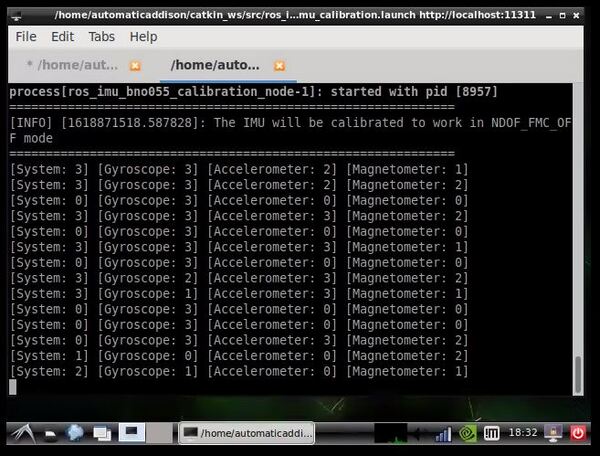
Move your IMU around as explained at the bottom of this page in order to calibrate the gyroscope, accelerometer, and the magnetometer.
That’s it! Keep building!