In this tutorial, we will install Ubuntu and Virtual Box on our personal computer. My machine is running Windows 10. Let’s walk through this whole process, step-by-step, so you understand how to do it no matter what operating system you have.
Ubuntu is a popular distribution (i.e. flavor) of the Linux operating system and is fully supported by ROS, the most popular framework for writing robotics software.
The process for installing Ubuntu has a lot of steps, so be patient and don’t give up if something isn’t working. Let’s get started!
You Will Need
- A laptop or desktop computer running Windows, MacOS, or Linux with the sufficient processor, memory, and hard drive space.
Directions
Download the Ubuntu Image
Check Ubuntu Releases to find the latest version of Ubuntu that has long term support (LTS). As of the date of this writing, the latest version is Ubuntu 20.04 LTS (Focal Fossa), so click on that one.
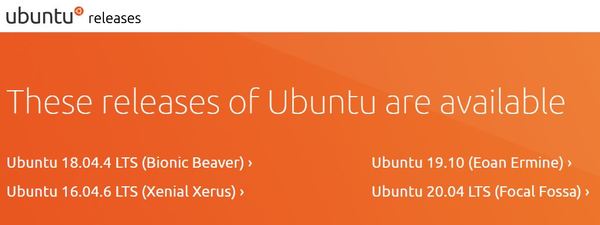
Download the 64-bit PC (AMD64) desktop image (.iso file). It is a large file (about 2.5GB) and will take quite a while to download. Just go do something else and come back to it when it is finished.
Before you install the Ubuntu you just downloaded, you need to install Virtual Box. Virtual Box extends the capabilities of your host computer (i.e. your laptop or desktop PC) by enabling you to install and run an operating system in a new environment on top of your current operating system (Windows 10 in my case). The environment the new operating system will run in is known as a virtual machine (or guest).
Install VirtualBox
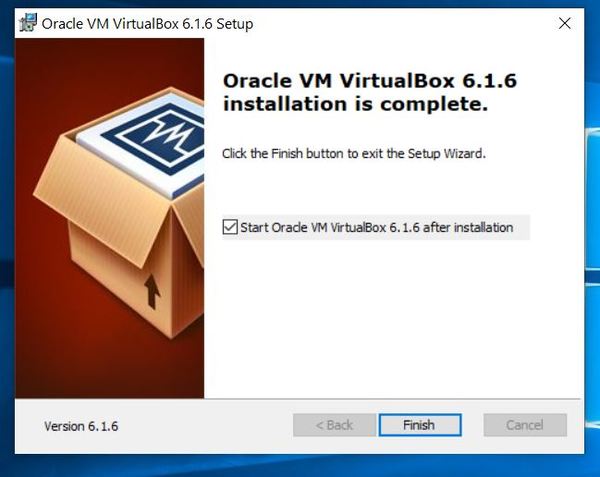
Go to the VirtualBox downloads page and select the version that is compatible with your computer. Install it. Once you’re done, your screen should look like this:
Detailed installation instructions for all operating systems (Windows, Mac OS, Linux, and Solaris) can be found in the instruction manual.
You can now delete the original executable file for VirtualBox (the one with the .exe extension). You don’t need it anymore.
Create a Virtual Machine
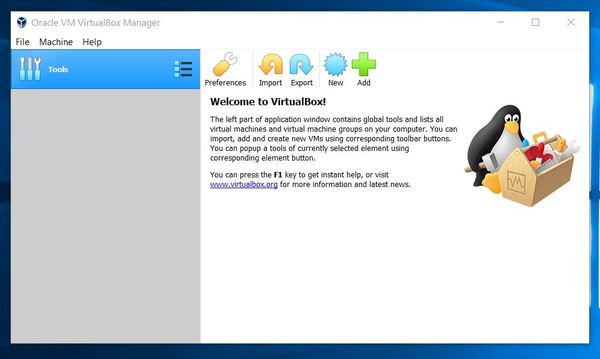
Now that VirtualBox is installed on your computer, we need to create a new virtual machine.
Open Virtual Box and click the New button in the toolbar.
Type in a descriptive name for your operating system. You can stick with the default machine folder. The machine folder is where your virtual machines will be stored. I prefer to install it on the D drive where I have more space.
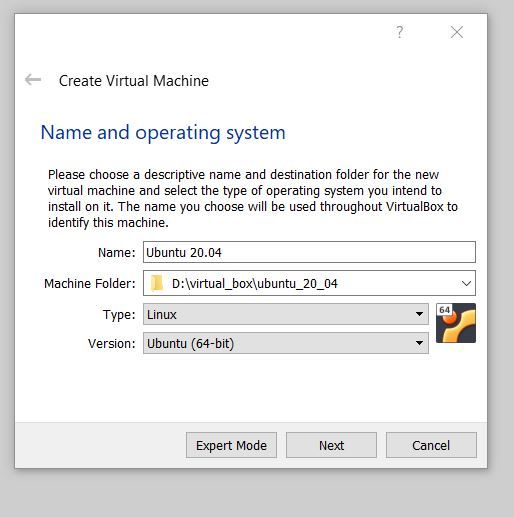
Also, select the operating system that you want to later install (Linux and Ubuntu_64 in the Type and Version fields).
Click Next to proceed.
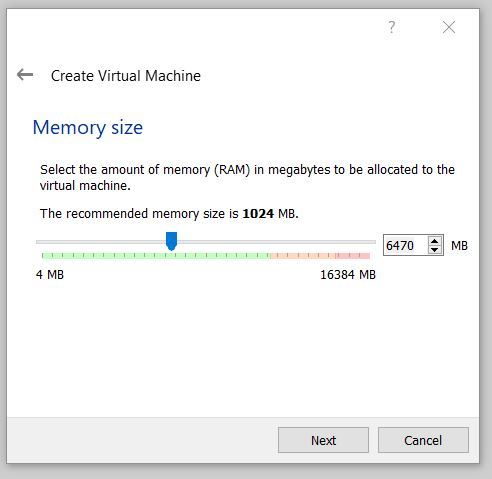
The default memory size for me is 1024 MB. That is not sufficient for our purposes, so let’s raise it to 6470 MB, and then click Next to proceed.
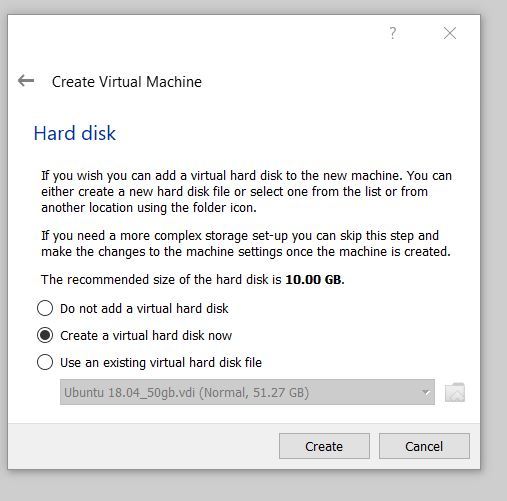
Make sure “Create a virtual hard disk now” is selected, and click Create.
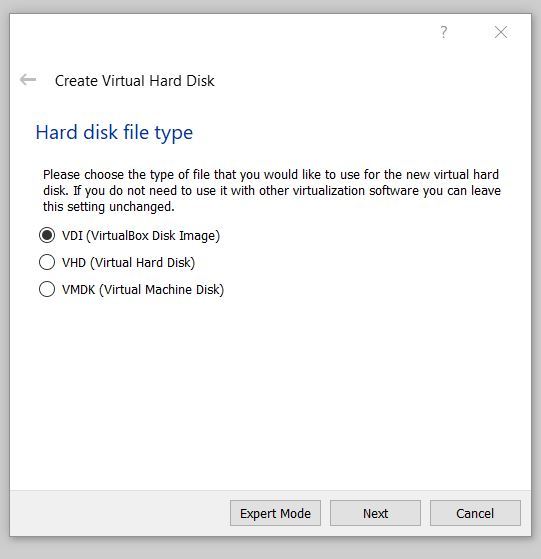
Select “VirtualBox Disk Image (VDI)”, and click Next.
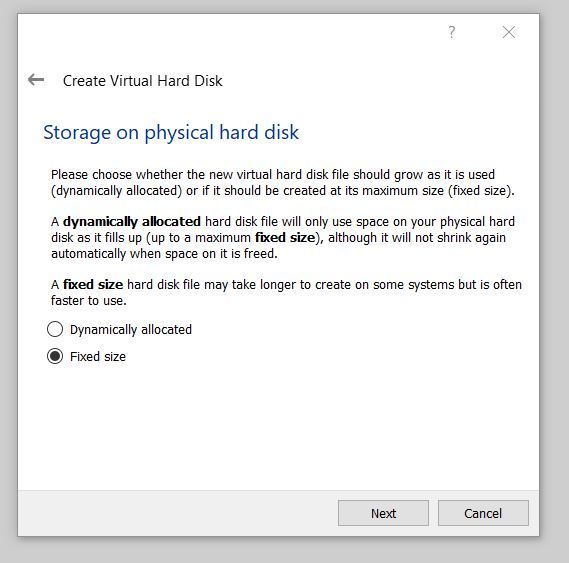
Choose a Fixed size virtual hard disk so that you have better performance, and click Next.
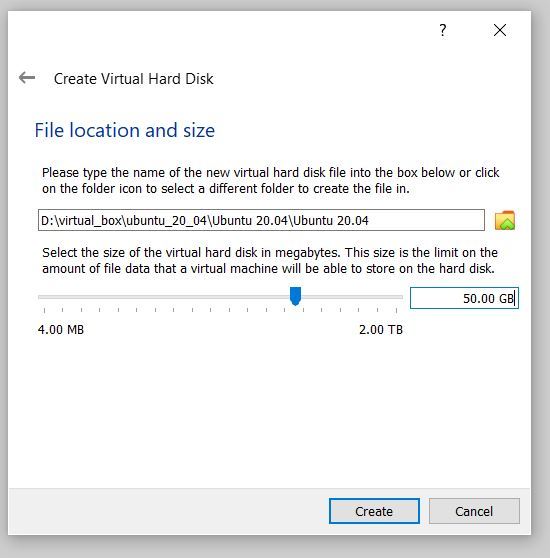
Go with something like 50 GB for the hard disk space. Then click Create.
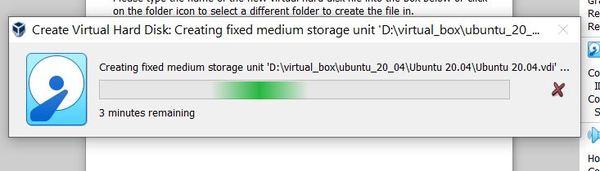
It will take several minutes to create the virtual hard disk, so be patient.
Install Ubuntu
Double-click on the left panel where you see the name of the virtual machine you just created.
A startup window will appear.
Click the Folder icon next to Empty. A popup box will appear that is titled “Optical Disk Selector.”
Click Add.
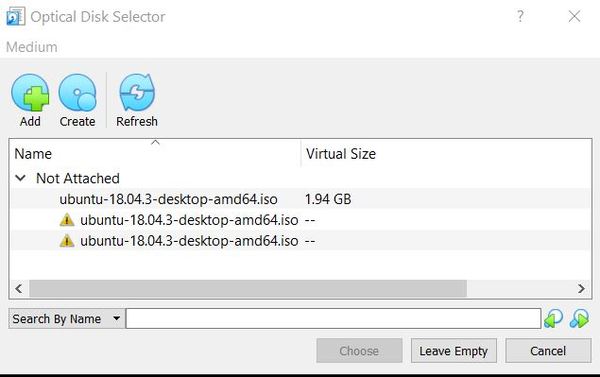
Find the Ubuntu image you downloaded earlier in this tutorial. It is a .iso file. Select it.
Click Choose.
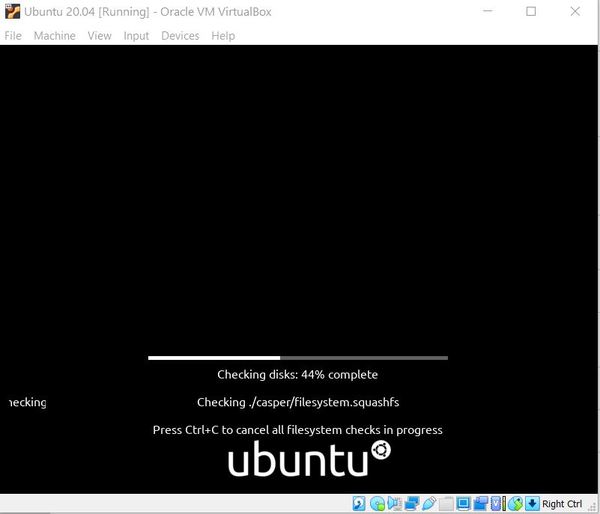
Click Start to proceed with that Ubuntu image.
Ubuntu should start launching.
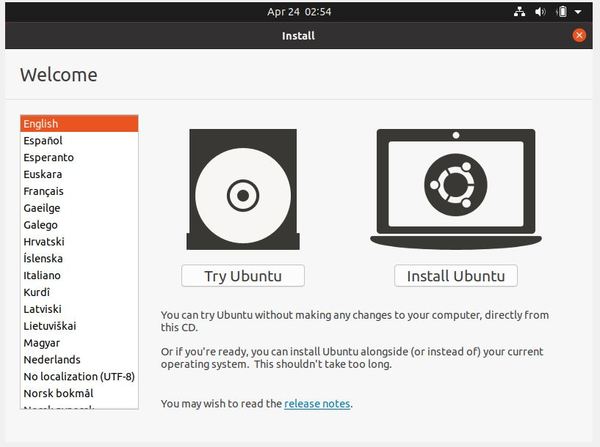
Click on “Install Ubuntu” to install Ubuntu. You should see a window that looks something like this.
Click “Continue” to save the keyboard layout. The default English one is fine.
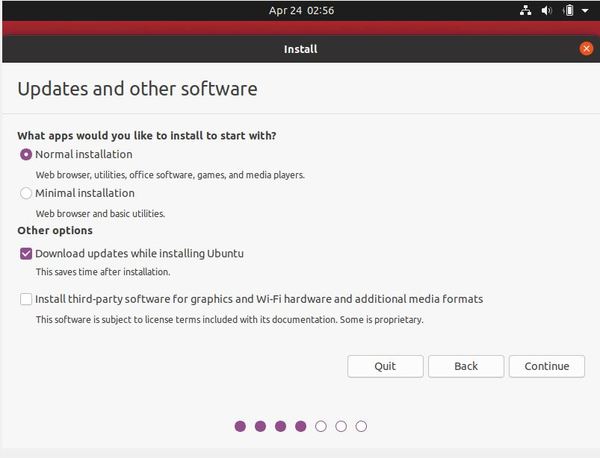
Select “Normal installation” and “Download updates while installing Ubuntu.” Then click Continue.
Select “Erase disk and install Ubuntu”. Then click “Install Now”.
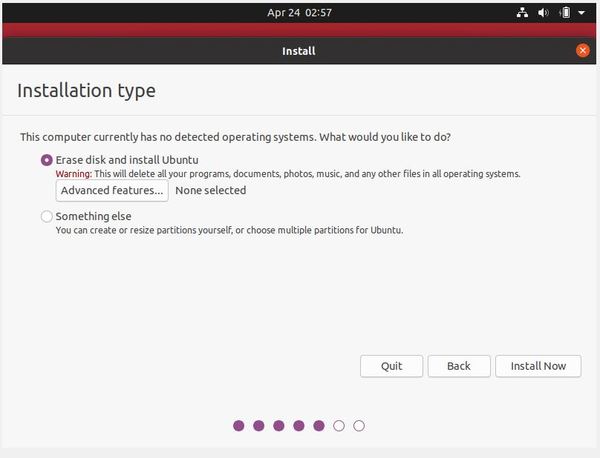
Click Continue when it asks “Write the changes to the disks?”.
You will get to a point where you will need to set your time zone. It will be a big map of the world that should automatically detect your location. Click Continue.
Type in a computer name and pick a username and password. I select the “Log in automatically” option.
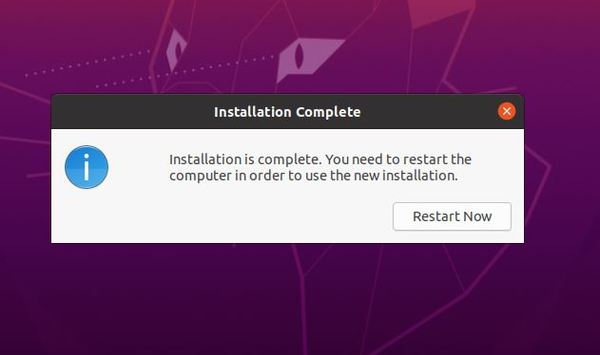
When installation is complete, click “Restart Now.”
A message will say “Please remove the installation medium, then press ENTER:”. Just ignore it.
Go to File -> Close in the upper left part of the window.
Select “Power off the machine.” Click OK.
In the “Oracle VM Virtual Box Manager” window, highlight your virtual machine and click the green arrow up top that says “Start”.
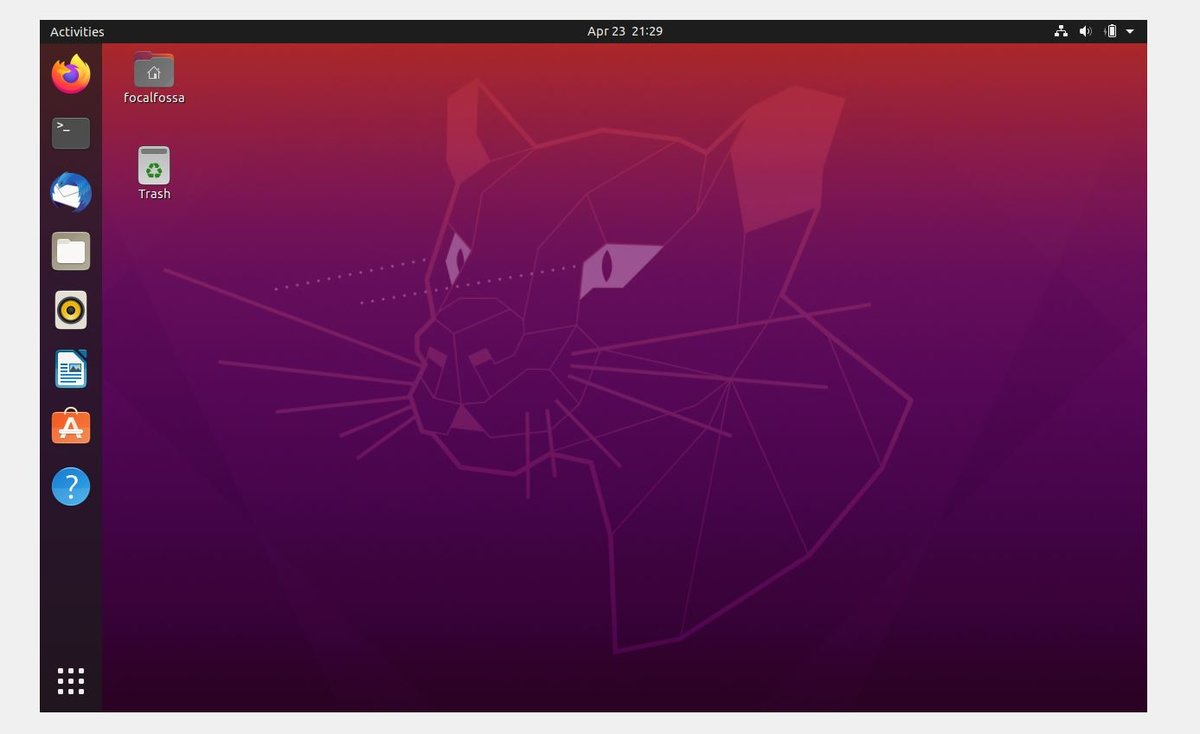
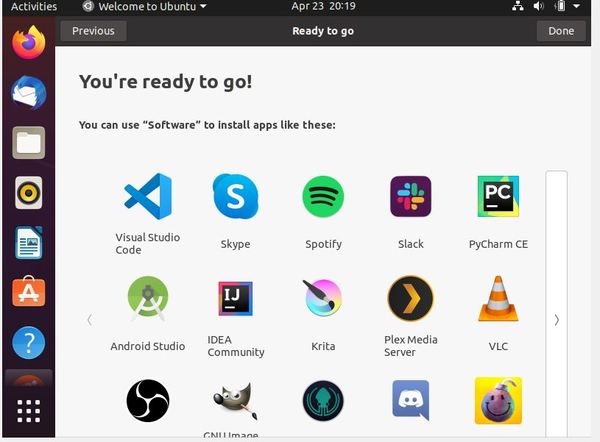
You should now see your Ubuntu Linux desktop.
Click the small white arrow in the upper-right portion of the screen. “Power Off” the machine.
Alternatively, you can open up a terminal window and type the following command:
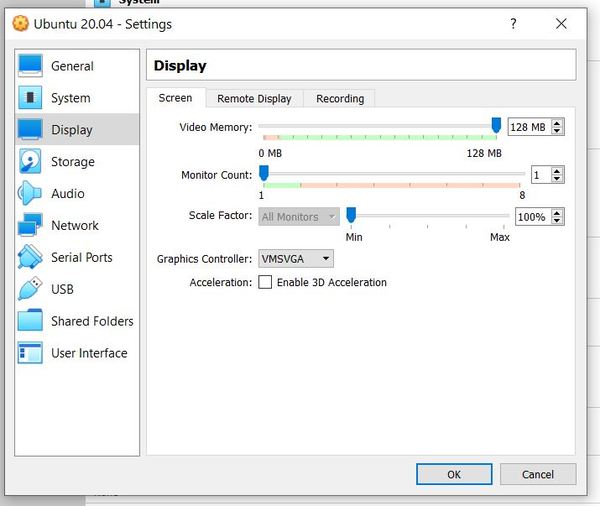
sudo shutdown -h nowHighlight your virtual machine and go to Settings → Display and change your Video Memory to 128 MB. This will give you ample video memory. Click OK.
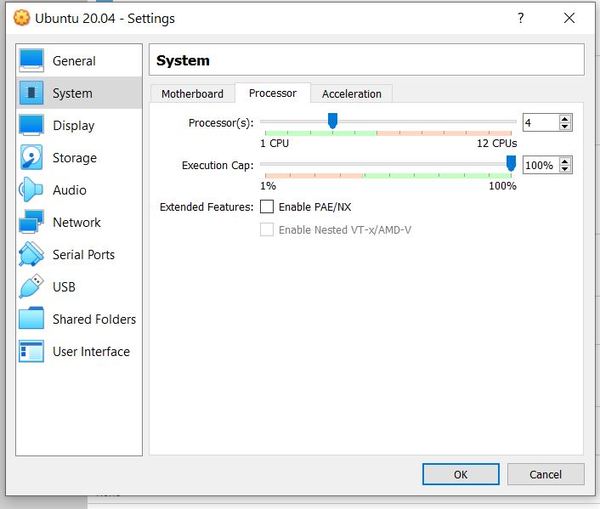
Also go to Settings → System → Processor, and adjust the number of CPUs to 4. Then Click OK.
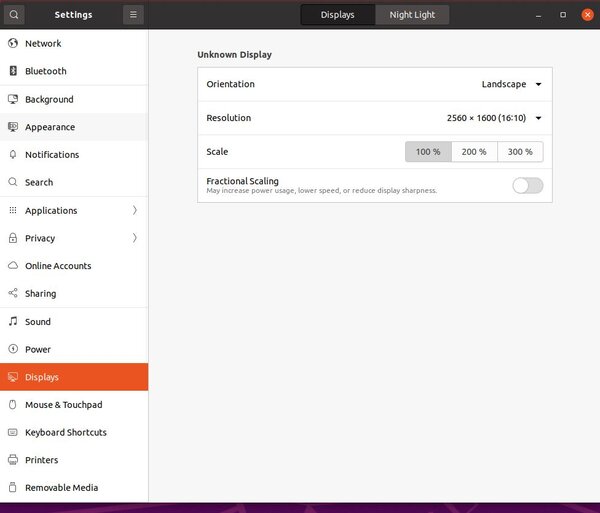
To make your screen larger, log back into Linux and go to your Settings. Then go to Display, and select your desired resolution.
If you have issues where your screen flips to portrait mode and gets stuck there, press CTRL + Alt + F1 to return to the login screen to fix the resolution.
You can follow this tutorial to enable clipboard sharing.
Congrats! You’re done!