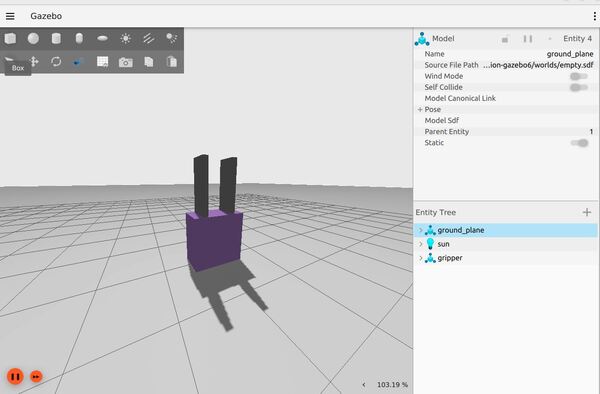
In this tutorial, I will show you how to set up and control a robotic arm using ROS 2 Control and Gazebo (the classic version and the newer version).
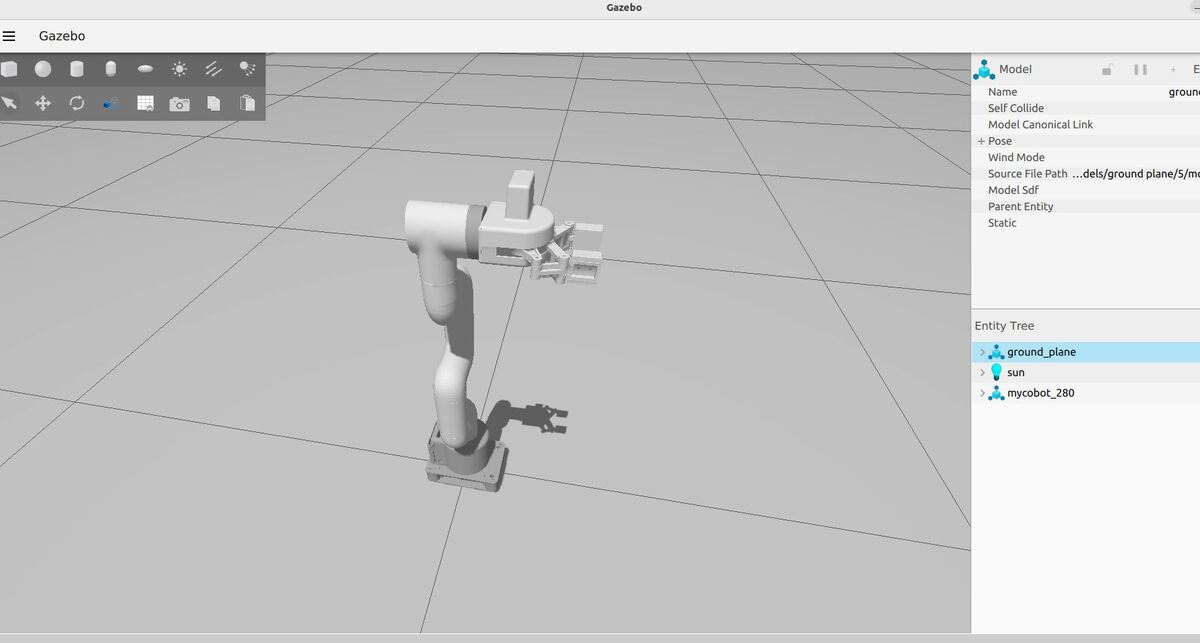
By the end of this tutorial, you will be able to create this:
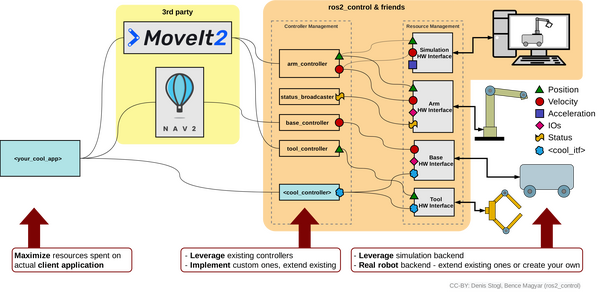
ROS 2 Control is a framework for robots that lets you create programs to control their movement. Think of it as a middleman between the robot hardware and the robot software.
ROS 2 Control connects directly to your hardware (e.g. Arduino) to send commands to the hardware from the software and to receive joint states from the hardware (i.e. the current angular position in radians of each motor of the robotic arm) and send that information out to the rest of ROS 2.
A complete block diagram showing an overview of ROS 2 Control is on this page.
If you look at that block diagram, you will see that the two main building blocks for ROS 2 Control are:
- Controller Manager (managers the controllers, which calculate the commands needed to make the robot behave as desired)
- Resource Manager (manages the hardware interfaces, or communication with the actual robot hardware)
The Controller Manager is responsible for loading, unloading, and managing multiple controllers within the ROS 2 Control framework. It handles the lifecycle of controllers, coordinates their execution, and ensures proper switching between different control modes.
ROS 2 has many different controllers, with some of the most popular being:
- Joint Position Controller: Inputs a desired joint position and outputs position commands to the hardware.
- Joint Trajectory Controller: Accepts a trajectory of joint positions over time, from a software like MoveIt2, as input (think of it as a list of goal positions for your robotic arm) and outputs a series of position, velocity, or effort commands to the hardware interface so that arm can follow that trajectory.
- Diff Drive Controller: Takes velocity commands (linear and angular) from a software such as Nav2 as input and outputs wheel velocities or positions for differential drive robots.
These controllers process their respective inputs to generate appropriate outputs, enabling precise control of various robotic systems from manipulators to mobile platforms.
The Resource Manager manages the hardware resources of the robot (i.e. “Hardware Interface”), providing an abstraction layer between the controllers and the actual hardware. It handles the communication with the physical devices (such as the Arduino on the robotic arm), manages state information (e.g. the current angle of each joint of the robotic arm), and provides a unified interface for controllers to interact with various hardware components.
Prerequisites
All my code for this project is located here on GitHub.
Here is the official documentation for ROS 2 control.
Gazebo (classic version)
Install ROS 2 Control
To begin, open a terminal window, and install the ROS 2 Control packages (the packages might already be installed):
sudo apt-get install ros-${ROS_DISTRO}-ros2-control ros-${ROS_DISTRO}-ros2-controllers ros-${ROS_DISTRO}-gripper-controllers ros-${ROS_DISTRO}-gazebo-ros2-control
Create the XACRO/URDF Files
Let’s begin by creating some URDF files. Open a new terminal window, and type:
cd ~/ros2_ws/src/mycobot_ros2/mycobot_gazebo/urdf
mkdir -p ros2_control/classic_gazebo
cd ros2_control/classic_gazebo
gedit mycobot_280.urdf.xacro
Add this code. Then save and close.
If you take a look at the file, you will see we have added a <transmissions> element.
The purpose of the <transmission> element is to define how the joint commands from the controllers are mapped to the actual joint motions of the robot.
Historically, in ROS 1, the <transmission> element was commonly used to specify the relationship between the joint commands and the actuator commands. It provided a way to define the gearing ratio, mechanical reduction, and other properties related to the transmission of motion from the actuators to the joints.
In general, when using the ros2_control framework in ROS 2, the <transmission> element is not strictly necessary in the XACRO files. The joint-actuator mapping and control-related configurations are typically handled through the controller configuration YAML files and the hardware interface layer.
gedit mycobot_280_classic_gazebo.xacro
Add this code. Then save and close.
This XML code defines a Gazebo plugin for a robot named “mycobot_280” using the ROS 2 control framework. It specifies the robot description, robot state publisher node, and the location of the controller configuration YAML file for the mycobot_280 robot.
gedit mycobot_280_ros2_control.xacro
Add this code. Then save and close.
This XML code defines the interface between the robot’s hardware and the ROS 2 Control library for a robot named “mycobot_280”. It specifies the joint names, their command and state interfaces, and the minimum and maximum position limits for each joint, including the gripper joints with mimic properties.
If you take a closer look at the file, you can see that ROS 2 Control provides a structured way to handle the hardware interface for different types of robots through a set of standardized components. These components are primarily divided into command interfaces and state interfaces. Here’s an overview of each:
Command Interfaces (write to hardware)
Command interfaces are used for sending commands to hardware components. These commands could be setpoints, desired positions, velocities, or efforts (torque/force) that the hardware should attempt to achieve. Command interfaces are important for motors and are defined based on the type of control you need to exert on a hardware component. Typical command interfaces include:
- Position Commands: Used to set a desired position for the motors.
- Velocity Commands: Used to set a desired velocity for the motors.
- Effort Commands: Used to control motors based on force or torque (e.g. the force to be applied to grasp an object)
These interfaces allow controllers to interact directly with the hardware abstraction layers, issuing commands that the hardware then tries to follow based on its capabilities and feedback mechanisms.
State Interfaces (read from hardware)
State interfaces are used to read the current state of the hardware components. These are essential for monitoring and feedback loops in control systems. State interfaces provide real-time data on various parameters such as position, velocity, effort, and other specific sensor readings. Common types of state interfaces include:
- Position State: Provides the current position of actuators or sensors.
- Velocity State: Gives the current velocity of moving parts.
- Effort State: Indicates the current force or torque being applied by actuators.
In practice, to use ros2_control, you define these interfaces in a YAML configuration file (see next section) where you specify each joint or hardware component along with its corresponding command and state interfaces. This configuration is then loaded and managed by a controller manager, which handles the life cycle and updates of each controller in real-time.
This framework allows developers to focus more on the higher-level control strategies rather than the specifics of each hardware component, promoting reusability and scalability in robotics applications.
Create a YAML Configuration File for the Controller Manager
In this section, we will create a YAML configuration file that defines the controllers and their properties for our robotic arm. The controller manager in ROS 2 Control uses this file to load and configure the appropriate controllers during runtime.
The YAML file allows us to specify the joint controllers, their types, and associated parameters. By creating a well-structured configuration file, we can easily manage and control the behavior of our robotic arm in the Gazebo simulation environment.
We will walk through the process of creating the YAML file step by step, explaining each part and its significance. By the end of this section, you will have a complete configuration file ready to be used with the controller manager in your ROS 2 Control setup.
cd ~/ros2_ws/src/mycobot_ros2/mycobot_gazebo/config
gedit mycobot_280_controllers.yaml
Add this code, and save it.
# controller_manager provides the necessary infrastructure to manage multiple controllers efficiently and robustly.
controller_manager:
  ros__parameters:
    update_rate: 10 # update_rate specifies how often (in Hz) the controllers should be updated.

    # The JointTrajectoryController allows you to send joint trajectory commands to a group
    # of joints on a robot. These commands specify the desired positions for each joint.
    arm_controller:
      type: joint_trajectory_controller/JointTrajectoryController

    grip_controller:
      type: joint_trajectory_controller/JointTrajectoryController

    # Responsible for publishing the current state of the robot's joints to the /joint_states
    # ROS 2 topic
    joint_state_broadcaster:
      type: joint_state_broadcaster/JointStateBroadcaster

# Define the parameters for each controller
arm_controller:
  ros__parameters:
    joints:
      - link1_to_link2
      - link2_to_link3
      - link3_to_link4
      - link4_to_link5
      - link5_to_link6
      - link6_to_link6flange

    # The controller will expect position commands as input for each of these joints.
    command_interfaces:
      - position

    # Tells the controller that it should expect to receive position data as the state
    # feedback from the hardware interface,
    state_interfaces:
      - position

    # If true, When set to true, the controller will not use any feedback from the system
    # (e.g., joint positions, velocities, efforts) to compute the control commands.
    open_loop_control: true

    # When set to true, it allows the controller to integrate the trajectory goals it receives.
    # This means that if the goal trajectory only specifies positions, the controller will
    # numerically integrate the positions to compute the velocities and accelerations required
    # to follow the trajectory.
    allow_integration_in_goal_trajectories: true

grip_controller:
  ros__parameters:
    joints:
      - gripper_controller

    command_interfaces:
      - position

    state_interfaces:
      - position

    open_loop_control: true
    allow_integration_in_goal_trajectories: true
Here’s a brief explanation of the different parts of the YAML file:
1. controller_manager: This section defines the configuration for the controller manager, which is responsible for managing multiple controllers in the system.
2. arm_controller and grip_controller: These sections define the configuration for the arm and grip controllers, respectively. Both controllers are of type joint_trajectory_controller/JointTrajectoryController, which allows sending joint trajectory commands to a group of joints.
3. joint_state_broadcaster: This section defines the configuration for the joint state broadcaster, which is responsible for publishing the current state of the robot’s joints to the /joint_states ROS 2 topic. It is of type joint_state_broadcaster/JointStateBroadcaster.
4. ros__parameters under each controller:
- joints: Specifies the list of joints that the controller should control. In this case, the arm controller controls joints from `link1_to_link2` to `link6_to_link6flange`, while the grip controller controls the `gripper_controller` joint.
- command_interfaces: Specifies the type of command interface the controller expects. In this case, both controllers expect position commands.
- state_interfaces: Specifies the type of state feedback the controller expects from the hardware interface. Here, both controllers expect position feedback.
- open_loop_control: When set to true, the controller will not use any feedback from the system (e.g., joint positions, velocities, efforts) to compute the control commands. It will solely rely on the provided commands.
- allow_integration_in_goal_trajectories: When set to true, the controller will integrate the trajectory goals it receives. If the goal trajectory only specifies positions, the controller will numerically integrate the positions to compute the velocities and accelerations required to follow the trajectory.
Create a Launch File
cd ~/ros2_ws/src/mycobot_ros2/mycobot_gazebo/launch
gedit mycobot_280_arduino_bringup_ros2_control_classic_gazebo.launch.py
Add this code, and save.
Now build the package.
cd ~/ros2_ws/
colcon build
source ~/.bashrc
Launch Everything and Move the Arm
Now launch everything:
ros2 launch mycobot_gazebo mycobot_280_arduino_bringup_ros2_control_classic_gazebo.launch.py
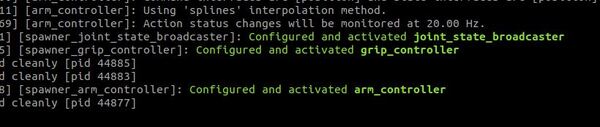
See the active controllers:
ros2 control list_controllers
To get more information, type:
ros2 control list_controllers -v
To see a list of all the commands you can use type:
ros2 control
Then press Tab twice.
List all the available hardware components that are loaded and ready to be used by the ros2_control controller manager.
ros2 control list_hardware_components
Now let’s send a command to the robotic arm to move it.
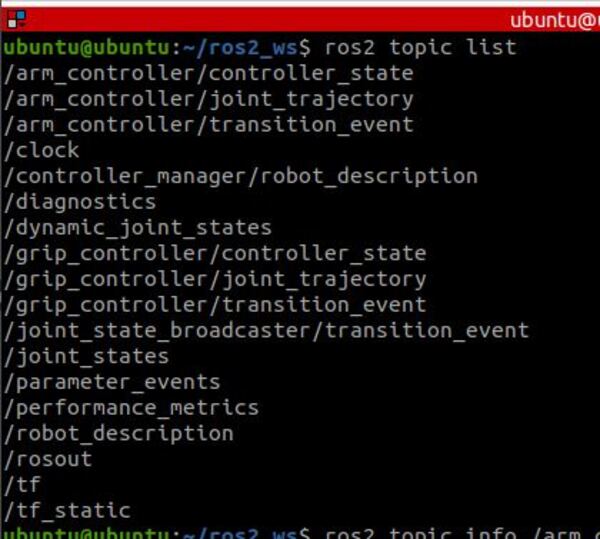
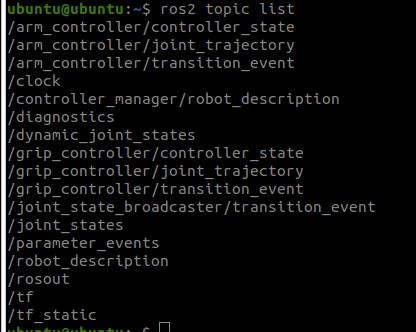
Let’s check out the topics:
ros2 topic list
We need this topic: /arm_controller/joint_trajectory
We can publish a trajectory to that topic to move the arm. Let’s get more information about the topic:
ros2 topic info /arm_controller/joint_trajectory
We need we need to publish a message of type:
trajectory_msgs/msg/JointTrajectory
Remember, here were the list of joints that are controlled by the arm_controller:
- link1_to_link2
- link2_to_link3
- link3_to_link4
- link4_to_link5
- link5_to_link6
- link6_to_link6flange
There are 6 joints in total.
Here is a command you can try:
ros2 topic pub --once /arm_controller/joint_trajectory trajectory_msgs/msg/JointTrajectory "{joint_names: ['link1_to_link2', 'link2_to_link3', 'link3_to_link4', 'link4_to_link5', 'link5_to_link6', 'link6_to_link6flange'], points: [{positions: [-1.345, -1.23, 0.264, -0.296, 0.389, -1.5], time_from_start: {sec: 5, nanosec: 0}}]}"
You can also move it back home now:
ros2 topic pub --once /arm_controller/joint_trajectory trajectory_msgs/msg/JointTrajectory "{joint_names: ['link1_to_link2', 'link2_to_link3', 'link3_to_link4', 'link4_to_link5', 'link5_to_link6', 'link6_to_link6flange'], points: [{positions: [0.0, 0.0, 0.0, 0.0, 0.0, 0.0], time_from_start: {sec: 5, nanosec: 0}}]}"
To close the gripper, you can type:
ros2 topic pub /grip_controller/joint_trajectory trajectory_msgs/msg/JointTrajectory "{joint_names: ['gripper_controller'], points: [{positions: [-0.70], time_from_start: {sec: 5} } ]}" --once
To open the gripper, you can type:
ros2 topic pub /grip_controller/joint_trajectory trajectory_msgs/msg/JointTrajectory "{joint_names: ['gripper_controller'], points: [{positions: [0.0], time_from_start: {sec: 5} } ]}" --once
That’s it for Gazebo Classic.
Gazebo (new version – recommended)
Now let’s run through the process for ROS 2 Control using the newer version of Gazebo.
Install ROS 2 Control
Open a new terminal window, and type
sudo apt update
sudo apt install ros-${ROS_DISTRO}-gz-ros2-control
Check your installation:
ros2 pkg list | grep gz_ros2_control
You can also install the gz_ros2_control_demos package.
sudo apt install ros-${ROS_DISTRO}-gz-ros2-control-demos
To run the gripper example, type:
ros2 launch gz_ros2_control_demos gripper_mimic_joint_example.launch.py
To move the gripper, type:
ros2 run gz_ros2_control_demos example_gripper
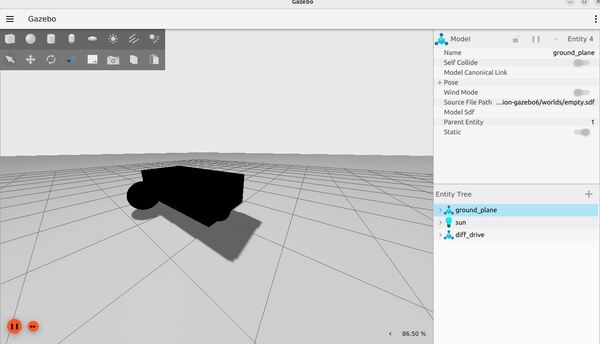
You can try the differential drive mobile robot example as well:
ros2 launch gz_ros2_control_demos diff_drive_example.launch.py
To move the robot, type:
ros2 run gz_ros2_control_demos example_diff_drive
Create the XACRO/URDF Files
Open a new terminal window, and type:
cd ~/ros2_ws/src/mycobot_ros2/mycobot_gazebo/urdf/ros2_control
mkdir gazebo
cd gazebo
gedit mycobot_280.urdf.xacro
Add this code. Then save and close.
gedit mycobot_280_gazebo.xacro
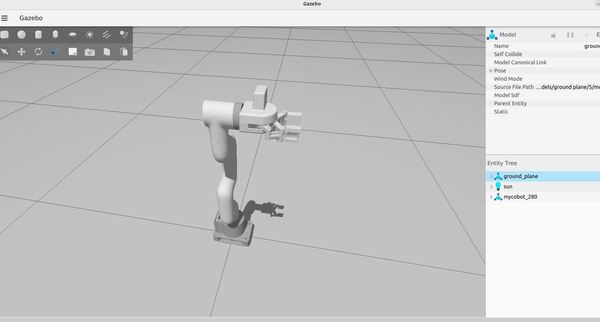
Take a look at the file. The main body of the robot consists of a base and six arm segments. These segments are joined together in a way that allows them to rotate, much like your own arm can rotate at different points. At the end of the arm, there’s a part called a flange, which is where the gripper is attached.
The gripper has several small parts that work together to allow it to open and close, mimicking the action of fingers grasping an object. T
For each part of the robot, the file describes both how it looks (its “visual” properties) and its physical shape for the purpose of detecting collisions with other objects. Many of these descriptions use 3D mesh files to define complex shapes accurately.
The file also includes information about the physical properties of each part, such as its mass and how that mass is distributed. This is important for simulating how the robot would move and interact with objects in the real world.
The joints that allow the robot’s parts to move have defined limits on how far and how fast they can rotate. This ensures that the simulated robot behaves like its real-world counterpart, preventing unrealistic movements.
Finally, the file includes some information about how the robot should appear in the Gazebo simulation environment, specifying colors and materials for different parts.
Now let’s create some more code. This file is one of the files that we imported in the URDF file we just created. Open a terminal window, and type this:
gedit mycobot_280_gazebo.xacro
Add this code below. Then save and close.
<?xml version="1.0" ?>
<robot xmlns:xacro="http://wiki.ros.org/xacro" name="mycobot_280">
    <gazebo>
        <plugin filename="gz_ros2_control-system" name="gz_ros2_control::GazeboSimROS2ControlPlugin">
            <parameters>$(find mycobot_gazebo)/config/mycobot_280_controllers.yaml</parameters>
            <ros>                <remapping>/controller_manager/robot_description:=/robot_description</remapping>
            </ros>
        </plugin>
    </gazebo>
</robot>
The GazeboSimROS2ControlPlugin is a bridge between the Gazebo simulation environment and ROS 2 control systems. It does the following:
- Loads and initializes the ROS 2 controller manager.
- Sets up the simulation environment
- Manages the overall integration between Gazebo and ROS 2 control
Pay careful attention to the remapping of the topics. The controller manager subscribes to the URDF via the /controller_manager/robot_description topic by default. You need to remap this subscription to the /robot_description topic, which is published by the robot state publisher.
You can learn more about this plugin here on GitHub.
Remember from our last tutorial that the ROS 2 controller manager manages the controllers, like the Joint Trajectory Controller or the Differential Drive Controller.
The Joint Trajectory Controller takes as input trajectory_msgs/msg/JointTrajectory messages from a software like MoveIt2 and outputs commands to the hardware interface (which is managed by the Resource Manager.
You can find a complete list of controllers on this page.
Let’s continue. Open a terminal window, and type:
gedit mycobot_280_ros2_control.xacro
Add this code below. Then save and close.
<?xml version="1.0" ?>

<robot xmlns:xacro="http://wiki.ros.org/xacro" name="mycobot_280">
    <ros2_control name="RobotSystem" type="system">
        <hardware>
            <plugin>gz_ros2_control/GazeboSimSystem</plugin>
        </hardware>

        <joint name="link1_to_link2">
            <command_interface name="position">
                <param name="min">-2.879793</param>
                <param name="max">2.879793</param>
            </command_interface>
            <state_interface name="position"/>
        </joint>

        <joint name="link2_to_link3">
            <command_interface name="position">
                <param name="min">-2.879793</param>
                <param name="max">2.879793</param>
            </command_interface>
            <state_interface name="position"/>
        </joint>

        <joint name="link3_to_link4">
            <command_interface name="position">
                <param name="min">-2.879793</param>
                <param name="max">2.879793</param>
            </command_interface>
            <state_interface name="position"/>
        </joint>

        <joint name="link4_to_link5">
            <command_interface name="position">
                <param name="min">-2.879793</param>
                <param name="max">2.879793</param>
            </command_interface>
            <state_interface name="position"/>
        </joint>

        <joint name="link5_to_link6">
            <command_interface name="position">
                <param name="min">-2.879793</param>
                <param name="max">2.879793</param>
            </command_interface>
            <state_interface name="position"/>
        </joint>

        <joint name="link6_to_link6flange">
            <command_interface name="position">
                <param name="min">-3.05</param>
                <param name="max">3.05</param>
            </command_interface>
            <state_interface name="position"/>
        </joint>

        <joint name="gripper_controller">
            <command_interface name="position">
                <param name="min">-0.7</param>
                <param name="max">0.15</param>
            </command_interface>
            <state_interface name="position"/>
            <state_interface name="velocity"/>
        </joint>

        <joint name="gripper_base_to_gripper_left2">
            <param name="mimic">gripper_controller</param>
            <param name="multiplier">1.0</param>
            <command_interface name="position">
                <param name="min">-0.8</param>
                <param name="max">0.5</param>
            </command_interface>
            <state_interface name="position"/>
            <state_interface name="velocity"/>
        </joint>

        <joint name="gripper_left3_to_gripper_left1">
            <param name="mimic">gripper_controller</param>
            <param name="multiplier">-1.0</param>
            <command_interface name="position">
                <param name="min">-0.5</param>
                <param name="max">0.5</param>
            </command_interface>
            <state_interface name="position"/>
            <state_interface name="velocity"/>
        </joint>

        <joint name="gripper_base_to_gripper_right3">
            <param name="mimic">gripper_controller</param>
            <param name="multiplier">-1.0</param>
            <command_interface name="position">
                <param name="min">-0.15</param>
                <param name="max">0.7</param>
            </command_interface>
            <state_interface name="position"/>
            <state_interface name="velocity"/>
        </joint>

        <joint name="gripper_base_to_gripper_right2">
            <param name="mimic">gripper_controller</param>
            <param name="multiplier">-1.0</param>
            <command_interface name="position">
                <param name="min">-0.5</param>
               <param name="max">0.8</param>
            </command_interface>
            <state_interface name="position"/>
            <state_interface name="velocity"/>
        </joint>

        <joint name="gripper_right3_to_gripper_right1">
            <param name="mimic">gripper_controller</param>
            <param name="multiplier">1.0</param>
            <command_interface name="position">
                <param name="min">-0.5</param>
                <param name="max">0.5</param>
            </command_interface>
            <state_interface name="position"/>
            <state_interface name="velocity"/>
        </joint>
    </ros2_control>
</robot>
The GazeboSimSystem plugin does the following:
- Implements the specific hardware interfaces for joints and sensors
- Handles the direct read/write operations with the simulated hardware
GazeboSimROS2ControlPlugin loads the Controller Manager, while GazeboSimSystem implements the specific hardware interface that allows ROS 2 controllers (which are managed by the Controller Manager) to send and receive data from the the simulated robotic arm in Gazebo. They work together to provide a complete bridge between Gazebo simulation and ROS 2 control systems.
Create a Launch File
cd ~/ros2_ws/src/mycobot_ros2/mycobot_gazebo/launch
gedit mycobot_280_arduino_bringup_ros2_control_gazebo.launch.py
Add this code below, and save.
# Author: Addison Sears-Collins
# Date: July 30, 2024
# Description: Launch a robotic arm in Gazebo

import os
from launch import LaunchDescription
from launch.actions import AppendEnvironmentVariable, DeclareLaunchArgument, ExecuteProcess, IncludeLaunchDescription
from launch.actions import RegisterEventHandler
from launch.conditions import IfCondition
from launch.event_handlers import OnProcessExit
from launch.launch_description_sources import PythonLaunchDescriptionSource
from launch.substitutions import LaunchConfiguration
from launch_ros.actions import Node
from launch_ros.substitutions import FindPackageShare
import xacro


def generate_launch_description():

  # Constants for paths to different files and folders
  package_name_description = 'mycobot_description'
  package_name_gazebo = 'mycobot_gazebo'

  default_robot_name = 'mycobot_280'
  gazebo_launch_file_path = 'launch'
  gazebo_models_path = 'models'
  rviz_config_file_path = 'rviz/mycobot_280_arduino_view_description.rviz'
  urdf_file_path = 'urdf/ros2_control/gazebo/mycobot_280.urdf.xacro'
  world_file_path = 'worlds/empty.world' # e.g. 'world/empty.world', 'world/house.world'


  # Set the path to different files and folders.
  pkg_ros_gz_sim = FindPackageShare(package='ros_gz_sim').find('ros_gz_sim')
  pkg_share_description = FindPackageShare(package=package_name_description).find(package_name_description)
  pkg_share_gazebo = FindPackageShare(package=package_name_gazebo).find(package_name_gazebo)

  default_rviz_config_path = os.path.join(pkg_share_description, rviz_config_file_path)
  default_urdf_model_path = os.path.join(pkg_share_gazebo, urdf_file_path)
  gazebo_launch_file_path = os.path.join(pkg_share_gazebo, gazebo_launch_file_path)
  gazebo_models_path = os.path.join(pkg_share_gazebo, gazebo_models_path)
  world_path = os.path.join(pkg_share_gazebo, world_file_path)


  # Launch configuration variables specific to simulation
  robot_name = LaunchConfiguration('robot_name')
  rviz_config_file = LaunchConfiguration('rviz_config_file')
  use_robot_state_pub = LaunchConfiguration('use_robot_state_pub')
  use_rviz = LaunchConfiguration('use_rviz')
  use_sim_time = LaunchConfiguration('use_sim_time')
  world = LaunchConfiguration('world')

  # Set the default pose
  x = LaunchConfiguration('x')
  y = LaunchConfiguration('y')
  z = LaunchConfiguration('z')
  roll = LaunchConfiguration('roll')
  pitch = LaunchConfiguration('pitch')
  yaw = LaunchConfiguration('yaw')

  # Declare the launch arguments
  declare_robot_name_cmd = DeclareLaunchArgument(
    name='robot_name',
    default_value=default_robot_name,
    description='The name for the robot')

  declare_rviz_config_file_cmd = DeclareLaunchArgument(
    name='rviz_config_file',
    default_value=default_rviz_config_path,
    description='Full path to the RVIZ config file to use')

  declare_use_robot_state_pub_cmd = DeclareLaunchArgument(
    name='use_robot_state_pub',
    default_value='True',
    description='Whether to start the robot state publisher')

  declare_use_rviz_cmd = DeclareLaunchArgument(
    name='use_rviz',
    default_value='True',
    description='Whether to start RVIZ')

  declare_use_sim_time_cmd = DeclareLaunchArgument(
    name='use_sim_time',
    default_value='true',
    description='Use simulation (Gazebo) clock if true')

  declare_world_cmd = DeclareLaunchArgument(
    name='world',
    default_value=world_path,
    description='Full path to the world model file to load')

  declare_x_cmd = DeclareLaunchArgument(
    name='x',
    default_value='0.0',
    description='x component of initial position, meters')

  declare_y_cmd = DeclareLaunchArgument(
    name='y',
    default_value='0.0',
    description='y component of initial position, meters')

  declare_z_cmd = DeclareLaunchArgument(
    name='z',
    default_value='0.05',
    description='z component of initial position, meters')

  declare_roll_cmd = DeclareLaunchArgument(
    name='roll',
    default_value='0.0',
    description='roll angle of initial orientation, radians')

  declare_pitch_cmd = DeclareLaunchArgument(
    name='pitch',
    default_value='0.0',
    description='pitch angle of initial orientation, radians')

  declare_yaw_cmd = DeclareLaunchArgument(
    name='yaw',
    default_value='0.0',
    description='yaw angle of initial orientation, radians')

  # Specify the actions

  set_env_vars_resources = AppendEnvironmentVariable(
    'GZ_SIM_RESOURCE_PATH',
    gazebo_models_path)

  # Start arm controller
  start_arm_controller_cmd = ExecuteProcess(
    cmd=['ros2', 'control', 'load_controller', '--set-state', 'active',
        'arm_controller'],
        output='screen')

  # Start Gazebo environment
  start_gazebo_cmd = IncludeLaunchDescription(
    PythonLaunchDescriptionSource(
      os.path.join(pkg_ros_gz_sim, 'launch', 'gz_sim.launch.py')),
    launch_arguments=[('gz_args', [' -r -v 4 ', world])])

  # Start gripper controller
  start_gripper_controller_cmd =  ExecuteProcess(
    cmd=['ros2', 'control', 'load_controller', '--set-state', 'active',
        'grip_controller'],
        output='screen')

  # Start gripper action controller
  start_gripper_action_controller_cmd = ExecuteProcess(
    cmd=['ros2', 'control', 'load_controller', '--set-state', 'active',
        'grip_action_controller'],
        output='screen')

  # Launch joint state broadcaster
  start_joint_state_broadcaster_cmd = ExecuteProcess(
    cmd=['ros2', 'control', 'load_controller', '--set-state', 'active',
        'joint_state_broadcaster'],
        output='screen')

  # Subscribe to the joint states of the robot, and publish the 3D pose of each link.
  doc = xacro.parse(open(default_urdf_model_path))
  xacro.process_doc(doc)
  start_robot_state_publisher_cmd = Node(
    condition=IfCondition(use_robot_state_pub),
    package='robot_state_publisher',
    executable='robot_state_publisher',
    name='robot_state_publisher',
    output='screen',
    parameters=[{
      'use_sim_time': use_sim_time,
      'robot_description': doc.toxml()}])

  # Launch RViz
  start_rviz_cmd = Node(
    condition=IfCondition(use_rviz),
    package='rviz2',
    executable='rviz2',
    name='rviz2',
    output='screen',
    arguments=['-d', rviz_config_file],
    parameters=[{'use_sim_time': use_sim_time}])


  # Spawn the robot
  start_gazebo_ros_spawner_cmd = Node(
    package='ros_gz_sim',
    executable='create',
    arguments=[
      '-string', doc.toxml(),
      '-name', robot_name,
      '-allow_renaming', 'true',
      '-x', x,
      '-y', y,
      '-z', z,
      '-R', roll,
      '-P', pitch,
      '-Y', yaw
      ],
    output='screen')

  # Launch the joint state broadcaster after spawning the robot
  load_joint_state_broadcaster_cmd = RegisterEventHandler(
     event_handler=OnProcessExit(
     target_action=start_gazebo_ros_spawner_cmd ,
     on_exit=[start_joint_state_broadcaster_cmd],))

  # Launch the arm controller after launching the joint state broadcaster
  load_arm_controller_cmd = RegisterEventHandler(
    event_handler=OnProcessExit(
    target_action=start_joint_state_broadcaster_cmd,
    on_exit=[start_arm_controller_cmd],))

  # Launch the gripper controller after launching the arm controller
  load_gripper_controller_cmd = RegisterEventHandler(
    event_handler=OnProcessExit(
    target_action=start_arm_controller_cmd,
    on_exit=[start_gripper_controller_cmd],))

  # Launch the gripper action controller after launching the gripper controller
  load_gripper_action_controller_cmd = RegisterEventHandler(
    event_handler=OnProcessExit(
    target_action=start_gripper_controller_cmd,
    on_exit=[start_gripper_action_controller_cmd],))

  # Create the launch description and populate
  ld = LaunchDescription()

  # Declare the launch options
  ld.add_action(declare_robot_name_cmd)
  ld.add_action(declare_rviz_config_file_cmd)
  ld.add_action(declare_use_robot_state_pub_cmd)
  ld.add_action(declare_use_rviz_cmd)
  ld.add_action(declare_use_sim_time_cmd)
  ld.add_action(declare_world_cmd)

  ld.add_action(declare_x_cmd)
  ld.add_action(declare_y_cmd)
  ld.add_action(declare_z_cmd)
  ld.add_action(declare_roll_cmd)
  ld.add_action(declare_pitch_cmd)
  ld.add_action(declare_yaw_cmd)

  # Add any actions
  ld.add_action(set_env_vars_resources)
  ld.add_action(start_gazebo_cmd)
  ld.add_action(start_robot_state_publisher_cmd)
  ld.add_action(start_rviz_cmd)

  ld.add_action(start_gazebo_ros_spawner_cmd)

  ld.add_action(load_joint_state_broadcaster_cmd)
  ld.add_action(load_arm_controller_cmd)
  ld.add_action(load_gripper_controller_cmd)
  ld.add_action(load_gripper_action_controller_cmd)

  return ld
Now build the package.
cd ~/ros2_ws/
colcon build
source ~/.bashrc
Launch Everything and Move the Arm
Now launch everything:
ros2 launch mycobot_gazebo mycobot_280_arduino_bringup_ros2_control_gazebo.launch.py
See the active controllers:
ros2 control list_controllers
To get more information, type:
ros2 control list_controllers -v
If you want to close the gripper, you can do this:
ros2 action send_goal /grip_action_controller/gripper_cmd control_msgs/action/GripperCommand "{command: {position: -0.7, max_effort: 5.0}}"
If you want to open the gripper, you can do this:
ros2 action send_goal /grip_action_controller/gripper_cmd control_msgs/action/GripperCommand "{command: {position: 0.0, max_effort: 5.0}}"
Deactivate the grip_action_controller (which uses the position_controllers/GripperActionController interface…we will use this in a later tutorial)
ros2 control set_controller_state grip_action_controller inactive
Activate the grip_controller (which uses the joint_trajectory_controller/JointTrajectoryController interface)
ros2 control set_controller_state grip_controller active
To see a list of all the commands you can use type:
ros2 control
Then press Tab twice.
List all the available hardware components that are loaded and ready to be used by the ros2_control controller manager.
ros2 control list_hardware_components
Now let’s send a command to the robotic arm to move it.
Let’s check out the topics:
ros2 topic list
We need this topic: /arm_controller/joint_trajectory
We can publish a trajectory to that topic to move the arm. Let’s get more information about the topic:
ros2 topic info /arm_controller/joint_trajectory
We need we need to publish a message of type:
trajectory_msgs/msg/JointTrajectory
Remember, here were the list of joints that are controlled by the arm_controller:
- link1_to_link2
- link2_to_link3
- link3_to_link4
- link4_to_link5
- link5_to_link6
- link6_to_link6flange
There are 6 joints in total.
Here is a command you can try:
ros2 topic pub --once /arm_controller/joint_trajectory trajectory_msgs/msg/JointTrajectory "{joint_names: ['link1_to_link2', 'link2_to_link3', 'link3_to_link4', 'link4_to_link5', 'link5_to_link6', 'link6_to_link6flange'], points: [{positions: [-1.345, -1.23, 0.264, -0.296, 0.389, -1.5], time_from_start: {sec: 3, nanosec: 0}}]}"
You can also move it back home now:
ros2 topic pub --once /arm_controller/joint_trajectory trajectory_msgs/msg/JointTrajectory "{joint_names: ['link1_to_link2', 'link2_to_link3', 'link3_to_link4', 'link4_to_link5', 'link5_to_link6', 'link6_to_link6flange'], points: [{positions: [0.0, 0.0, 0.0, 0.0, 0.0, 0.0], time_from_start: {sec: 3, nanosec: 0}}]}"
To close the gripper, you can type:
ros2 topic pub /grip_controller/joint_trajectory trajectory_msgs/msg/JointTrajectory "{joint_names: ['gripper_controller'], points: [{positions: [-0.70], time_from_start: {sec: 3.0} } ]}" --once
To open the gripper, you can type:
ros2 topic pub /grip_controller/joint_trajectory trajectory_msgs/msg/JointTrajectory "{joint_names: ['gripper_controller'], points: [{positions: [0.0], time_from_start: {sec: 3.0} } ]}" --once
Move the Robotic Arm Using Code
Let’s create a ROS 2 node that can loop through a list of trajectories to simulate the arm moving from the home position to a goal location and then back to home.
Python
Let’s start by creating a script using Python.
cd ~/ros2_ws/src/mycobot_ros2/mycobot_gazebo/scripts
gedit example_joint_trajectory_publisher.py
Add this code and save the file.
#! /usr/bin/env python3

"""
Description:
  ROS 2: Executes a sample trajectory for a robotic arm in Gazebo
-------
Publishing Topics (ROS 2):
  Desired goal pose of the robotic arm
    /arm_controller/joint_trajectory - trajectory_msgs/JointTrajectory

  Desired goal pose of the gripper
    /grip_controller/joint_trajectory - trajectory_msgs/JointTrajectory
-------
Author: Addison Sears-Collins
Date: April 29, 2024
"""

import rclpy # Python client library for ROS 2
from rclpy.node import Node # Handles the creation of nodes
from trajectory_msgs.msg import JointTrajectory, JointTrajectoryPoint
from builtin_interfaces.msg import Duration
from std_msgs.msg import Header  # Import the Header message

# Define constants
arm_joints = [ 'link1_to_link2',
               'link2_to_link3',
               'link3_to_link4',
               'link4_to_link5',
               'link5_to_link6',
               'link6_to_link6flange']

gripper_joints = ['gripper_controller']

class ExampleJointTrajectoryPublisherPy(Node):
    """This class executes a sample trajectory for a robotic arm

    """
    def __init__(self):
        """ Constructor.

        """
        # Initialize the class using the constructor
        super().__init__('example_joint_trajectory_publisher_py')

        # Create the publisher of the desired arm and gripper goal poses
        self.arm_pose_publisher = self.create_publisher(JointTrajectory, '/arm_controller/joint_trajectory', 1)
        self.gripper_pose_publisher = self.create_publisher(JointTrajectory, '/grip_controller/joint_trajectory', 1)

        self.timer_period = 5.0  # seconds 5.0
        self.timer = self.create_timer(self.timer_period, self.timer_callback)

        self.frame_id = "base_link"

        # Desired time from the trajectory start to arrive at the trajectory point.
        # Needs to be less than or equal to the self.timer_period above to allow
        # the robotic arm to smoothly transition between points.
        self.duration_sec = 2
        self.duration_nanosec = 0.5 * 1e9 # (seconds * 1e9)

        # Set the desired goal poses for the robotic arm.
        self.arm_positions = []
        self.arm_positions.append([0.0, 0.0, 0.0, 0.0, 0.0, 0.0]) # Home location
        self.arm_positions.append([-1.345, -1.23, 0.264, -0.296, 0.389, -1.5]) # Goal location
        self.arm_positions.append([-1.345, -1.23, 0.264, -0.296, 0.389, -1.5])
        self.arm_positions.append([0.0, 0.0, 0.0, 0.0, 0.0, 0.0]) # Home location

        self.gripper_positions = []
        self.gripper_positions.append([0.0]) # Open gripper
        self.gripper_positions.append([0.0])
        self.gripper_positions.append([-0.70]) # Close gripper
        self.gripper_positions.append([-0.70])

        # Keep track of the current trajectory we are executing
        self.index = 0

    def timer_callback(self):
        """Set the goal pose for the robotic arm.

        """
        # Create new JointTrajectory messages
        msg_arm = JointTrajectory()
        msg_arm.header = Header()
        msg_arm.header.frame_id = self.frame_id
        msg_arm.joint_names = arm_joints

        msg_gripper = JointTrajectory()
        msg_gripper.header = Header()
        msg_gripper.header.frame_id = self.frame_id
        msg_gripper.joint_names = gripper_joints

        # Create JointTrajectoryPoints
        point_arm = JointTrajectoryPoint()
        point_arm.positions = self.arm_positions[self.index]
        point_arm.time_from_start = Duration(sec=int(self.duration_sec), nanosec=int(self.duration_nanosec))  # Time to next position
        msg_arm.points.append(point_arm)
        self.arm_pose_publisher.publish(msg_arm)

        point_gripper = JointTrajectoryPoint()
        point_gripper.positions = self.gripper_positions[self.index]
        point_gripper.time_from_start = Duration(sec=int(self.duration_sec), nanosec=int(self.duration_nanosec))
        msg_gripper.points.append(point_gripper)
        self.gripper_pose_publisher.publish(msg_gripper)

        # Reset the index
        if self.index == len(self.arm_positions) - 1:
            self.index = 0
        else:
            self.index = self.index + 1

def main(args=None):

    # Initialize the rclpy library
    rclpy.init(args=args)

    # Create the node
    example_joint_trajectory_publisher_py = ExampleJointTrajectoryPublisherPy()

    # Spin the node so the callback function is called.
    rclpy.spin(example_joint_trajectory_publisher_py)

    # Destroy the node
    example_joint_trajectory_publisher_py.destroy_node()

    # Shutdown the ROS client library for Python
    rclpy.shutdown()

if __name__ == '__main__':
  main()
Add the code to your CMakeLists.txt file.
cd ~/ros2_ws/
colcon build
source ~/.bashrc
Launch your arm in Gazebo:
ros2 launch mycobot_gazebo mycobot_280_arduino_bringup_ros2_control_gazebo.launch.py
Now run your node:
ros2 run mycobot_gazebo example_joint_trajectory_publisher.py
C++
Now let’s create the same node in C++.
mkdir ~/ros2_ws/src/mycobot_ros2/mycobot_gazebo/src
mkdir ~/ros2_ws/src/mycobot_ros2/mycobot_gazebo/include
cd src
gedit example_joint_trajectory_publisher.cpp
/**
 * @file example_joint_trajectory_publisher.cpp
 * @brief ROS 2: Executes a sample trajectory for a robotic arm in Gazebo
 *
 * Publishing Topics (ROS 2):
 *   Desired goal pose of the robotic arm
 *     /arm_controller/joint_trajectory - trajectory_msgs::msg::JointTrajectory
 *
 *   Desired goal pose of the gripper
 *     /grip_controller/joint_trajectory - trajectory_msgs::msg::JointTrajectory
 *
 * @author Addison Sears-Collins
 * @date April 29, 2024
 */

#include <chrono>
#include <functional>
#include <memory>
#include <string>

#include "rclcpp/rclcpp.hpp"
#include "trajectory_msgs/msg/joint_trajectory.hpp"
#include "std_msgs/msg/header.hpp"

using namespace std::chrono_literals;

// Define constants
const std::vector<std::string> arm_joints = {
    "link1_to_link2",
    "link2_to_link3",
    "link3_to_link4",
    "link4_to_link5",
    "link5_to_link6",
    "link6_to_link6flange"
};

const std::vector<std::string> gripper_joints = {
    "gripper_controller"
};

class ExampleJointTrajectoryPublisherCpp : public rclcpp::Node
{
public:
    ExampleJointTrajectoryPublisherCpp()
        : Node("example_joint_trajectory_publisher_cpp")
    {
        // Create the publisher of the desired arm and gripper goal poses
        arm_pose_publisher_ = create_publisher<trajectory_msgs::msg::JointTrajectory>("/arm_controller/joint_trajectory", 1);
        gripper_pose_publisher_ = create_publisher<trajectory_msgs::msg::JointTrajectory>("/grip_controller/joint_trajectory", 1);

        // Create a timer to periodically call the timerCallback function
        timer_ = create_wall_timer(5s, std::bind(&ExampleJointTrajectoryPublisherCpp::timerCallback, this));

        frame_id_ = "base_link";

        // Desired time from the trajectory start to arrive at the trajectory point.
        // Needs to be less than or equal to the timer period above to allow
        // the robotic arm to smoothly transition between points.
        duration_sec_ = 2;
        duration_nanosec_ = 0.5 * 1e9;  // (seconds * 1e9)

        // Set the desired goal poses for the robotic arm.
        arm_positions_ = {
            {0.0, 0.0, 0.0, 0.0, 0.0, 0.0},  // Home location
            {-1.345, -1.23, 0.264, -0.296, 0.389, -1.5},  // Goal location
            {-1.345, -1.23, 0.264, -0.296, 0.389, -1.5},
            {0.0, 0.0, 0.0, 0.0, 0.0, 0.0}  // Home location
        };

        gripper_positions_ = {
            {0.0},  // Open gripper
            {0.0},
            {-0.70},  // Close gripper
            {-0.70}
        };

        // Keep track of the current trajectory we are executing
        index_ = 0;
    }

private:
    void timerCallback()
    {
        // Create new JointTrajectory messages for arm and gripper
        auto msg_arm = trajectory_msgs::msg::JointTrajectory();
        msg_arm.header.frame_id = frame_id_;
        msg_arm.joint_names = arm_joints;

        auto msg_gripper = trajectory_msgs::msg::JointTrajectory();
        msg_gripper.header.frame_id = frame_id_;
        msg_gripper.joint_names = gripper_joints;

        // Create JointTrajectoryPoints for arm and gripper
        auto point_arm = trajectory_msgs::msg::JointTrajectoryPoint();
        point_arm.positions = arm_positions_[index_];
        point_arm.time_from_start = rclcpp::Duration(duration_sec_, duration_nanosec_);
        msg_arm.points.push_back(point_arm);
        arm_pose_publisher_->publish(msg_arm);

        auto point_gripper = trajectory_msgs::msg::JointTrajectoryPoint();
        point_gripper.positions = gripper_positions_[index_];
        point_gripper.time_from_start = rclcpp::Duration(duration_sec_, duration_nanosec_);
        msg_gripper.points.push_back(point_gripper);
        gripper_pose_publisher_->publish(msg_gripper);

        // Reset the index
        if (index_ == arm_positions_.size() - 1) {
            index_ = 0;
        } else {
            index_++;
        }
    }

    // Publishers for arm and gripper joint trajectories
    rclcpp::Publisher<trajectory_msgs::msg::JointTrajectory>::SharedPtr arm_pose_publisher_;
    rclcpp::Publisher<trajectory_msgs::msg::JointTrajectory>::SharedPtr gripper_pose_publisher_;

    // Timer for periodic callback
    rclcpp::TimerBase::SharedPtr timer_;

    // Frame ID for the joint trajectories
    std::string frame_id_;

    // Duration for each trajectory point
    int duration_sec_;
    int duration_nanosec_;

    // Desired goal poses for the robotic arm and gripper
    std::vector<std::vector<double>> arm_positions_;
    std::vector<std::vector<double>> gripper_positions_;

    // Index to keep track of the current trajectory point
    size_t index_;
};

int main(int argc, char * argv[])
{
    // Initialize the ROS 2 client library
    rclcpp::init(argc, argv);

    // Create an instance of the ExampleJointTrajectoryPublisherCpp node
    auto node = std::make_shared<ExampleJointTrajectoryPublisherCpp>();

    // Spin the node to execute the callbacks
    rclcpp::spin(node);

    // Shutdown the ROS 2 client library
    rclcpp::shutdown();

    return 0;
}
Update your CMakeLists.txt file and package.xml file.
cd ~/ros2_ws/
colcon build
source ~/.bashrc
Launch your arm in Gazebo:
ros2 launch mycobot_gazebo mycobot_280_arduino_bringup_ros2_control_gazebo.launch.py
Now run your node:
ros2 run mycobot_gazebo example_joint_trajectory_publisher_cpp
Your robotic arm will go repeatedly from the home position to the target position.
Congratulations! You made it to the end. That’s it! Keep building!