How to Install and Launch ROS2 Using Docker

In this tutorial, we will install and launch ROS2 using Docker within Ubuntu Linux 20.04. To test our installation, we will launch and run the popular Turtlebot3 software program.

What is Docker?

You can think of a Docker container on your PC as a computer inside your computer.

Docker is a service that provides portable stand-alone containers that come bundled with pre-installed software packages. These containers  make your life easier because they come with the right software versions and dependencies for whatever application you are trying to run.

Docker makes a lot more sense when you actually use it, so let’s get started.

Install Docker

Go to this link to download the appropriate Docker for your system.

Install Docker on your computer. Since I’m using Ubuntu 20.04 in Virtual Box on a Windows 10 machine, I’ll follow the Ubuntu instructions for “Install using the repository.”

If you’re using a Mac or Windows, follow those instructions. I actually find it easier to use Ubuntu, so if you’re using Windows, I highly suggest you do this tutorial first to get Ubuntu up and running, and then come back to this page.

Pull and Start the Docker Container With ROS2

Open a new terminal window, and create a new folder.

mkdir new_folder

Let’s pull a docker container. This one below comes with ROS2 already installed. This docker container comes from this GitHub repository.

sudo docker pull /tiryoh/ros2-desktop-vnc:foxy

Now we need to start the docker container and mount the folder on it (the command below is all a single command).

sudo docker run -it -p 6080:80 -v /new_folder --name ros2_new_folder tiryoh/ros2-desktop-vnc:foxy

Note that ros2_new_folder is the name of the container.

Type the following in any browser: http://127.0.0.1:6080/

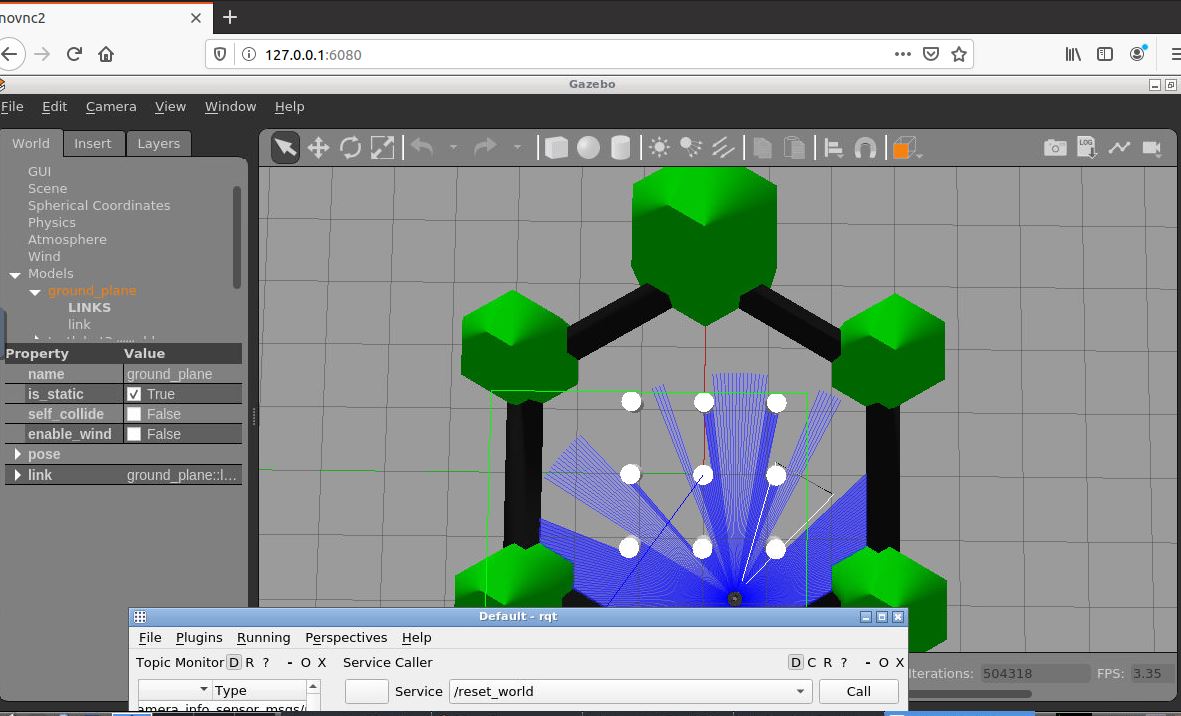
Here is the screen you should see:

1-screen-you-should-seeJPG

Install TurtleBot3

Click the menu icon in the very bottom left of the container.

Go to System Tools -> LX Terminal.

Download TurtleBot3.

mkdir -p ~/turtlebot3_ws/src
cd ~/turtlebot3_ws
wget https://raw.githubusercontent.com/ROBOTIS-GIT/turtlebot3/ros2/turtlebot3.repos
vcs import src < turtlebot3.repos

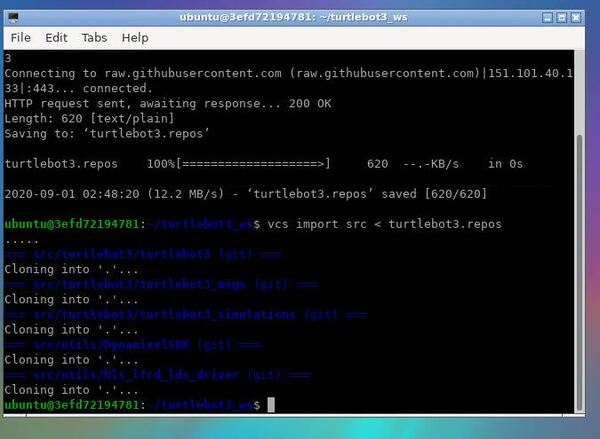
Wait a while while TurtleBot3 downloads into the container.

2-wait-a-whileJPG

Compile the source code.

colcon build --symlink-install

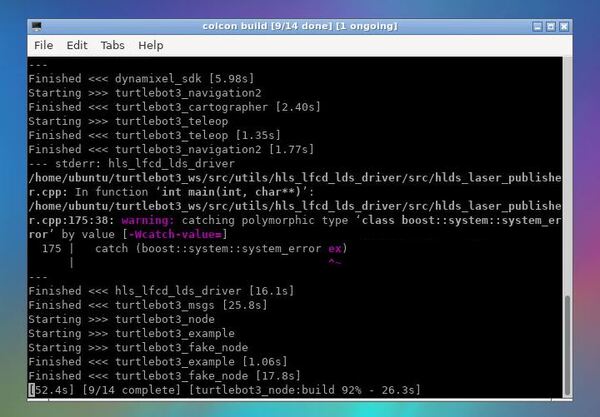
Wait for the source code to compile.

3-source-code-compileJPG

Let’s set the environment variables. Type these commands, one right after the other.

echo 'source ~/turtlebot3_ws/install/setup.bash' >> ~/.bashrc
echo 'export GAZEBO_MODEL_PATH=$GAZEBO_MODEL_PATH:~/turtlebot3_ws/src/turtlebot3/turtlebot3_simulations/turtlebot3_gazebo/models' >> ~/.bashrc
echo 'export TURTLEBOT3_MODEL=waffle_pi' >> ~/.bashrc
source ~/.bashrc

Launch an Empty World in Gazebo in ROS2

Now we will launch the simulation using the ros2 launch command.

ros2 launch turtlebot3_gazebo empty_world.launch.py

It will take a while to launch the first time, so be patient. You might see a bunch of warning messages, just ignore those.

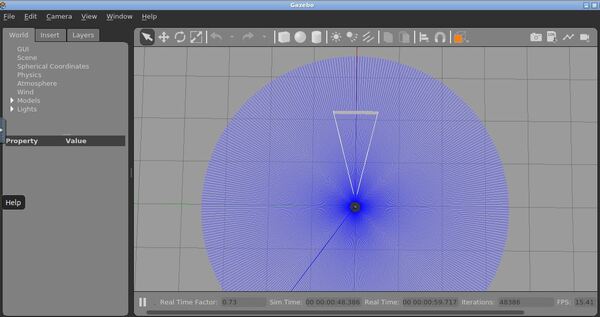
When everything is done launching, you should see an empty world like this.

4-empty-gazebo-worldJPG

Go back to the terminal window by clicking the icon at the bottom of the screen.

Press CTRL+C to close it out.

For more simulations, check out this link at the TurtleBot3 website.

How to Stop the Docker Container

To stop the Docker container, go back to Ubuntu Linux and open a new terminal window. Type the following code.

sudo docker stop [name_of_container]

For example:

sudo docker stop ros2_new_folder

How to Restart the Docker Container

If you ever want to restart it in the future, you type:

sudo docker stop [name_of_container]

For example:

sudo docker restart ros2_new_folder

Type the following in any browser. http://127.0.0.1:6080/

That’s it.

How To Install Ubuntu and Raspbian on Your Raspberry Pi 4

In this tutorial, we will set up a Raspberry Pi 4 with both the Ubuntu 20.04 and Raspbian operating systems.

You Will Need

2020-08-29-150822

This section is the complete list of components you will need for this project.

Install Ubuntu

Prepare the SD Card

Grab the USB MicroSD Card Reader.

2020-08-29-151538

Take off the cap of the USB MicroSD Card Reader.

2020-08-29-151621

Stick the MicroSD card inside the Card Reader.

Stick the Card Reader into the USB drive on your computer.

Download the Raspberry Pi Imager for your operating system. I’m using Windows, so I will download Raspberry Pi Imager for Windows.

Open the Raspberry Pi Imager. Follow the instructions to install it on your computer.

When the installation is complete, click Finish.

Open the CHOOSE OS menu.

Scroll down, and click “Ubuntu”.

Select the Ubuntu 20.04 download (32-bit server).

Click CHOOSE SD. 

Select the microSD card you inserted. 

Click WRITE, and wait for the operating system to write to the card. It will take a while so be patient.

While you’re waiting, grab your Raspberry Pi 4 and the bag of heat sinks.

2020-08-29-154338
2020-08-29-154824

Peel off the backup of the heat sinks, and attach them to the corresponding chips on top of the Raspberry Pi.

2020-08-29-154344

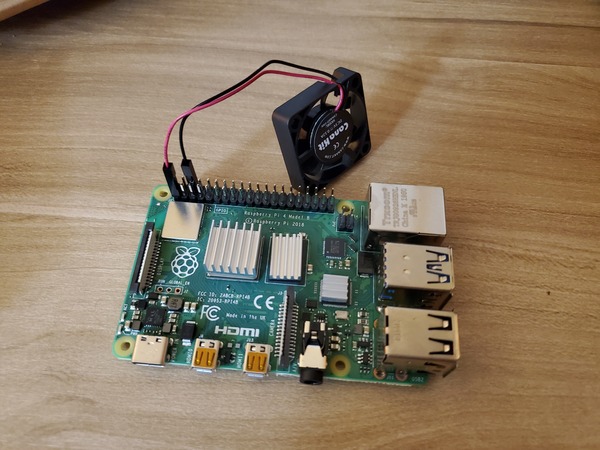
Grab the cooling fan.

2020-08-29-155325

Connect the black wire to header pin 6 of the Raspberry Pi. Connect the red wire to header pin 1 of the Raspberry Pi.

2020-08-29-155750

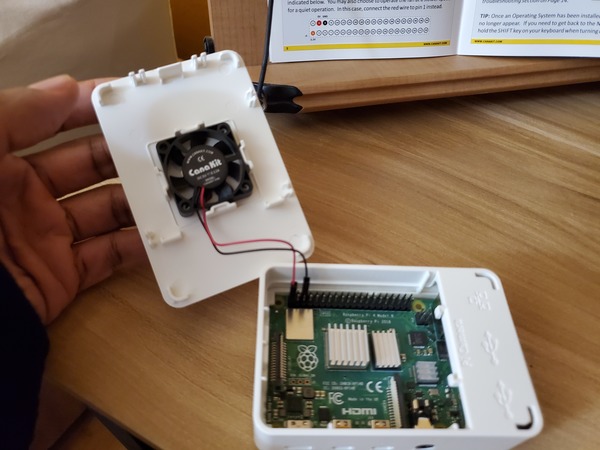
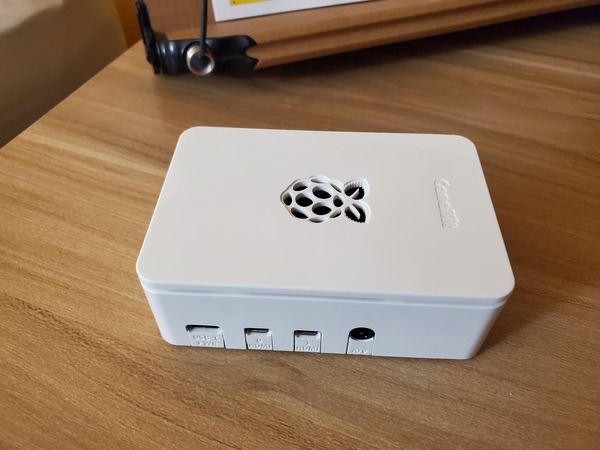
Install the Raspberry Pi inside the case.

2020-08-29-155840

Connect the PiSwitch to the USB-C Power Supply. It should snap into place.

2020-08-29-160447

Once the installation of the operating system is complete, remove the microSD card reader from your laptop.

Set Up Wi-Fi

Reinsert the microSD card into your computer.

2020-08-29-161429

Open your File Manager, and find the network-config file. Mine is located on the F drive in Windows.

Open that file using Notepad or another plain text editor.

Uncomment (remove the “#” at the beginning) and edit the following lines to add your Wi-Fi credentials (don’t touch any of the other lines):

wifis:
  wlan0:
  dhcp4: true
  optional: true
  access-points:
    <wifi network name>:
      password: "<wifi password>"

For example:

wifis:
  wlan0:
  dhcp4: true
  optional: true
  access-points:
    "home network":
      password: "123456789"

Make sure the network name and password are inside quotes.

Save the file.

Set Up the Raspberry Pi

Safely remove the microSD Card Reader from your laptop.

Remove the microSD card from the card reader.

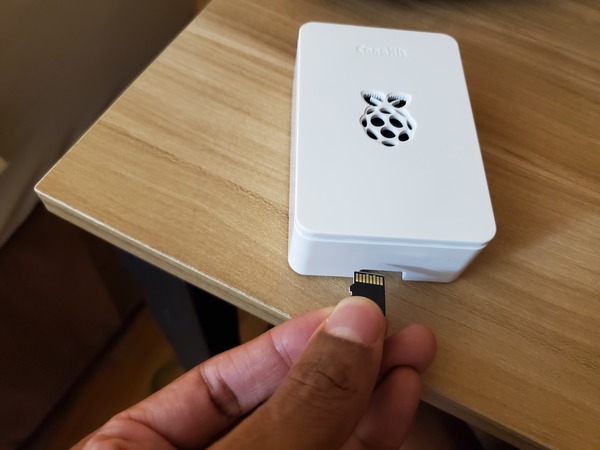
Insert the microSD card into the bottom of the Raspberry Pi.

Connect a keyboard and a mouse to the USB 3.0 ports of the Raspberry Pi.

2020-08-29-165525

Connect an HDMI monitor to the Raspberry Pi using the Micro HDMI cable connected to the Main MIcro HDMI port (which is labeled HDMI 0).

Connect the 3A USB-C Power Supply to the Raspberry Pi. You should see the computer boot.

Log in using “ubuntu” as both the password and login ID. You will have to do this multiple times.

You will then be asked to change your password.

Type:

sudo reboot

Type the command: 

hostname -I 

You will see the IP address of your Raspberry Pi. Mine is 192.168.254.68. Write this number down on a piece of paper because you will need it later.

Now update and upgrade the packages.

sudo apt update
sudo apt upgrade

Now, install a desktop.

sudo apt install xubuntu-desktop

Installing the desktop should take around 20-30 minutes or so.

Once that is done, it will ask you what you want as your default display manager. I’m going to use gdm3.

Wait for that to download.

Reboot your computer.

sudo reboot

Your desktop should show up.

Type in your password and press ENTER.

Click on Activities in the upper left corner of the screen to find applications.

If you want to see a Windows-like desktop, type the following commands:

cd ~/.cache/sessions/

Remove any files in there.

Type:

rm 

Then press the Tab key and press Enter.

Now type:

xfdesktop

Connect to Raspberry Pi from Your Personal Computer

Follow the steps for Putty under step 9b at this link to connect to your Raspberry Pi from your personal computer.

Install Raspbian

Now, we will install the Raspbian operating system. Turn off the Raspberry Pi, and remove the microSD card.

Insert the default microSD card that came with the kit.

Turn on the Raspberry Pi.

You should see an option to select “Raspbian Full [RECOMMENDED]”. Click the checkbox beside that.

Change the language to your desired language.

Click Wifi networks, and type in the password of your network.

Click Install.

Click Yes to confirm.

Wait while the operating system installs.

You’ll get a message that the operating system installed successfully.

Now follow all the steps from Step 7 of this tutorial. All the software updates at the initial startup take a really long time, so be patient. You can even go and grab lunch and return. It might not look like the progress bar is moving, but it is.

2020-08-29-212546

Keep building!

MATLAB Cookbook – Code Examples for the Most Common Tasks

In this post, I will write example code for the most common things you’ll do in MATLAB. MATLAB is a software package used for numerical computation and visualization.

My goal is to write bare-bones, skeleton recipes that can be easily modified and adapted to your own projects.

Prerequisites

  • You have MATLAB installed on your computer. I’m using MATLAB Release 2020a.

Select a Current Directory

Open MATLAB.

In the command window, select your desired Current Folder (i.e. working directory). The syntax is:

cd 'path_to_folder'

For example., in the Command Window, you would type the following command and press Enter in your keyboard:

cd 'C:\Program Files\My_Documents'

Create New Scripts

To create a new script (i.e. the most basic Matlab file with the ‘.m’ extension), run the following command in the Command window.

edit matlab_cookbook_1.m

If this is your first time creating a file in MATLAB, you might see a prompt that asks you “Do you want to create it?”

Highlight “Do not show this prompt again,” and click Yes.

Accept User Input

Write the following code inside matlab_cookbook_1.m.

% Get rid of blank lines in the output
format compact

% Accept a string as input
% Semicolon prevents every variable and output from appearing
% in the command window
name = input("What's your first name : ", "s");

% Check if the user entered something as input
if ~isempty(name)
    fprintf("Hi %s\n", name) 
end

Save the code.

Click Run to run the code.

Type in your name into the Command Window.

Press Enter.

Here is the output:

2-user-input-output

To stop a script from running at any time, you can type CTRL+C.

Now, let’s create a new file named matlab_cookbook_2.m.

edit matlab_cookbook_2.m

Add the following code:

% Get rid of blank lines in the output
format compact

% Accept vector input
vector_input = input("Enter a vector : ");

% Display the vector to the Command Window
disp(vector_input)

Click Run.

Enter your vector. For example, you can enter:

[1 2 3]

Here is the output:

3-enter-your-vector

Declare and Initialize Variables and Data Types

Let’s work with variables and data types (i.e. classes).

Create a new script.

edit matlab_cookbook_3.m

Type the following code.

format compact

% Initialize a character variable
char_1 = 'A'

% Determine the class of a character
class(char_1)

% Initialize a string variable
str_1 = "This is a string"

% Determine the class
class(str_1)

% Evaluate a boolean expression
5 > 2

% Initialize a boolean varable to true
bool_1 = true

% Initialize a boolean variable to false
bool_2 = false

% Check out the maximum and minimum values that can be 
% stored in a data type
intmin('int8')
intmax('int8')

% See the largest double value that can be stored
realmax

% See the largest integer that can be stored
realmax('single')

Run it.

Here is the output:

4-matlab-cookbook3-output1
4-matlab-cookbook3-output2

How do you create an expression that spans more than one line?

Open a new script.

edit matlab_cookbook_4.m
format compact

% An expression that spans more than one line
var_1 = 5 + 5 + 1 ...
      + 1

Save and then run the code. 

5-matlab-cookbook4-output

Casting Variables to Different Data Types

Let’s explore how to cast variables to different data types.

Create a new script.

edit matlab_cookbook_5.m

Type the following code.

format compact

% Create a double (double is the default)
var_1 = 9

% Output the data type
class(var_1)

% Caste the double to an int8 data type
var_2 = int8(var_1)

% Check that the variable was properly converted
class(var_2)

% Convert a character to a double
var_3 = double('A')

% Convert a double to a character 
var_4 = char(64)

Run it.

Here is the output:

6-matlab-cookbook5-output

Formatting Data into a String

Let’s explore how to format data into a string.

Create a new script.

edit matlab_cookbook_6.m

Type the following code.

format compact

% Format output into a string.
% Sum should be a signed integer - %d
sprintf('9 + 2 = %d\n', 9 + 2)

% Format output into a string.
% Sum should be a float with two decimal places
sprintf('9 + 2 = %.2f\n', 9 + 2)

Run it.

Here is the output:

7-matlab-cookbook6-output

Basic Mathematical Operations

Let’s explore how to do basic mathematical operations in MATLAB.

Create a new script.

edit matlab_cookbook_7.m

Type the following code.

% Supress the display of blank lines
format compact 

% Display formatted text
% Addition
fprintf('9 + 2 = %d\n', 9 + 2)

% Subtraction
fprintf('9 - 2 = %d\n', 9 - 2)

% Multiplication
fprintf('9 * 2 = %d\n', 9 * 2)

% Display float with two decimal places
fprintf('9 * 2 = %0.2f\n', 9 / 2)

% Exponentiation
fprintf('5^2 = %d\n', 5^2)

% Modulus
fprintf('5%%2 = %d\n', mod(5,2))

% Generate a random number between 50 and 100
randi([50,100]) 

Run it.

Here is the output:

8-matlab-cookbook7-output

Basic Mathematical Functions

Let’s take a look at some basic mathematical functions in MATLAB.

Create a new script.

edit matlab_cookbook_8.m

Type the following code.

format compact

% This code has some basics mathematical functions
% in MATLAB

% Absolute Value
fprintf('abs(-7) = %d\n', abs(-7))

% Floor
fprintf('floor(3.23) = %d\n', floor(3.23))

% Ceiling
fprintf('ceil(3.23) = %d\n', ceil(3.23))

% Rounding
fprintf('round(3.23) = %d\n', round(3.23))

% Exponential (e^x)
fprintf('exp(1) = %f\n', exp(1)) 

% Logarithms
fprintf('log(100) = %f\n', log(100))
fprintf('log10(100) = %f\n', log10(100))
fprintf('log2(100) = %f\n', log2(100))

% Square root
fprintf('sqrt(144) = %f\n', sqrt(144))

% Convert from degrees to radians
fprintf('90 Deg to Radians = %f\n', deg2rad(90))

% Convert from radians to degrees
fprintf('pi/2 Radians to Degrees = %f\n', rad2deg(pi/2))

%%%% Trigonometric functions%%%
% Sine of argument in radians
fprintf('Sine of pi/2 = %f\n', sin(pi/2))

% Cosine of argument in radians
fprintf('Cosine of pi/2 = %f\n', cos(pi/2))

% Tangent of argument in radians
fprintf('Tangent of -pi/4 = %f\n', tan(-pi/4))

Run it.

Here is the output:

9-matlab-cookbook8-output

To see a big list of the built-in mathematical functions, you can type the following command:

help elfun

Relational and Logical Operators

Create a new script.

edit matlab_cookbook_9.m

Type the following code.

format compact

%{ 
Relational Operators: 
  -- Greater than >
  -- Less than < 
  -- Greater than or equal to >=
  -- Less than or equal to <=
  -- Equal to ==
  -- Not equal to ~=

Logical Operators: 
  -- OR || 
  -- AND &&
  -- NOT ~
%} 

% Example
age = 19

if age < 18
    disp("You are not in college yet")
elseif age >= 18 && age <= 22
    disp("You are a college student")
else
    disp("You have graduated from college")
end   

Run it.

Here is the output:

10-matlab-cookbook9-output

Now, let’s work with switch statements.

edit matlab_cookbook_10.m

Here is the output:

format compact

size = 12

switch size
    case 2
        disp("Too small")
    case num2cell(3:10) % If number is between 3 and 10, inclusive
        disp("Just right")
    case {11, 12, 13, 14} % If number is any of these numbers
        disp("A bit large")
    otherwise
        disp("Too big")
end  

Vectors

edit matlab_cookbook_11.m

Here is the output:

format compact

% Create a vector
vector_1 = [6 9 1 3 8]

% Calculate the length of the vector
vector_1_length = length(vector_1)

% Sort a vector in ascending order
vector_1 = sort(vector_1)

% Sort a vector in descending order
vector_1 = sort(vector_1, 'descend')

% Create a vector that has the numbers 3 through 9
vector_2 = 3:9

% Create a vector of numbers from 10 through 15 in steps of 0.5
vector_3 = 10:0.5:15

% Concatenate vectors
vector_4 = [vector_2 vector_3] 

% Get the first item in the vector above. Indices start at 1.
vector_4(1)
edit matlab_cookbook_12.m
format compact

% Create a vector
vector_1 = [6 9 1 3 8]

% Get the last value in a vector
last_val_in_vector = vector_1(end)

% Change the first value in a vector
vector_1(1) = 7

% Append values to end of vector
vector_1(6) = 99

% Get the first 3 values of a vector
vector_1(1:3)

% Get the first and second value of a vector
vector_1([1 2])

% Create a column vector
col_vector_1 = [6;9;1;3;8]

% Multiply a column vector and a row vector
vector_mult = col_vector_1 * vector_1

% Take the dot product of two vectors
% 2 * 5 + 3 * 9 + 4 * 7 = 65
vector_2 = [2 3 4]
vector_3 = [5 9 7]
dot_product_val = dot(vector_2, vector_3)

Here is the output:

13-matlab-cookbook12-output

Matrix Basics

edit matlab_cookbook_13.m
format compact

% Initialize a matrix
matrix_1 = [4 6 2; 6 3 2]

% Get the number of values in a row
num_in_a_row = length(matrix_1)

% Get the total number of values in a matrix
num_of_vals = numel(matrix_1)

% Size of matrix (num rows   num cols)
matrix_size = size(matrix_1)

[num_of_rows, num_of_cols] = size(matrix_1)

% Generate a random matrix with values between 20 and 30
% Matrix has two rows.
matrix_2 = randi([20,30],2)

% Modify a value inside a matrix (row 1, column 2)
% Remember matrices start at 1
matrix_2(1, 2) = 33

% Modify all row values in the first row
matrix_2(1,:) = 26

% Modify all column values in the first column
matrix_2(:,1) = 95

% Get the first value in the last row
first_val_last_row = matrix_2(end, 1)

% Get the second value in the last column
second_val_last_col = matrix_2(2, end)

% Delete the second column
matrix_2(:,2) = [];

Loops

For loops

edit matlab_cookbook_14.m
format compact

% Loop from 1 through 5
for i = 1:5
    disp(i) % Display
end

% Add a space
disp(' ')

% Decrement from 5 to 0 in steps of 1
for i = 5:-1:0
    disp(i)
end

% Add a space
disp(' ')

% Loop from 1 through 3
for i = [1 2 3]
    disp(i)
end

% Add a space
disp(' ')

% Create a matrix
matrix_1 = [1 4 5; 6 2 7];

% Nested for loop to run through all values in a matrix
for row = 1:2
    for col = 1:3
        disp(matrix_1(row, col))
    end
end

% Go through an entire vector
vector_1 = [2 8 3 5]
for i = 1:length(vector_1)
    disp(vector_1(i))
end

Output:

14-matlab-cookbook14-output

While loops

edit matlab_cookbook_15.m
format compact

% Create a while loop
i = 1
while i < 25
    % If the number is divisible by 5
    if(mod(i,5)) == 0
        disp(i)
        i = i + 1;
        continue
    end
    % Else
    i = i + 1;
    if i >= 14
        % Prematurely leave the while loop
        break
    end
end

Output:

15-matlabcookbook15-output

Matrix Operations

edit matlab_cookbook_16.m

Here is the first part of the output.

format compact

% Initialize a 3x3 matrix
matrix_1 = [4 6 2; 3 6 14; 5 2 9]

matrix_2 = [2:4; 7:9]
matrix_3 = [5:7; 9:11]
matrix_4 = [1:2; 3:4; 2:3]

% Add two matrices together
matrix_2 + matrix_3

% Multiply corresponding elements of two matrices together
matrix_2 .* matrix_3

% Multiply two matrices together
matrix_2 * matrix_4

% Perform the square root on every value in a matrix
sqrt(matrix_1)

% Double everything in a matrix
matrix_2 = matrix_2 * 2

% Sum everything in each column
sum(matrix_2)

% Convert a matrix to a boolean array
% Any value greater than 5 is 1
greater_than_five = matrix_1 > 5

Cell Arrays

edit matlab_cookbook_17.m
format compact

% Create a cell array
cell_array_1 = {'Automatic Addison', 25, [6 32 54]}

% Preallocate a cell array to which we will later assign data
cell_array_2 = cell(3)

% Get the first value in the cell array
cell_array_1{1}

% Add more information 
cell_array_1{4} = 'John Doe'

% Get the length of the cell array
length(cell_array_1)

% Display the values in a cell array
for i = 1:length(cell_array_1)
    disp(cell_array_1{i})
end

Here is the output:

17-matlabcookbook17-output

Strings

edit matlab_cookbook_18.m

format compact

% Initialize a string
my_string_1 = 'Automatic Addison'

% Get the length of the string
length(my_string_1)

% Get the second value in the string
my_string_1(2)

% Get the first three letters of the string
my_string_1(1:3)

% Concatenate
longer_string = strcat(my_string_1, ' We''re longer now')

% Replace a value in a string
strrep(longer_string, 'now', 'immediately')

% Split a string based on space delimiter
string_array = strsplit(longer_string, ' ')

% Convert an integer to a string
num_string = int2str(33)

% Convert a float to a string
float_string = num2str(2.4928)

Here is the output:

18-matlabcookbook18-outputJPG

Structures

Here is how to create your own custom data type using structures. Structures consist of key-value pairs (like a dictionary).

edit matlab_cookbook_19.m
format compact

automatic_addison = struct('name', 'Automatic Addison', ...
    'age', 35, 'item_purchased', [65 23])

% Get his age
disp(automatic_addison.age)

% Add a field
automatic_addison.favorite_food = 'Oatmeal'

% Remove a field
automatic_addison = rmfield(automatic_addison, 'favorite_food')

% Store a structure in a vector
clients(1) = automatic_addison

Here is the output:

19-matlabcookbook19-output

Tables

edit matlab_cookbook_20.m
format compact

name = {'Sam'; 'Bill'; 'John'};
age = [32; 52; 19];
salary = [45000; 90000; 15000]
id = {'1', '2', '3'}

% The name of each row will be the id
employees = table(name, age, salary, ...
    'RowName', id)

% Get the average salary
avg_salary = mean(employees.salary)

% 'help table' command helps you find what you can do with tables

% Add a new field
employees.vacation_days = [10; 20; 15]

Here is the output:

20-matlabcookbook20-output

File Input/Output

edit matlab_cookbook_21.m
format compact

% Generate a random 8x8 matrix
random_matrix = randi([1,5],8)

% Save the matrix as a text file
save sample_data_1.txt random_matrix -ascii

% Load the text file
load sample_data_1.txt

disp sample_data_1 

type sample_data_1.txt

Here is the output:

21-matlabcookbook21-output

Functions

edit matlab_cookbook_22.m
format compact

% Input vector
values = [9.7, 63.5, 25.2, 72.9, 1.1];

% Calculate the average and store it
mean = average(values)

% Define a function named average.m that 
% accepts an input vector and returns the average
function ave = average(x)
    % Take the sum of all elements in x and divide 
    % by the number of elements
    ave = sum(x(:))/numel(x); 
end

Here is the output:

22-matlabcookbook22-output

Creating a Plot

edit basic_plot.m
% Graph a parabola
x = [-100:5:100];
y = x.^2;
plot(x, y)

Here is the output:

23-basic-plotJPG