How to Set Up Anaconda for Windows 10

In this post, I will show you how to set up Anaconda. Anaconda is a free, open-source distribution of Python (and R). The goal of Anaconda is to be a free “one-stop-shop” for all your Python data science and machine learning needs. It contains the key packages you need to build cool machine learning projects.

Requirements

Here are the requirements:

  • Set up Anaconda.
  • Set up Jupyter Notebook.
  • Install important libraries.
  • Learn basic Anaconda commands.

Directions

Install Anaconda

Go to the Anaconda website and click “Download.”

setting-up-anaconda-1

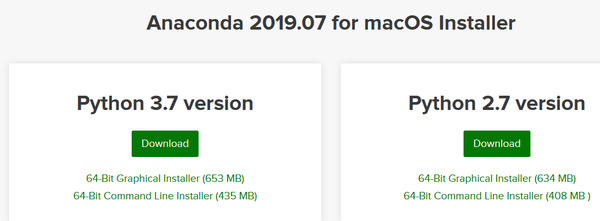
Choose the latest version of Python. In my case, that is Python 3.7. Click “Download” to download the Anaconda installer for your operating system type (i.e. Windows, macOS, or Linux). 
setting-up-anaconda-2

Follow the instructions to install the program:

setting-up-anaconda-3
setting-up-anaconda-4
setting-up-anaconda-5
setting-up-anaconda-6

Verify Anaconda is installed by searching for “Anaconda Navigator” on your computer.

Open Anaconda Navigator.

setting-up-anaconda-7

Follow the instructions here for creating a “Hello World” program. You can use Spyder, Jupyter Notebooks, or the Anaconda Prompt (terminal). If you use Jupyter Notebooks, you will need to open the notebooks in Firefox, Google Chrome or another web browser.

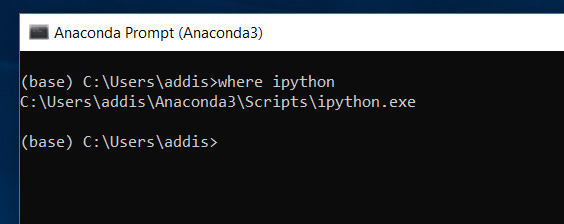
Check to make sure that you have IPython installed. Use the following command (in an Anaconda Prompt window) to check:

where ipython
setting-up-anaconda-8

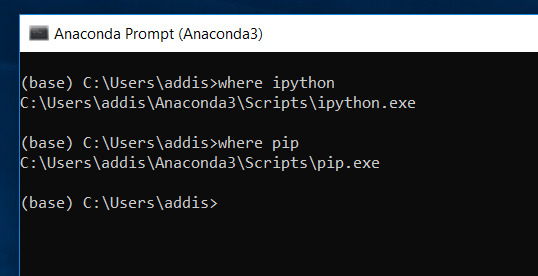
Make sure that you have pip installed. Pip is the package management system for Python.

where pip
setting-up-anaconda-9

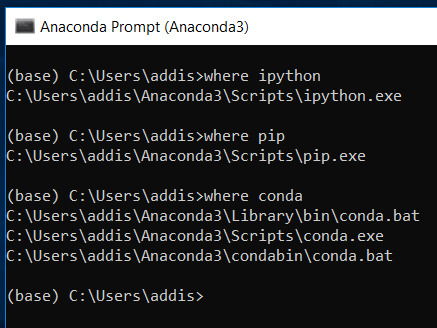
Make sure that you have conda installed. Conda is Anaconda’s package management system.

where conda
setting-up-anaconda-10

Install Some Libraries

Install OpenCV

To install OpenCV, use the following command in the Anaconda Prompt:

pip install opencv-contrib-python

Type the following command to get a list of packages and make sure opencv-contrib-python is installed.

conda list

Install dlib

Install cmake.

pip install cmake

Install the C++ library called dlib

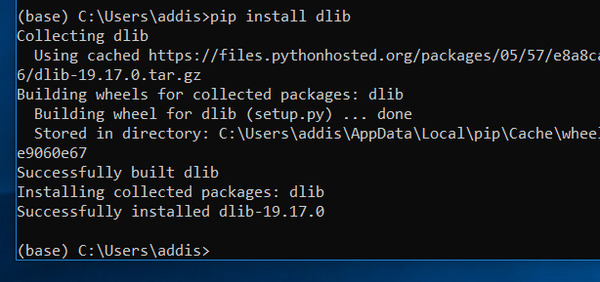
pip install dlib
setting-up-anaconda-11

Type the following command and take a look at the list to see if dlib is successfully installed:

conda list

Install Tesseract

Go to Tesseract at UB Mannheim.

Download the Tesseract for your system.

Set it up by following the prompts.
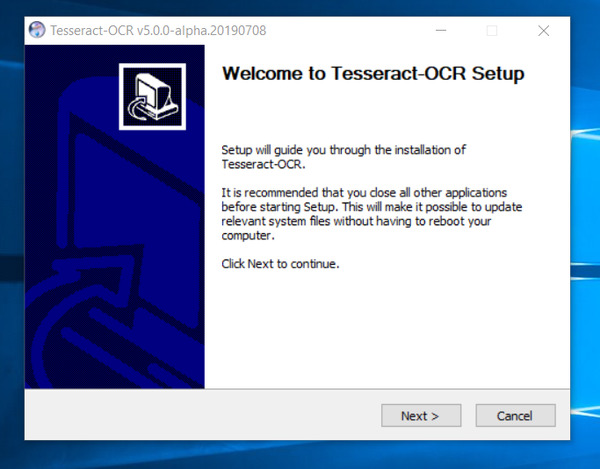
setting-up-anaconda-12

Once Tesseract OCR is downloaded, find it on your system.

Copy the name of the file it is located in. In my case, that is:

C:\Program Files\Tesseract-OCR

Search for “Environment Variables” on your computer.
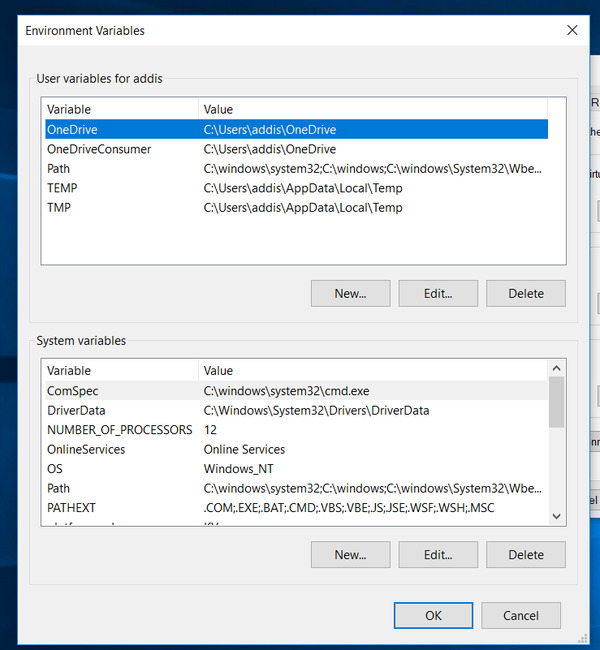
setting-up-anaconda-13

Under “System Variables,” click “Path,” and then click Edit.

Add the path: C:\Program Files\Tesseract-OCR
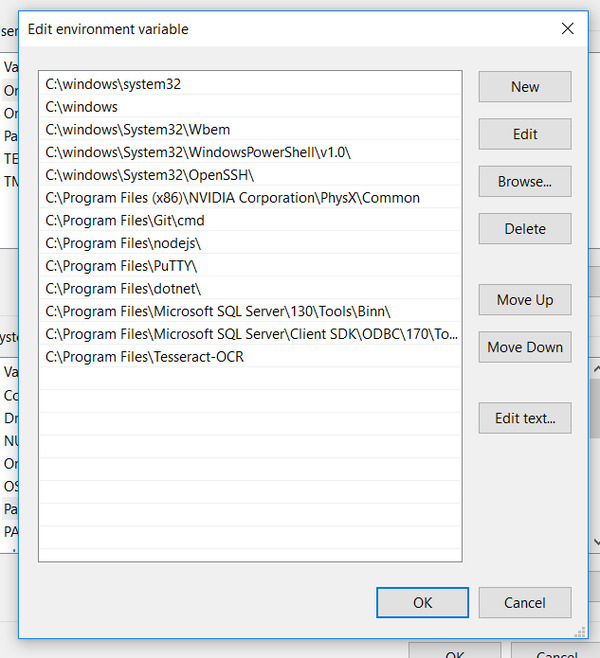
setting-up-anaconda-14

Click OK a few times to close all windows.

Open up the Anaconda Prompt.

Type this command to see if tesseract is installed on your system.

where tesseract

Now, apply the Python binding to the packages using the following commands:

pip install tesseract
pip install pytesseract

Install TensorFlow

Type the following command in the Anaconda Prompt:

pip install tensorflow

Install TensorFlow hub using this command:

pip install tensorflow-hub

Now install tflearn.

pip install tflearn

Now, install the Keras neural network library.

pip install keras

Install the Rest of the Libraries

Type the following commands to install the rest of the libraries:

pip install pillow
pip install SimpleITK

Learn Basic Anaconda Commands

Changing Directories

If you ever want to change directories to the D drive instead of the C drive, open Anaconda Prompt on your computer and type the following commands, in order

D:
cd D:\XXXX\XXXX\XXXX\XXXX

where D:\XXXX\XXXX\XXXX\XXXX is the file path.

Listing Directory Contents

Type the dir command to list the contents of a directory.

dir

Creating a Jupyter Notebook

Open Anaconda Prompt on your computer and type the following command:

jupyter notebook

Converting a Jupyter Notebook into Python Files

If you want to convert a Jupyter Notebook into Python files, change to that directory and type the following command:

jupyter nbconvert --to script *.ipynb

Congratulations if you made it this far! You have all the libraries installed that you need to do fundamental image processing and computer vision work in Python.

Difference Between Recursion and Iteration

If you are learning algorithms or data structures, you might have come across the terms recursion and iteration. Knowing the difference between the two can be confusing, so I will explain both terms using a real-world example.

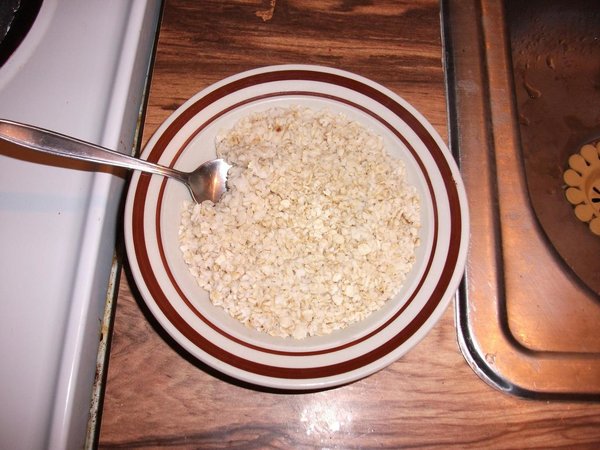
Eating My Morning Bowl of Oatmeal

eating-oatmeal

Everyday before I go to work, I take a shower, get dressed, and then head over to the kitchen to fix myself a big bowl of oatmeal. Breakfast is my favorite meal of the day and the most important. Many days I feel like skipping breakfast so that I can go on with my day. However, on those rare occasions when I decide to skip breakfast, I have usually regretted it. I spend the morning hungry and cannot fully concentrate on the tasks at hand.

The problem of eating my morning bowl of oatmeal can be implemented both iteratively and recursively. Iteration is the act of repeating a process. So, in the case of oatmeal, an iterative way to solve the problem of eating my bowl of oatmeal would be to do the following:

  1. Take one bite of the oatmeal
  2. Repeat Step 1 until the bowl is empty.

Recursion, on the other hand, is when a method calls itself. It involves breaking a problem into smaller versions of the same problem until you reach a trivial stopping case.

Let’s consider the problem of eating a bowl of oatmeal. I can solve the problem of eating the entire bowl of oatmeal recursively by breaking it into two subproblems as follows:

  • Take one bite of oatmeal
  • Eat the rest of the bowl of oatmeal

Each step of this recursive procedure gets smaller and smaller until all I am left with is one more spoonful of oatmeal. Once I finish that last spoonful, I am done, and I can go on about my day.

Here is how I would implement the iterative and recursive procedures for eating a bowl of oatmeal in Java pseudocode:

Iterative Implementation

public static main void main(String[] args) {

    while (!bowl.empty()) {
        bowl.takeOneBite(); 
        // Keep taking bites over and over 
        // again until the bowl of oatmeal 
        // is empty
    }
}

Recursive Implementation

public static void eatOatmeal(Bowl bowl) {

    if (bowl.empty()) {  
    // This is our stopping case. 
    // We stop taking bites once 
    // the bowl is empty

        return;  
    }
    else {
        bowl.takeOneBite(); 
        eatOatmeal(bowl); // Recursive call
    }
}

What Is a Maximum Spanning Tree?

In this post, I will explain the concept of a maximum spanning tree.

What is a Spanning Tree?

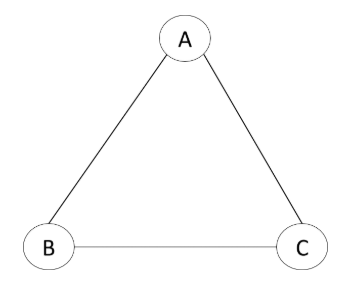
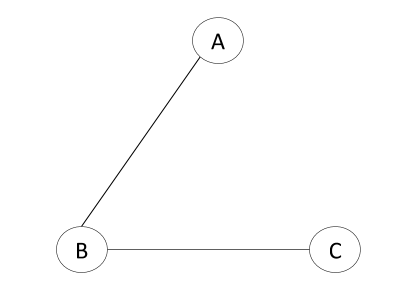
Let’s say we have a graph G with three nodes, A, B, and C. Each node represents an attribute. For example, for a classification problem for breast cancer, A = clump size, B = blood pressure, C = body weight.

Graph G:

maximum-spanning-tree-1

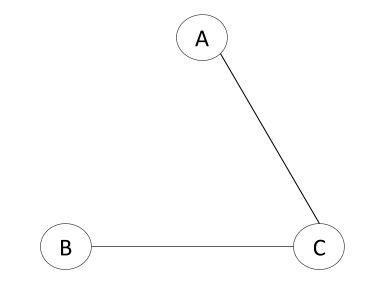
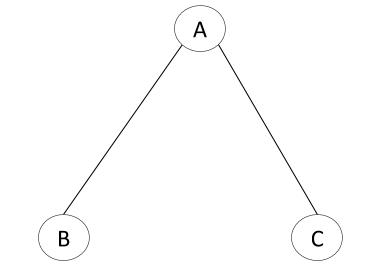
A spanning tree is a subset of the graph G that includes all of the attributes with the minimum number of edges (that would have to be 2 because a tree with just one edge would only connect at most 2 attributes). In the graph above, there are three spanning trees. All spanning trees in this graph G must have the same number of attributes (3 in total) and edges (2 in total).

Spanning Tree 1:

Spanning Tree 2:

Spanning Tree 3:

What is a Maximum Spanning Graph?

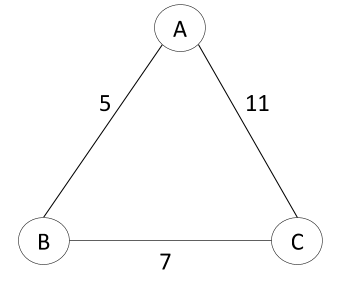
OK, so we have our spanning trees. Now, imagine that each edge has a weight. This weight would be some number. Weighted graphs look like this:

The graph above could has three spanning trees, subsets of the graph G that include all of the attributes with the minimum number of edges.

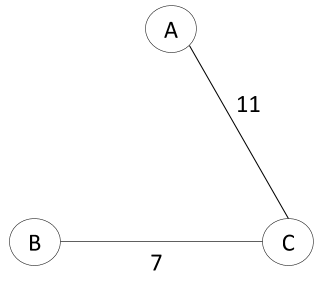
Which one of those spanning graphs is the “maximum spanning graph?”…the one that, when you add up the weights of each edge of the spanning graph, delivers the greatest result. The answer to that is our maximum spanning tree.

Here is the maximum spanning tree:

Since the Attribute Designated as the Root Is Arbitrary, Is It Safe to Assume That This Choice Does Not Affect the Model Effectiveness?

Yes, it is safe to assume that. The graph doesn’t change, and Kruskal’s algorithm, the algorithm for finding the maximum spanning tree in a graph doesn’t care what the root is…it just wants to find the largest edge at each step that doesn’t produce a cycle.

The number of maximum spanning trees in a graph G remains constant. Whether you start at C, B, and E, doesn’t matter. The graph is what it is…unless of course you decide to add a new attribute…but then it would be a different graph with a whole other set of spanning trees.