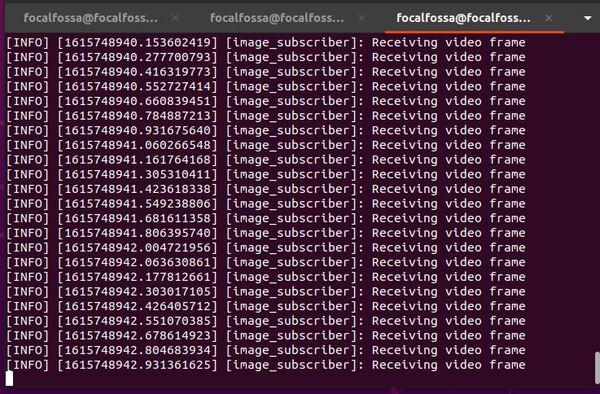
How to Install OpenCV 4.5 on NVIDIA Jetson Nano

In this tutorial, we will install OpenCV 4.5 on the NVIDIA Jetson Nano. The reason I will install OpenCV 4.5 is because the OpenCV that comes pre-installed on the Jetson Nano does not have CUDA support. CUDA support will enable us to use the GPU to run deep learning applications.

The terminal command to check which OpenCV version you have on your computer is:

python -c 'import cv2; print(cv2.__version__)'

Prerequisites

Install Dependencies

Type the following command.

sudo sh -c "echo '/usr/local/cuda/lib64' >> /etc/ld.so.conf.d/nvidia-tegra.conf"

Create the links and caching to the shared libraries

sudo ldconfig

Install the relevant third party libraries. Play close attention to the line wrapping below. Each command begins with “sudo apt-get install”.

sudo apt-get install build-essential cmake git unzip pkg-config
sudo apt-get install libjpeg-dev libpng-dev libtiff-dev
sudo apt-get install libavcodec-dev libavformat-dev libswscale-dev
sudo apt-get install libgtk2.0-dev libcanberra-gtk*
sudo apt-get install python3-dev python3-numpy python3-pip
sudo apt-get install libxvidcore-dev libx264-dev libgtk-3-dev
sudo apt-get install libtbb2 libtbb-dev libdc1394-22-dev
sudo apt-get install libv4l-dev v4l-utils
sudo apt-get install libgstreamer1.0-dev libgstreamer-plugins-base1.0-dev
sudo apt-get install libavresample-dev libvorbis-dev libxine2-dev
sudo apt-get install libfaac-dev libmp3lame-dev libtheora-dev
sudo apt-get install libopencore-amrnb-dev libopencore-amrwb-dev
sudo apt-get install libopenblas-dev libatlas-base-dev libblas-dev
sudo apt-get install liblapack-dev libeigen3-dev gfortran
sudo apt-get install libhdf5-dev protobuf-compiler
sudo apt-get install libprotobuf-dev libgoogle-glog-dev libgflags-dev

Download OpenCV

Now that we’ve installed the third-party libraries, let’s install OpenCV itself. The latest release is listed here. Again, pay attention to the line wrapping. The https://github… was too long to fit on one line.

cd ~
wget -O opencv.zip https://github.com/opencv/opencv/archive/4.5.1.zip
wget -O opencv_contrib.zip https://github.com/opencv/opencv_contrib/archive/4.5.1.zip
unzip opencv.zip
unzip opencv_contrib.zip

Now rename the directories. Type each command below, one after the other.

mv opencv-4.5.1 opencv
mv opencv_contrib-4.5.1 opencv_contrib
rm opencv.zip
rm opencv_contrib.zip

Build OpenCV

Let’s build the OpenCV files.

Create a directory.

cd ~/opencv
mkdir build
cd build

Set the compilation directives. You can copy and paste this entire block of commands below into your terminal.

cmake -D CMAKE_BUILD_TYPE=RELEASE \
-D CMAKE_INSTALL_PREFIX=/usr \
-D OPENCV_EXTRA_MODULES_PATH=~/opencv_contrib/modules \
-D EIGEN_INCLUDE_PATH=/usr/include/eigen3 \
-D WITH_OPENCL=OFF \
-D WITH_CUDA=ON \
-D CUDA_ARCH_BIN=5.3 \
-D CUDA_ARCH_PTX="" \
-D WITH_CUDNN=ON \
-D WITH_CUBLAS=ON \
-D ENABLE_FAST_MATH=ON \
-D CUDA_FAST_MATH=ON \
-D OPENCV_DNN_CUDA=ON \
-D ENABLE_NEON=ON \
-D WITH_QT=OFF \
-D WITH_OPENMP=ON \
-D WITH_OPENGL=ON \
-D BUILD_TIFF=ON \
-D WITH_FFMPEG=ON \
-D WITH_GSTREAMER=ON \
-D WITH_TBB=ON \
-D BUILD_TBB=ON \
-D BUILD_TESTS=OFF \
-D WITH_EIGEN=ON \
-D WITH_V4L=ON \
-D WITH_LIBV4L=ON \
-D OPENCV_ENABLE_NONFREE=ON \
-D INSTALL_C_EXAMPLES=OFF \
-D INSTALL_PYTHON_EXAMPLES=OFF \
-D BUILD_NEW_PYTHON_SUPPORT=ON \
-D BUILD_opencv_python3=TRUE \
-D OPENCV_GENERATE_PKGCONFIG=ON \
-D BUILD_EXAMPLES=OFF ..

I got this message when everything was done building.
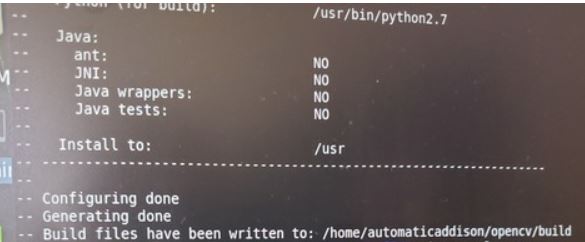
done_building

Build OpenCV. This command below will take a long time (1-2 hours), so you can go do something else and come back later.

make -j4

If the building process stops before it reaches 100%, repeat the cmake command I showed earlier, and run the ‘make -j4’ command again.

One other thing. A lot of times I had the installation stall. To avoid that happening, I moved the mouse cursor every few minutes so that the screen saver for the Jetson Nano didn’t turn on.

Finish the install.

cd ~
sudo rm -r /usr/include/opencv4/opencv2
cd ~/opencv/build
sudo make install
sudo ldconfig
make clean
sudo apt-get update

Verify Your OpenCV Installation

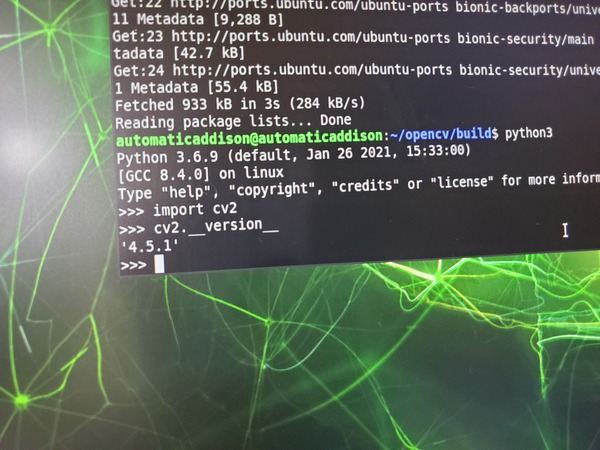
Let’s verify that everything is working correctly.

python3
import cv2
cv2.__version__
exit()
2021-04-04-20.43.34

Final Housekeeping

Delete the original OpenCV and OpenCV_Contrib folders.

sudo rm -rf ~/opencv
sudo rm -rf ~/opencv_contrib

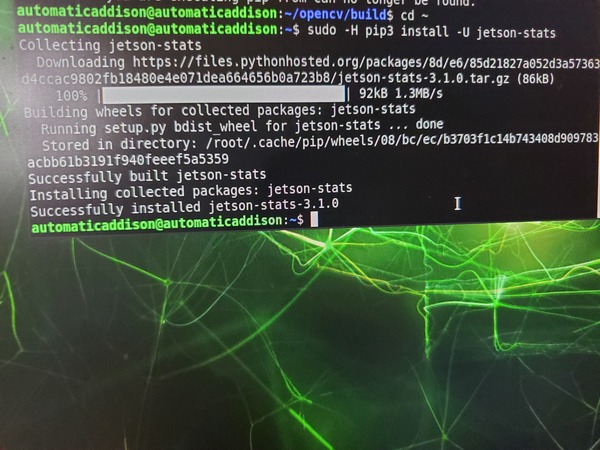
Install jtop, a system monitoring software for Jetson Nano.

cd ~
sudo -H pip3 install -U jetson-stats
2021-04-04-20.47.13

Reboot your machine.

sudo reboot
jtop
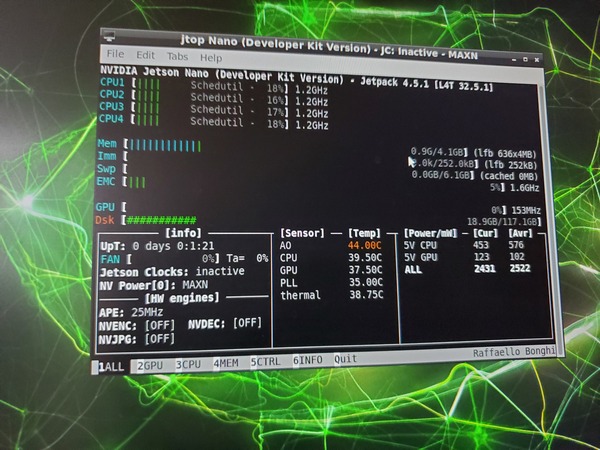
2021-04-04-20.49.11

Press q to quit.

Verify the installation of OpenCV one last time.

python3
import cv2
cv2.__version__
exit()

That’s it. Keep building!

References

This article over at Q-engineering was really helpful.

How to Determine the Orientation of an Object Using OpenCV

In this tutorial, we will build a program that can determine the orientation of an object (i.e. rotation angle in degrees) using the popular computer vision library OpenCV.

Real-World Applications

One of the most common real-world use cases of the program we will develop in this tutorial is when you want to develop a pick and place system for robotic arms. Determining the orientation of an object on a conveyor belt is key to determining the appropriate way to grasp the object, pick it up, and place it in another location.

Let’s get started!

Prerequisites

Installation and Setup

Before we get started, let’s make sure we have all the software packages installed. Check to see if you have OpenCV installed on your machine. If you are using Anaconda, you can type:

conda install -c conda-forge opencv

Alternatively, you can type:

pip install opencv-python

Install Numpy, the scientific computing library.

pip install numpy

Find an Image File

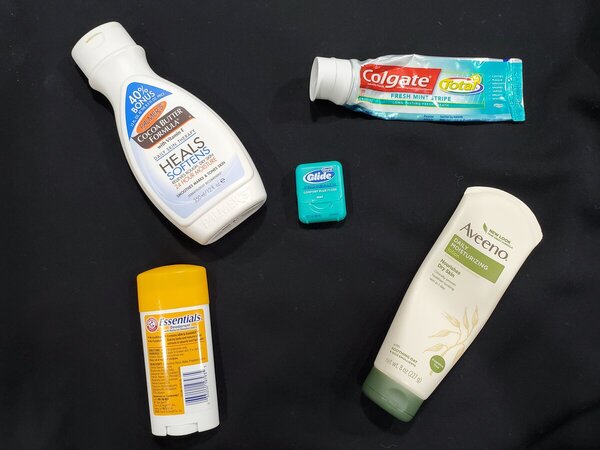
Find an image. My input image is 1200 pixels in width and 900 pixels in height. The filename of my input image is input_img.jpg.

input_img_600

Write the Code

Here is the code. It accepts an image named input_img.jpg and outputs an annotated image named output_img.jpg. Pieces of the code pull from the official OpenCV implementation.

import cv2 as cv
from math import atan2, cos, sin, sqrt, pi
import numpy as np

def drawAxis(img, p_, q_, color, scale):
  p = list(p_)
  q = list(q_)

  ## [visualization1]
  angle = atan2(p[1] - q[1], p[0] - q[0]) # angle in radians
  hypotenuse = sqrt((p[1] - q[1]) * (p[1] - q[1]) + (p[0] - q[0]) * (p[0] - q[0]))

  # Here we lengthen the arrow by a factor of scale
  q[0] = p[0] - scale * hypotenuse * cos(angle)
  q[1] = p[1] - scale * hypotenuse * sin(angle)
  cv.line(img, (int(p[0]), int(p[1])), (int(q[0]), int(q[1])), color, 3, cv.LINE_AA)

  # create the arrow hooks
  p[0] = q[0] + 9 * cos(angle + pi / 4)
  p[1] = q[1] + 9 * sin(angle + pi / 4)
  cv.line(img, (int(p[0]), int(p[1])), (int(q[0]), int(q[1])), color, 3, cv.LINE_AA)

  p[0] = q[0] + 9 * cos(angle - pi / 4)
  p[1] = q[1] + 9 * sin(angle - pi / 4)
  cv.line(img, (int(p[0]), int(p[1])), (int(q[0]), int(q[1])), color, 3, cv.LINE_AA)
  ## [visualization1]

def getOrientation(pts, img):
  ## [pca]
  # Construct a buffer used by the pca analysis
  sz = len(pts)
  data_pts = np.empty((sz, 2), dtype=np.float64)
  for i in range(data_pts.shape[0]):
    data_pts[i,0] = pts[i,0,0]
    data_pts[i,1] = pts[i,0,1]

  # Perform PCA analysis
  mean = np.empty((0))
  mean, eigenvectors, eigenvalues = cv.PCACompute2(data_pts, mean)

  # Store the center of the object
  cntr = (int(mean[0,0]), int(mean[0,1]))
  ## [pca]

  ## [visualization]
  # Draw the principal components
  cv.circle(img, cntr, 3, (255, 0, 255), 2)
  p1 = (cntr[0] + 0.02 * eigenvectors[0,0] * eigenvalues[0,0], cntr[1] + 0.02 * eigenvectors[0,1] * eigenvalues[0,0])
  p2 = (cntr[0] - 0.02 * eigenvectors[1,0] * eigenvalues[1,0], cntr[1] - 0.02 * eigenvectors[1,1] * eigenvalues[1,0])
  drawAxis(img, cntr, p1, (255, 255, 0), 1)
  drawAxis(img, cntr, p2, (0, 0, 255), 5)

  angle = atan2(eigenvectors[0,1], eigenvectors[0,0]) # orientation in radians
  ## [visualization]

  # Label with the rotation angle
  label = "  Rotation Angle: " + str(-int(np.rad2deg(angle)) - 90) + " degrees"
  textbox = cv.rectangle(img, (cntr[0], cntr[1]-25), (cntr[0] + 250, cntr[1] + 10), (255,255,255), -1)
  cv.putText(img, label, (cntr[0], cntr[1]), cv.FONT_HERSHEY_SIMPLEX, 0.5, (0,0,0), 1, cv.LINE_AA)

  return angle

# Load the image
img = cv.imread("input_img.jpg")

# Was the image there?
if img is None:
  print("Error: File not found")
  exit(0)

cv.imshow('Input Image', img)

# Convert image to grayscale
gray = cv.cvtColor(img, cv.COLOR_BGR2GRAY)

# Convert image to binary
_, bw = cv.threshold(gray, 50, 255, cv.THRESH_BINARY | cv.THRESH_OTSU)

# Find all the contours in the thresholded image
contours, _ = cv.findContours(bw, cv.RETR_LIST, cv.CHAIN_APPROX_NONE)

for i, c in enumerate(contours):

  # Calculate the area of each contour
  area = cv.contourArea(c)

  # Ignore contours that are too small or too large
  if area < 3700 or 100000 < area:
    continue

  # Draw each contour only for visualisation purposes
  cv.drawContours(img, contours, i, (0, 0, 255), 2)

  # Find the orientation of each shape
  getOrientation(c, img)

cv.imshow('Output Image', img)
cv.waitKey(0)
cv.destroyAllWindows()
 
# Save the output image to the current directory
cv.imwrite("output_img.jpg", img)

Output Image

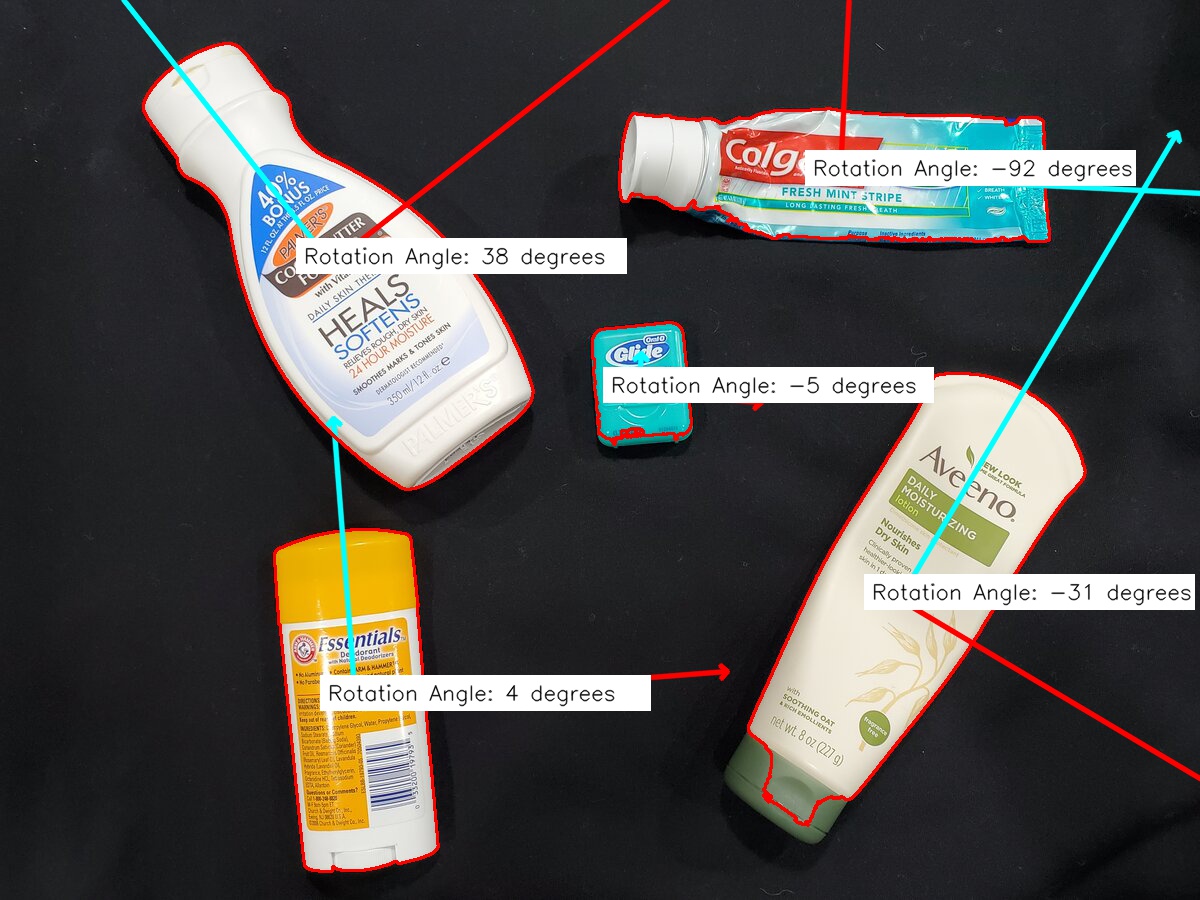
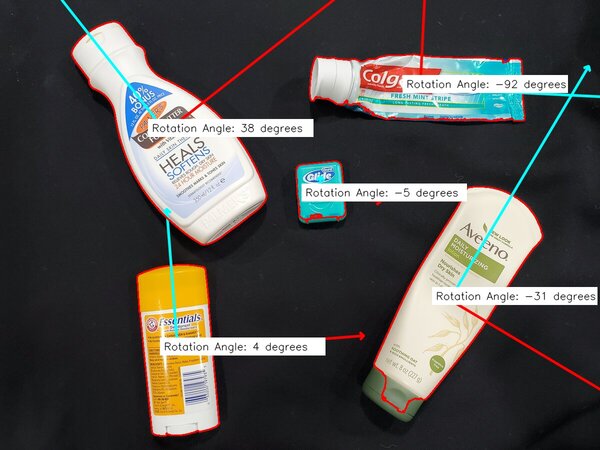
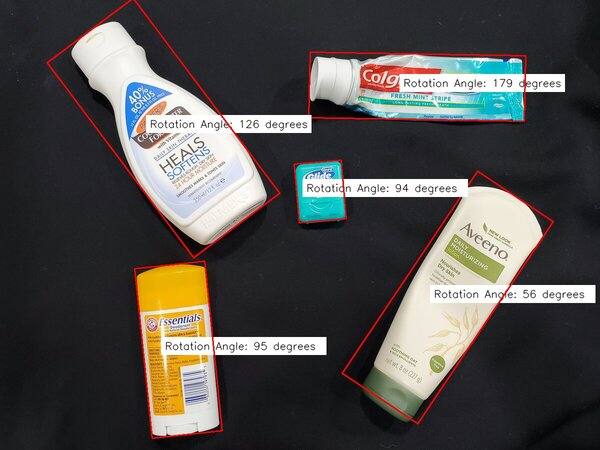
Here is the result:

output_img_600-1

Understanding the Rotation Axes

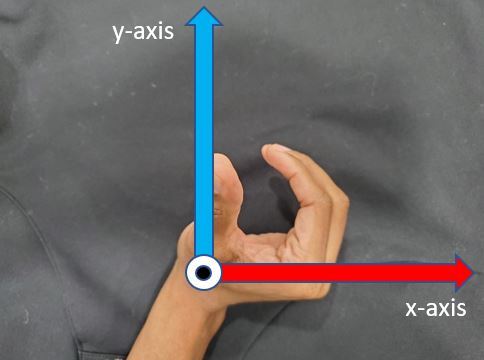
The positive x-axis of each object is the red line. The positive y-axis of each object is the blue line

The global positive x-axis goes from left to right horizontally across the image. The global positive z-axis points out of this page. The global positive y-axis points from the bottom of the image to the top of the image vertically.

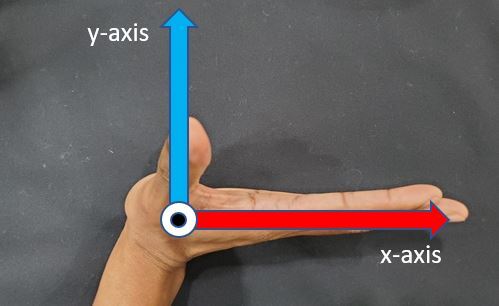
Using the right-hand rule to measure rotation, you stick your four fingers out straight (index finger to pinky finger) in the direction of the global positive x-axis.

right-hand-ruleJPG

You then rotate your four fingers 90 degrees counterclockwise. Your fingertips point towards the positive y-axis, and your thumb points out of this page towards the positive z-axis.

right-hand-rule-curlJPG

Calculate an Orientation Between 0 and 180 Degrees

If we want to calculate the orientation of an object and make sure that the result is always between 0 and 180 degrees, we can use this code:

# This programs calculates the orientation of an object.
# The input is an image, and the output is an annotated image
# with the angle of otientation for each object (0 to 180 degrees)

import cv2 as cv
from math import atan2, cos, sin, sqrt, pi
import numpy as np

# Load the image
img = cv.imread("input_img.jpg")

# Was the image there?
if img is None:
  print("Error: File not found")
  exit(0)

cv.imshow('Input Image', img)

# Convert image to grayscale
gray = cv.cvtColor(img, cv.COLOR_BGR2GRAY)

# Convert image to binary
_, bw = cv.threshold(gray, 50, 255, cv.THRESH_BINARY | cv.THRESH_OTSU)

# Find all the contours in the thresholded image
contours, _ = cv.findContours(bw, cv.RETR_LIST, cv.CHAIN_APPROX_NONE)

for i, c in enumerate(contours):

  # Calculate the area of each contour
  area = cv.contourArea(c)

  # Ignore contours that are too small or too large
  if area < 3700 or 100000 < area:
    continue

  # cv.minAreaRect returns:
  # (center(x, y), (width, height), angle of rotation) = cv2.minAreaRect(c)
  rect = cv.minAreaRect(c)
  box = cv.boxPoints(rect)
  box = np.int0(box)

  # Retrieve the key parameters of the rotated bounding box
  center = (int(rect[0][0]),int(rect[0][1])) 
  width = int(rect[1][0])
  height = int(rect[1][1])
  angle = int(rect[2])

  	
  if width < height:
    angle = 90 - angle
  else:
    angle = -angle
		
  label = "  Rotation Angle: " + str(angle) + " degrees"
  textbox = cv.rectangle(img, (center[0]-35, center[1]-25), 
    (center[0] + 295, center[1] + 10), (255,255,255), -1)
  cv.putText(img, label, (center[0]-50, center[1]), 
    cv.FONT_HERSHEY_SIMPLEX, 0.7, (0,0,0), 1, cv.LINE_AA)
  cv.drawContours(img,[box],0,(0,0,255),2)

cv.imshow('Output Image', img)
cv.waitKey(0)
cv.destroyAllWindows()
 
# Save the output image to the current directory
cv.imwrite("min_area_rec_output.jpg", img)

Here is the output:

min_area_rec_output

That’s it. Keep building!

Getting Started With OpenCV in ROS 2 Foxy Fitzroy (Python)

In this tutorial, we’ll learn the basics of how to interface ROS 2 with OpenCV, the popular computer vision library. These basics will provide you with the foundation to add vision to your robotics applications.

We’ll create an image publisher node to publish webcam data (i.e. video frames) to a topic, and we’ll create an image subscriber node that subscribes to that topic. 

Prerequisites

Create a Package

Open a new terminal window, and navigate to the src directory of your workspace:

cd ~/dev_ws/src

Now let’s create a package named cv_basics.

Type this command (this is all a single command):

ros2 pkg create --build-type ament_python cv_basics --dependencies rclpy image_transport cv_bridge sensor_msgs std_msgs opencv2

Modify Package.xml

Go to the dev_ws/src/cv_basics folder.

cd ~/dev_ws/src/cv_basics

Make sure you have a text editor installed. I like to use gedit.

sudo apt-get install gedit

Open the package.xml file. 

gedit package.xml

Fill in the description of the cv_basics package, your email address and name on the maintainer line, and the license you desire (e.g. Apache License 2.0).

<description>A minimal image publisher and subscriber node that uses OpenCV</description>
<maintainer email="automaticaddison@todo.todo">automaticaddison</maintainer>
<license>Apache License 2.0</license>

Save and close the file.

Create the Image Publisher Node (Python)

Move to the cv_basics package.

cd ~/dev_ws/src/cv_basics/cv_basics

Open a new Python file named webcam_pub.py.

gedit webcam_pub.py

Type the code below into it:

# Basic ROS 2 program to publish real-time streaming 
# video from your built-in webcam
# Author:
# - Addison Sears-Collins
# - https://automaticaddison.com
 
# Import the necessary libraries
import rclpy # Python Client Library for ROS 2
from rclpy.node import Node # Handles the creation of nodes
from sensor_msgs.msg import Image # Image is the message type
from cv_bridge import CvBridge # Package to convert between ROS and OpenCV Images
import cv2 # OpenCV library

class ImagePublisher(Node):
  """
  Create an ImagePublisher class, which is a subclass of the Node class.
  """
  def __init__(self):
    """
    Class constructor to set up the node
    """
    # Initiate the Node class's constructor and give it a name
    super().__init__('image_publisher')
     
    # Create the publisher. This publisher will publish an Image
    # to the video_frames topic. The queue size is 10 messages.
    self.publisher_ = self.create_publisher(Image, 'video_frames', 10)
     
    # We will publish a message every 0.1 seconds
    timer_period = 0.1  # seconds
     
    # Create the timer
    self.timer = self.create_timer(timer_period, self.timer_callback)
		
    # Create a VideoCapture object
    # The argument '0' gets the default webcam.
    self.cap = cv2.VideoCapture(0)
		
    # Used to convert between ROS and OpenCV images
    self.br = CvBridge()
  
  def timer_callback(self):
    """
    Callback function.
    This function gets called every 0.1 seconds.
    """
    # Capture frame-by-frame
    # This method returns True/False as well
    # as the video frame.
    ret, frame = self.cap.read()
         
    if ret == True:
      # Publish the image.
      # The 'cv2_to_imgmsg' method converts an OpenCV
      # image to a ROS 2 image message
      self.publisher_.publish(self.br.cv2_to_imgmsg(frame))

    # Display the message on the console
    self.get_logger().info('Publishing video frame')
 
def main(args=None):
 
  # Initialize the rclpy library
  rclpy.init(args=args)
 
  # Create the node
  image_publisher = ImagePublisher()
 
  # Spin the node so the callback function is called.
  rclpy.spin(image_publisher)
 
  # Destroy the node explicitly
  # (optional - otherwise it will be done automatically
  # when the garbage collector destroys the node object)
  image_publisher.destroy_node()
 
  # Shutdown the ROS client library for Python
  rclpy.shutdown()
 
if __name__ == '__main__':
  main()

Save and close the editor.

Modify Setup.py

Go to the following directory.

cd ~/dev_ws/src/cv_basics/

Open setup.py.

gedit setup.py

Add the following line between the ‘console_scripts’: brackets:

'img_publisher = cv_basics.webcam_pub:main',
    entry_points={
        'console_scripts': [
          'img_publisher = cv_basics.webcam_pub:main',
        ],
    },

Save the file, and close it.

Create the Image Subscriber Node (Python)

Move to the dev_ws/src/cv_basics/cv_basics folder.

cd ~/dev_ws/src/cv_basics/cv_basics

Now, let’s create the subscriber node. We’ll name it webcam_sub.py.

gedit webcam_sub.py

Type the code below into it:

# Basic ROS 2 program to subscribe to real-time streaming 
# video from your built-in webcam
# Author:
# - Addison Sears-Collins
# - https://automaticaddison.com
 
# Import the necessary libraries
import rclpy # Python library for ROS 2
from rclpy.node import Node # Handles the creation of nodes
from sensor_msgs.msg import Image # Image is the message type
from cv_bridge import CvBridge # Package to convert between ROS and OpenCV Images
import cv2 # OpenCV library

class ImageSubscriber(Node):
  """
  Create an ImageSubscriber class, which is a subclass of the Node class.
  """
  def __init__(self):
    """
    Class constructor to set up the node
    """
    # Initiate the Node class's constructor and give it a name
    super().__init__('image_subscriber')
     
    # Create the subscriber. This subscriber will receive an Image
    # from the video_frames topic. The queue size is 10 messages.
    self.subscription = self.create_subscription(
      Image, 
      'video_frames', 
      self.listener_callback, 
      10)
    self.subscription # prevent unused variable warning
     
    # Used to convert between ROS and OpenCV images
    self.br = CvBridge()
  
  def listener_callback(self, data):
    """
    Callback function.
    """
    # Display the message on the console
    self.get_logger().info('Receiving video frame')

    # Convert ROS Image message to OpenCV image
    current_frame = self.br.imgmsg_to_cv2(data)
   
    # Display image
    cv2.imshow("camera", current_frame)
   
    cv2.waitKey(1)
 
def main(args=None):
 
  # Initialize the rclpy library
  rclpy.init(args=args)
 
  # Create the node
  image_subscriber = ImageSubscriber()
 
  # Spin the node so the callback function is called.
  rclpy.spin(image_subscriber)
 
  # Destroy the node explicitly
  # (optional - otherwise it will be done automatically
  # when the garbage collector destroys the node object)
  image_subscriber.destroy_node()
 
  # Shutdown the ROS client library for Python
  rclpy.shutdown()
 
if __name__ == '__main__':
  main()

Save and close the editor.

Modify Setup.py

Go to the following directory.

cd ~/dev_ws/src/cv_basics/

Open setup.py.

gedit setup.py

Make sure the entry_points block looks like this:

    entry_points={
        'console_scripts': [
          'img_publisher = cv_basics.webcam_pub:main',
          'img_subscriber = cv_basics.webcam_sub:main',
        ],
    },

Save the file, and close it.

Build the Package 

Return to the root of your workspace:

cd ~/dev_ws/

We need to double check that all the dependencies needed are already installed.

rosdep install -i --from-path src --rosdistro foxy -y

If you get the following error:

ERROR: the following packages/stacks could not have their rosdep keys resolved to system dependencies: cv_basics: Cannot locate rosdep definition for [opencv2]

Follow these instructions to resolve the error.

Build the package:

colcon build --packages-select cv_basics

Run the Nodes

To run the nodes, open a new terminal window.

Make sure you are in the root of your workspace:

cd ~/dev_ws/

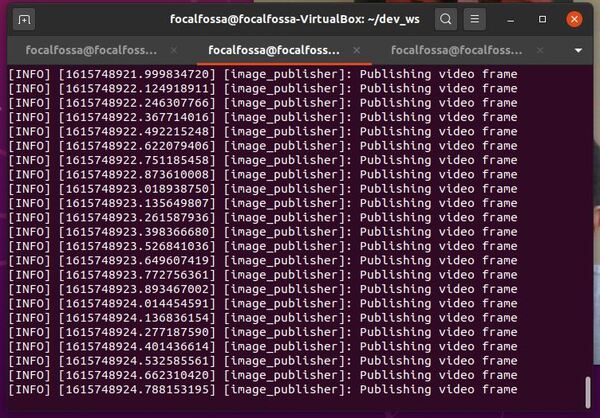
Run the publisher node. If you recall, its name is img_publisher.

ros2 run cv_basics img_publisher
2-publishing-video-frameJPG

A window will pop up with the streaming video.

1-outputJPG

Open a new terminal, and run the subscriber node.

ros2 run cv_basics img_subscriber
3-subscribing-to-video-frameJPG

Check out the active topics.

ros2 topic list -t
4-active-topicsJPG

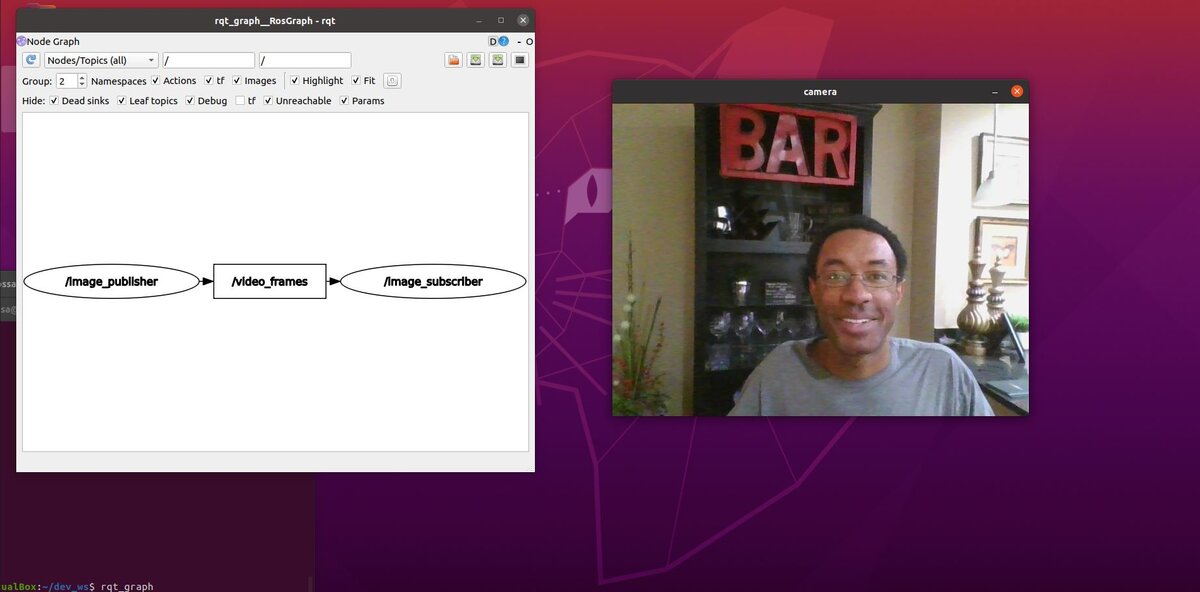
See the relationship between the active nodes.

rqt_graph

Click the refresh button. The refresh button is that circular arrow at the top of the screen.

refresh

We can see that the image_publisher node is publishing images to the video_frames topic. The image_subscriber node is subscribing to those video frames that are published to the video_frames topic.

5-rqt-graphJPG

That’s it! Keep building!