

In this post, we will install ROS 2 Foxy Fitzroy. As of the date of this tutorial, ROS 2 Foxy Fitzroy is the latest ROS distribution that has long term support. It will be supported until May 2023.
You Will Need
In order to complete this tutorial, you will need:
Ubuntu 20.04 installed and running properly (I’m running my Ubuntu in a VirtualBox on Windows 10).
Prerequisites
It is helpful if you’ve completed this tutorial on Linux fundamentals, but it is not required.
Set the Locale
The official steps for installing ROS are at this link at ROS.org, but I will walk you through the process below so that you can see what each step should look like. We will install ROS 2 Foxy via Debian Packages.
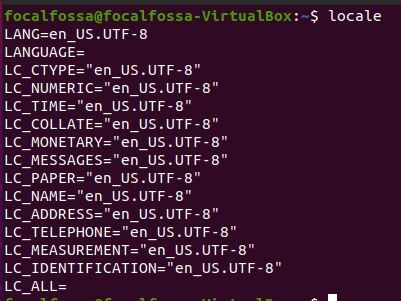
The first thing we are going to do is to set the locale. You can understand what locale means at this link.
Type this command inside the terminal window.
locale
Now type the following command.
sudo apt update && sudo apt install locales
If you get some error that looks like this: “Waiting for cache lock: Could not get lock /var/lib/dpkg/lock. It is held by process 3944”, open a new terminal window, and kill that process:

sudo kill -9 [process ID]
In my case, I type:
sudo kill -9 3944
Wait for everything to install, and then type:
sudo locale-gen en_US en_US.UTF-8
sudo update-locale LC_ALL=en_US.UTF-8 LANG=en_US.UTF-8
export LANG=en_US.UTF-8
locale
Add the ROS 2 Repositories
Type the following inside the terminal.
sudo apt update && sudo apt install curl gnupg2 lsb-release
At the prompt, type Y and then Enter to install the repositories.
Now type the following command (this is a single command. you can copy and paste all this into your terminal window):
curl -s https://raw.githubusercontent.com/ros/rosdistro/master/ros.asc | sudo apt-key add -
Now let’s add the repository to the source list.
sudo sh -c 'echo "deb [arch=$(dpkg --print-architecture)] http://packages.ros.org/ros2/ubuntu $(lsb_release -cs) main" > /etc/apt/sources.list.d/ros2-latest.list'
Install the ROS 2 Packages
Update the apt repository cache.
sudo apt update
Install the Desktop version of ROS 2.
sudo apt install ros-foxy-desktop
Type Y and Enter to download ROS 2.
Set up the Environment Variables
Add foxy to your bash file.
echo "source /opt/ros/foxy/setup.bash" >> ~/.bashrc
To check if it was added, type the following command, and scroll all the way to the bottom.:
gedit ~/.bashrc

If you don’t have gedit installed, type:
sudo apt-get install gedit
Now close the current terminal window, and open a new one.
Type the following command to see what version of ROS you are using.
printenv ROS_DISTRO
Here is what you should see.

You can also type:
env |grep ROS
Install some other tools that you will work with in ROS. After you type the command below, press Y and Enter to complete the download process.
sudo apt install -y python3-pippip3 install -U argcompletesudo apt install python3-argcompleteTest Your Installation
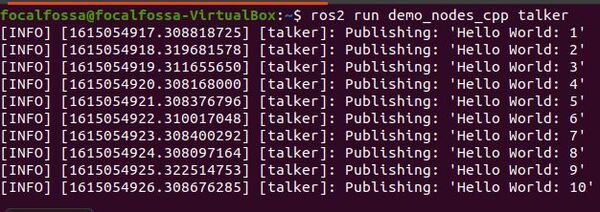
Open a new terminal window, and launch the talker program. This program is a demo program written in C++ that is publishing messages (i.e. data in the form of a string) to a topic.
ros2 run demo_nodes_cpp talker
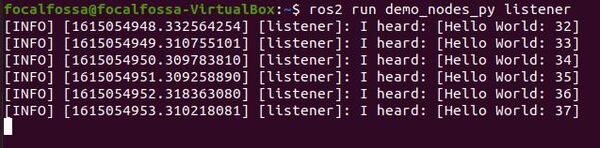
Then type the following command in another terminal window to launch the listener program. This Python program listens (i.e. subscribes) to the topic that the talker program is publishing messages to.
ros2 run demo_nodes_py listener
To understand how topics, publisher nodes, and subscriber nodes work in ROS, check out this post.
If you saw the output above, everything is working properly. Yay!
That’s it!