
In this tutorial, you will learn the most common commands and tools you will use again and again as you work with ROS on Linux for your robotics projects.
While there are hundreds of Linux commands, there are really only a handful that you will use repeatedly. I’m a firm believer in the Pareto Principle (also known as the 80/20 rule). Don’t waste your time memorizing a bunch of commands you may never use; instead focus on learning the fundamentals, the handful of commands and tools that you will use most frequently. Everything else, you can look it up when you need it.
This tutorial has a lot of steps, but be patient and take your time as you work all the way through it. By the end of this tutorial, you will have the rock-solid confidence to move around in Linux with ease.
Without further ado, let’s get started!
Table of Contents
- Explore the Folder Hierarchy
- Navigate Between Folders
- Create New Folders and Files
- Explore Permissions in Linux
- Create a Bash Script
- Explore the .bashrc File
- Explore Environment Variables
- Understand Processes in Linux
- –Launch a Foreground Process
- –Launch a Background Process
- Understand Secure Shell (SSH Protocol) in Linux
- Explore the “sudo” and “apt” Commands
Prerequisites
- You have ROS running on Ubuntu Linux (I’m running my Ubuntu Linux inside a virtual machine on Windows 10)
Explore the Folder Hierarchy
Open up a fresh Linux terminal window.
Let’s check out the directory (i.e. folder) structure of the catkin_ws folder, the workspace folder for ROS.
Install the tree program.
sudo apt-get install tree
Type:
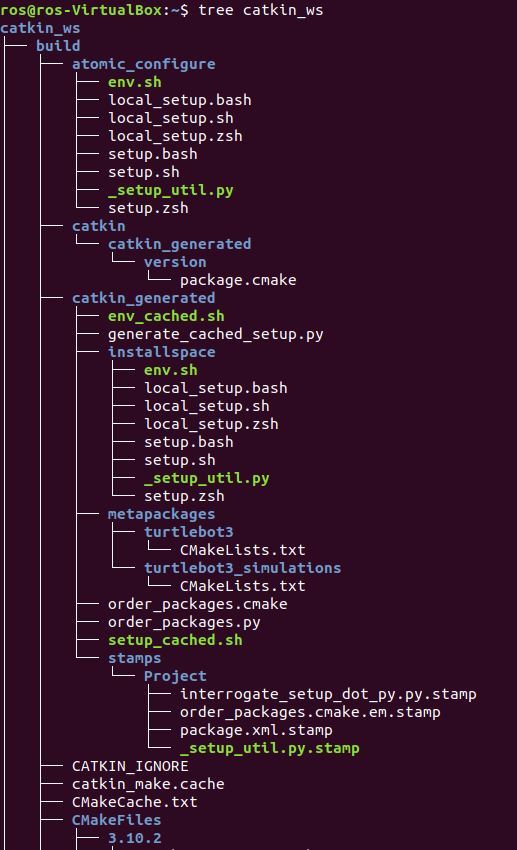
tree catkin_ws
You should see a hierarchy of all the folders underneath the catkin_ws folder.
If at anytime, you want to see the hierarchy of all folders underneath a specific folder, just type:
tree <path to the folder>
Navigate Between Folders
Ok, now we need to move to our catkin_ws/src folder.
cd catkin_ws/src
If you don’t have Git installed, install it now: https://git-scm.com/book/en/v2/Getting-Started-Installing-Git
You might have nothing in your catkin_ws/src directory at this stage. In order to learn Linux, it is best if we work with an actual ROS project with real folders and files so that we get comfortable with how Linux works.
Fortunately, the Robot Ignite Academy (they provide excellent ROS courses by the way) has some projects and simulations that they made publicly available here: https://bitbucket.org/theconstructcore/. Let’s download their Linux files.
Type this command (all on one line):
git clone https://bitbucket.org/theconstructcore/linux_course_files.git

Type the following command to see what files you have in there:
dir
You should have a folder named linux_course_files

Linux systems are made up of two main parts:
- Files: Used to store data
- Folders: Used to store files and other folders
Ok, let’s move to the folder that contains the Python file bb8_keyboard.py. We have to change directories (i.e. move folders) to get to where the program is located. Let’s do that now.
cd linux_course_files/move_bb8_pkg/src
Type the following command to see what is inside that folder:
dir

Let’s check the path to this directory.
pwd

Now, we move up one folder, to the move_bb8_pkg folder.
cd ..

How do we move back to the src folder?
cd src

How do we get back to the home folder?
cd ~
Note that, we could have also done:
cd /home/ros
~ is equal to /home/ros.
Now that we are at the home folder, let’s see what the official path to this directory is:
pwd

List all the folders in the home directory.
ls

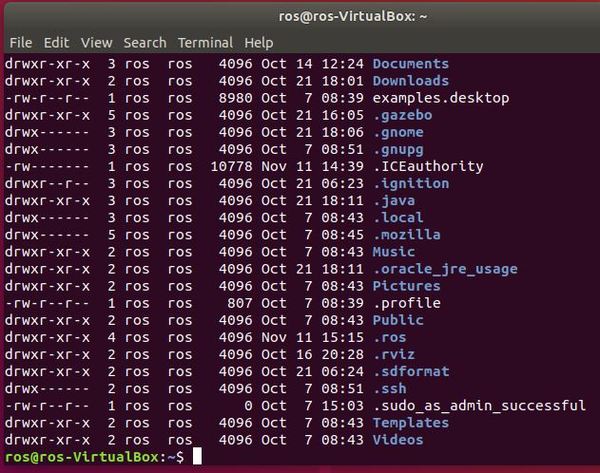
That ls command doesn’t list the hidden files. We need to type this command to list all the files.
ls -la
The . in front of the files means that they are hidden. You won’t see them using the regular ls command.
We could have also done:
ls --all
To get all the possibilities of commands you can type with ls, just type:
ls --help
To get the manual, we could have alternatively typed:
man ls
To get out of the manual, type q.
Create New Folders and Files
Ok, let’s learn how to make a new folder. Type the following command:
mkdir test_folder
If you type dir, you should see a new folder in there named test_folder.
Move to that folder.
cd test_folder
Create a new text file named new_file.txt.
touch new_file.txt

Open the new file in a text editor.
gedit new_file.txt
Close the text editor.
Now, go to the linux_course_files folder.
cd ~/catkin_ws/src/linux_course_files/
Create a new folder called scripts.
mkdir scripts
Move that file to the scripts folder
cd scripts
Create a new Python program called hello_world.py.
touch hello_world.py
Open the program using the text editor.
gedit hello_world.py
Write a simple program that prints “Hello World” every two seconds.
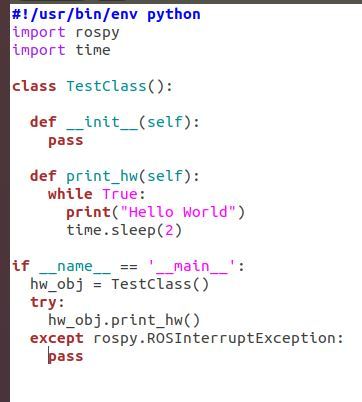
Save the program, and run it by typing:
python hello_world.py
Now go to the catkin_ws/src/linux_course_files/ folder.
cd ~/catkin_ws/src/linux_course_files/
Move the scripts folder to the move_bb8_pkg folder.

The syntax is:
mv <file/folder we want to move> <destination>
So we type:
mv scripts move_bb8_pkg
Note that in this case, we were in the linux_course_files folder, which contains both the scripts and move_bb8_pkg folders. For this reason, we did not have to type out the entire path of both folders (e.g. the entire path of the scripts folder is ~/catkin_ws/src/linux_course_files/scripts).
Now let’s move to the move_bb8_pkg folder to see if the scripts folder is in there.
cd move_bb8_pkg
Note, in the command above, if we would have typed cd m (i.e. the first letter of the folder of interest) and then pressed the TAB button on our keyboard, the system would have automatically filled in the rest. This saves us time from having to type out cd move_bb8_pkg.
The scripts folder is in there, containing the hello_world.py program.
cd scripts
dir

Let’s copy the hello_world.py file into a new Python file:
cp hello_world.py hello_world_copy.py

You have a new file called hello_world_copy.py, which has all the contents of hello_world.py.
The syntax for the copy operation in Linux is:
cp <file we want to copy> <name of the new file>
If you want to copy a folder, you can do the following command:
cp -r <folder we want to copy> <name of the new folder>
Remember, any time you want to see what other options you have with the cp command, just type:
cp --help
If you ever want to remove a file, here is the command:
rm <file to remove>
To remove a folder, you type:
rm -r <folder you want to remove>
Explore Permissions in Linux
Let’s take a look at how permissions work in Linux. Let’s open a new Linux terminal and change directories to our scripts folder.
cd ~/catkin_ws/src/linux_course_files/move_bb8_pkg/scripts
Now type:
ls -la
Here is the output:
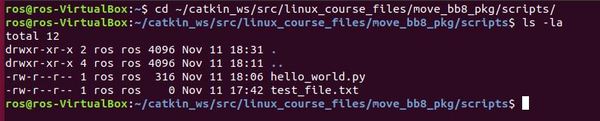
Notice the hello_world.py file. In the beginning of the line, you see the following:
-rw-r--r--
Linux has three permission types for files and directories:
- Read: Denoted by the letter r. This means that the user can read the file or directory.
- Write: Denoted by the letter w. This means that the user can write or modify the file or directory.
- Execute: Denoted by the letter x. This means that the user can execute the file.
There are also three different user permission groups:
- Owner: That’s me!
- Group: Whatever group the file or directory was assigned to.
- All Users: This permission group includes the rest of the users.
Given this information above, let’s translate the line of hello_world.py containing -rw-r–r–. Everything is in order, reading from left to right:
- Owner has read and write privileges (i.e. rw-)
- The group has read privileges (i.e. r–)
- All other users have only read privileges (r–).
Notice how no users, including the owner, have execute privileges on the hello_world.py file.
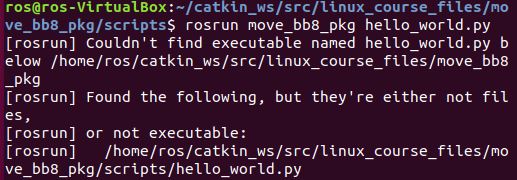
Try executing the hello_world.py file now, and see what you get:
rosrun <package name> <program you want to run>
rosrun move_bb8_pkg hello_world.py
You get this ugly message about not being able to find the executable. How do we change that?
You must use the chmod command.
chmod +x hello_world.py
Now type:
ls -la

Can you see that little x, which means that execution permissions have been added to the file? The following permissions are now in place:
- Owner: Read, Write and Execute (rwx)
- Group: Read and Execute (r-x)
- All Other Users: Read and Execute(r-x)
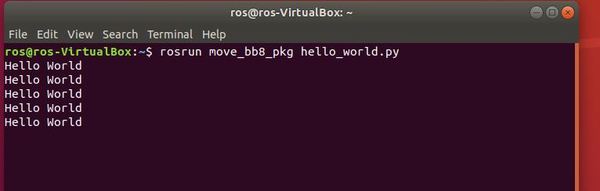
Now, run hello_world.py again using the ROS command rosrun.
rosrun move_bb8_pkg hello_world.py
Voila! You should see your program working now, with “Hello World” messages scrolling down the screen.

Create a Bash Script
Up until now, when we wanted to run commands in Linux, we opened up a terminal window and typed the command manually and then ran it. Examples of the commands we have used so far include cd (to change directories), ls (to list the folders and files inside a directory), and mv (to move a folder or file from one place to another), etc.
Fortunately, Linux has something called bash scripts. Bash scripts are text files that can contain commands that we would normally type out manually in the Linux terminal. Then, when you want to run a set of commands, all you have to do is run the bash script (which contains the commands that you want to execute). Pretty cool right? Software engineers are always looking for ways to automate tedious tasks!
Let’s take a look now at bash scripts. Open a new terminal window. Move to your scripts folder.
cd ~/catkin_ws/src/linux_course_files/move_bb8_pkg/scripts
Let’s create a new file named bash_script.sh.
touch bash_script.sh
Type the following command, and you should see the bash_script.sh file inside:
dir
Now open bash_script.sh.
gedit bash_script.sh
Type these two lines of code inside that file and click Save.
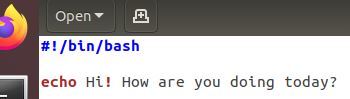
The first line of code is:
#!/bin/bash
This line of code tells Linux that this file is a bash script.
The .sh file extension is what you use for bash scripts. The echo command just tells the Linux terminal to print the message that follows to the screen.
Now, let’s close out the text editor and go back to the terminal window.
Type the following command:
./bash_script.sh
Uh oh! We have an error. Something about permissions. Let’s find out why.
Type the following command:
ls -la
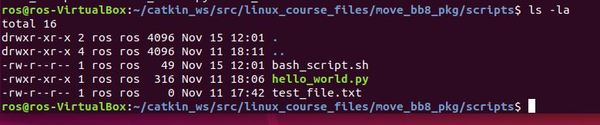
Notice how the bash_script.sh file only has read and write permissions because there is no x. Let’s fix that by giving ourselves execute permissions on this file.
chmod +x bash_script.sh
Now type:
ls -la
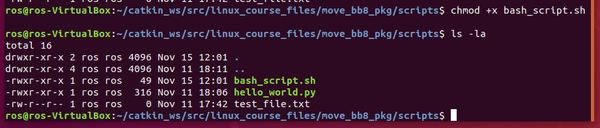
You should see that we now have execute permissions.
Let’s try to run the program again.
./bash_script.sh

We can also pass arguments to bash scripts.
Create a new bash script file named demo.sh.
touch demo.sh
Open the file:
gedit demo.sh
Add this code:
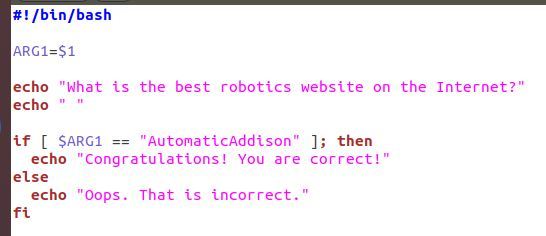
The $1 means the first argument. We can have $1, $2, $3…$N…depending on how many arguments you want to pass to the script. In our example above, we are only passing one argument. This argument is stored in the ARG1 variable.
The fi at the end of the if statement is necessary to close out the if statement.
Save the file.
Change the file’s permissions.
chmod +x demo.sh
Now run the program, passing in the argument one ‘AutomaticAddison’ one space to the right of the command.
./demo.sh AutomaticAddison

Explore the .bashrc File
Type the following command to go back home.
cd
Type the following command to list all files.
ls -la
You see that .bashrc file? Open it up in a text editor.
gedit .bashrc

Hmmm. What is this file with all this crazy code in it?
The .bashrc is a special bash script which is always located in your home directory. It contains an assortment of commands, aliases, variables, configuration, settings, and useful functions.
The .bashrc script runs automatically any time you open up a new terminal, window or pane in Linux. However, if you have a terminal window open and want to rerun the .bashrc script, you have to use the following command:
source .bashrc
Explore Environment Variables
Open a fresh, new terminal window and type:
export
You will see a list of all the environment variables in your system with their corresponding values. Environment variables are variables that describe the environment in which programs run. The programs that run on your computer use environment variables to answer questions such as: What is the username of this computer? What version of ROS is installed? Where is ROS installed?, etc.
There are lots of environment variables. How do we filter this list to get only the variables that contain ROS in them? Type the following command:
export | grep ROS
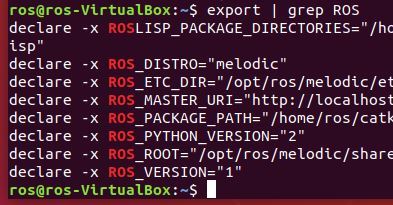
The ROS_PACKAGE_PATH variable tells the system where a program would find ROS packages.
If at any point, you want to change a variable’s value, you use the following syntax:
export ROS_PACKAGE_PATH= “<some new path here>"
The grep command is pretty cool. You can use it in conjunction with other commands too. Go to your catkin_ws/src folder.
cd ~/catkin_ws/src
Type:
ls

You should see a list of all files. Now type this:
ls | grep hello

You will see that all files containing the string ‘hello’ in the name are shown on the screen.
Understand Processes in Linux
In this section, we’ll take a look at Linux processes. A process is a computer program in action. A computer program consists of data and a set of instructions for your computer to execute.
At any given time multiple processes are running on your Linux system. There are foreground processes and background processes.
- Foreground processes (also known as interactive processes) require user input and will only initialize if requested by a user in a terminal window.
- Background processes (also known as non-interactive or automatic processes) launch automatically, without requiring prior user input.
Launch a Foreground Process
Let’s see the processes that are currently running on our system. Open a new terminal window and type:
ps faux
Now, let’s start a new foreground process. In a new terminal tab, type the following command:
rosrun move_bb8_pkg hello_world.py
Open a new tab, and type:
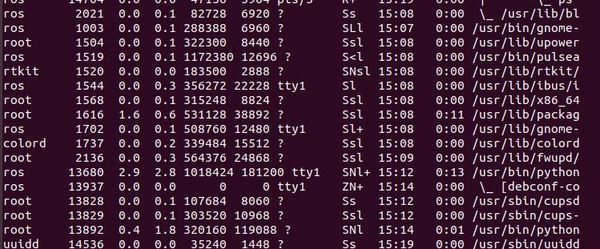
ps faux | grep hello_world
The first result is the hello_world.py program we are running.
Go back to the hello_world.py terminal and kill the process by pressing:
Ctrl + C
Now return to the other terminal window and type this command:
ps faux | grep hello_world

The process is now gone because we killed it (That grep–color=auto hello_world result has nothing to do with the hello_world.py program, so you can ignore that).
What happens if we have a process and all we want to do is to suspend it rather than kill it? What do we do?
Let’s take a look at that now.
In a new terminal window, launch the hello_world.py program again.
rosrun move_bb8_pkg hello_world.py
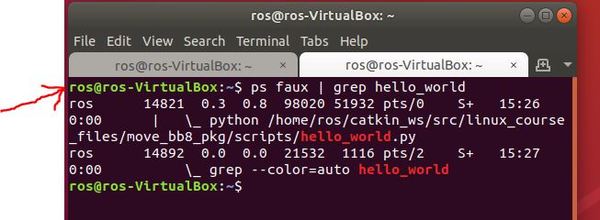
In a new terminal tab, type:
ps faux | grep hello_world

The number that is in the second column is the process ID (PID). The PID is 17208 (yours will be different).
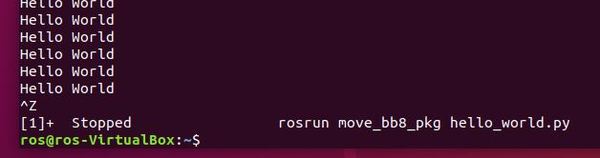
Now return to the window where “Hello World” keeps printing out and suspend (i.e. push the foreground process to the background) by typing:
Ctrl + Z
In a new terminal tab, type:
ps faux | grep hello_world
You will notice that the hello_world.py process is still an active process, but it is now running in the background.
Now let’s kill the process. The syntax is kill <PID>. In my case, I type:
kill 17208
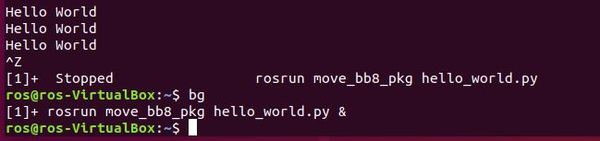
If you type ps faux | grep hello_world , you will notice the process is still not killed. The reason it is still not killed is because it is in the background. We need to go back to the window where we were running the hello_world.py script and resume the suspended process by typing:
bg
In a new terminal tab, type:
ps faux | grep hello_world
You will see that the process has been killed.
Launch a Background Process
Now, let’s launch our hello_world.py program as a background process rather than a foreground process. Type the following in a new terminal window.
rosrun move_bb8_pkg hello_world.py &
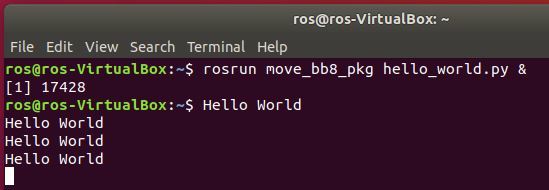
The PID (process ID) is 17428.
Now try to kill the process.
Ctrl + C
Didn’t work did it? Now try:
Ctrl + Z
Still didn’t work.
The reason the Ctrl + C or Ctrl + Z commands did not work is because they only work on foreground processes. We launched the process in the background. To kill it, we need to open up a new terminal tab and type kill <PID>:
kill 17428
To verify that the process is killed, type:
ps faux | grep hello_world
Understand Secure Shell (SSH Protocol) in Linux
In this section, we will explore the SSH protocol. SSH protocol provides a secure way to access a computer over an unsecured network. Your computer (the “client”) can access another computer (the “server”) to transfer files to it, run programs, carry out commands, etc.
If you have been following me for a while, you might remember when I connected my Windows-based laptop computer (“client”) to a Raspberry Pi (“server”) using the SSH protocol. I was then able to control the Raspberry Pi directly from my laptop.
The most common use case for SSH protocol is when you want to control a robot remotely. For example, imagine a robot that has an onboard computer (e.g. a Raspberry Pi). You can use SSH to run programs on the Raspberry Pi via your personal laptop computer.
Let’s see how SSH works. We will connect to a Raspberry Pi that is already setup with SSH from our Ubuntu Linux virtual box machine. The Raspberry Pi is the (“remote” server), and Ubuntu Linux, which is running in a Virtual Box on my Windows 10 machine, is the “local” client.
Note: You don’t have to go out and buy a Raspberry Pi right now. I just want to give you an idea of what the steps would be when you encounter a situation when you need to set up SSH communication between your local machine (e.g. personal laptop running Ubuntu Linux in a Virtual Box) and a remote server (e.g. Raspberry Pi) mounted on a robot.
The first thing we need to do is to install the openssh-server package on the Ubuntu Linux machine.
Type:
sudo apt update
sudo apt install openssh-server
Enter your password and press Y.
Type the following:
sudo systemctl status ssh
You should see a message that says active (running).
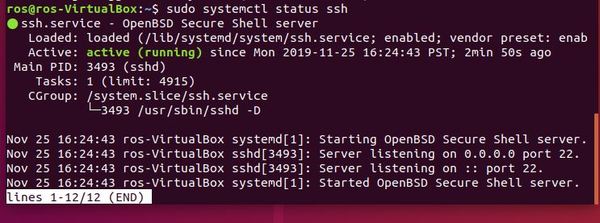
Press q to exit.
Open the SSH port:
sudo ufw allow ssh
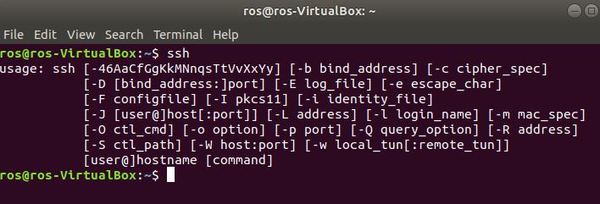
Check if ssh is installed.
ssh
On the Raspberry Pi, in a terminal window I type:
hostname -I

I see my Raspberry Pi’s IP address is:
192.168.0.17
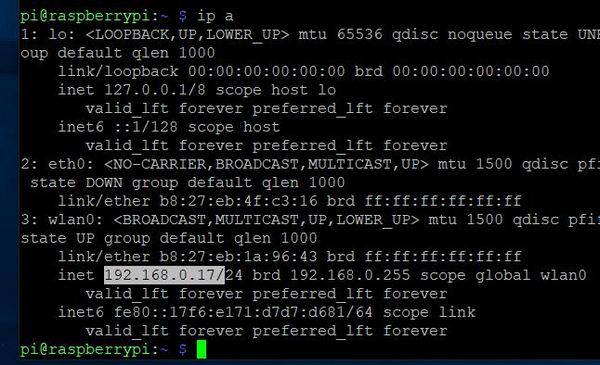
You can also type the command:
ip a
You will use the IP address next to inet
I want to connect to it from my Ubuntu Linux virtual box machine. The syntax for connecting to a remote computer via SSH is:
ssh <user>@<host>
where user is the account I want to login to on the remote machine, and host is the IP address of the remote machine (server) I want to login to. In my case, from an Ubuntu Linux terminal window, I type:
ssh pi@192.168.0.17
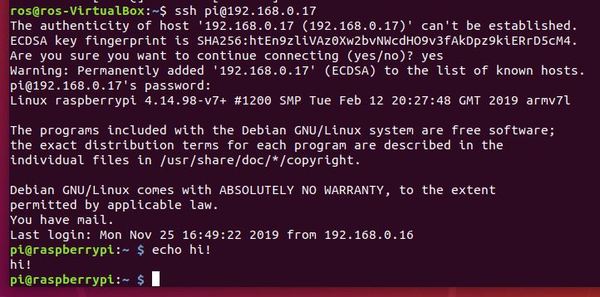
You will need to type the password for that username on the Raspberry Pi.
You can see that I am now connected to my Raspberry Pi. Type the following command to get a list of all the folders in the home directory.
ls

When I want to disconnect from the Raspberry Pi, I type:
exit

Typing the exit command gets me back to my normal user (i.e. ros).
Explore the “sudo” and “apt” Commands
Linux provides a tool called the Advanced Package Tool (APT). The Advanced Package Tool automates the retrieval, configuration and installation of software packages.
Let’s update the list of available software packages using this command in a new terminal window.
apt-get update
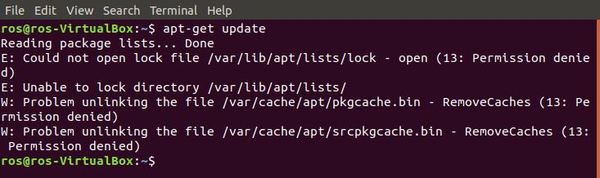
Hmm. That didn’t work. We have a problem. The problem is that we don’t have permissions to access the package database. Now, run this command:
sudo apt-get update
Type your password. Here is the output:
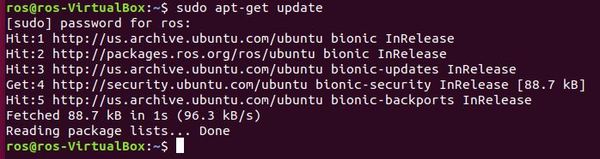
It worked!
What does “sudo” mean?
sudo is an abbreviated form of “super user do.” Putting “sudo” in front of a command tells Linux to run the command as a super user (i.e. root user) or another user.
Keep Building!
Congratulations on reaching the end of this tutorial. I recommend you bookmark this page and come back to it regularly as you work with ROS on Linux. We have covered the most essential commands and tools you will use again and again as you work with ROS on Linux for your robotics projects. Keep building!