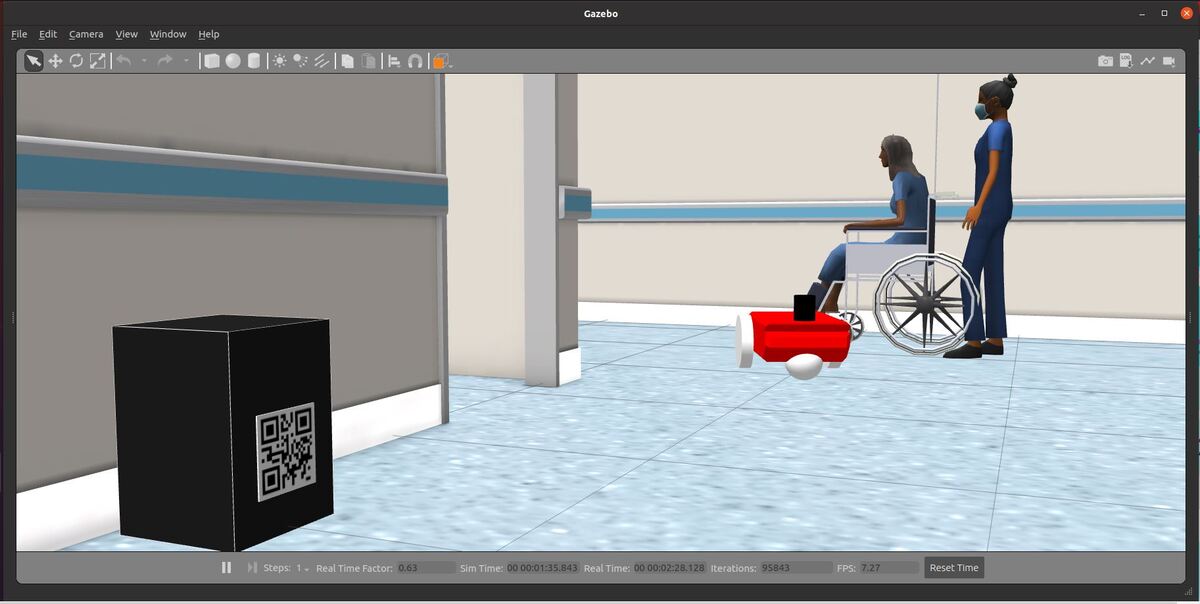
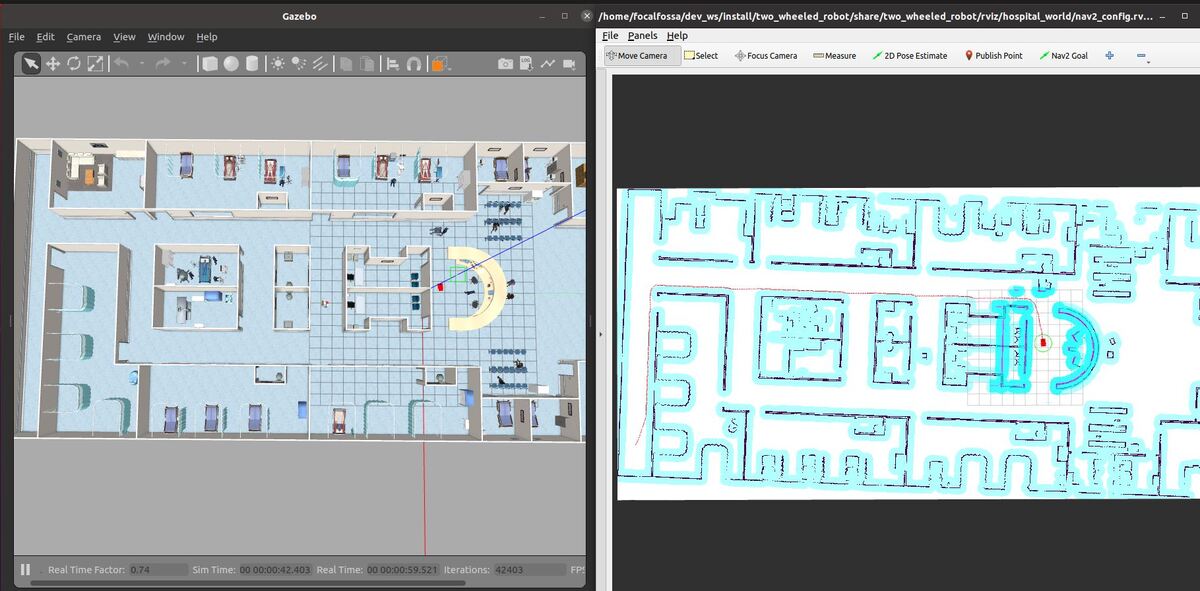
In this tutorial, I will show you how to create an autonomous docking application for a two-wheeled mobile robot. When the battery gets low, we want the robot to automatically go to a charging station (also known as docking station) to recharge its battery.
The two most common ways to implement autonomous docking are:
- ArUco Marker or ARTag (e.g. Neobotix)
- Infrared Receiver and Transmitter (e.g. iRobot Roomba)
In this tutorial, we will assume we know the location of the battery charging station. You can use what we develop here as a template for ARTag or Infrared-based automatic docking.
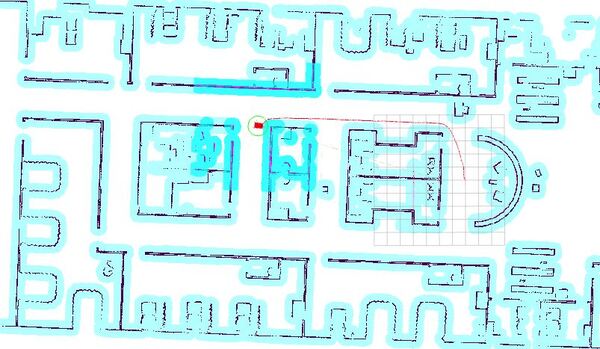
Here is the output you will be able to achieve after completing this tutorial:
Prerequisites
- You have completed this tutorial.
You can find the files for this post here on my Google Drive.
Create a tf Listener
The first thing you need to do is create a tf listener node to publish the base_link -> map transform.
Create the Charging Dock
Let’s begin by creating the charging dock.
Open a terminal window, and go to the following folder.
cd ~/dev_ws/src/two_wheeled_robot/models
Add the following folder named charging_dock.
Create the World
Open a terminal window, and go to the following folder.
cd ~/dev_ws/src/two_wheeled_robot/worlds
gedit hospital.world
Make sure you have the following code inside the file.
Save the file, and close it.
Build the Package
We will now build our package.
cd ~/dev_ws/
colcon build
Load the World
Now load the world in Gazebo using the launch file.
Open a new terminal, and type:
ros2 launch two_wheeled_robot hospital_world_connect_to_charging_dock.launch.py
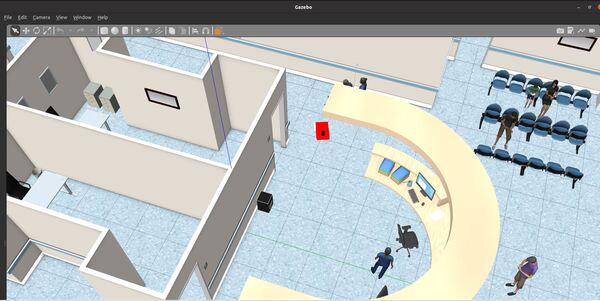
Here is the output:
Autonomous Docking Without ARTag Vision
Create the Script
Now, let’s create a script that will make the mobile robot navigate to the charging dock when the battery gets low. Credit to this GitHub repository for the inspiration for this method.
On a high level, the algorithm does the following:
- Navigate to the perpendicular line to the ARTag.
- Adjust heading.
- Go to a waypoint in front of the charging dock.
- Adjust heading.
- Go straight to the ARTag.
Open a terminal window, and go to the following folder.
cd ~/dev_ws/src/two_wheeled_robot/scripts
gedit navigate_to_charging_dock_v2.py
#! /usr/bin/env python3

"""
Description:
  Navigate to a charging dock once the battery gets low.
-------
Subscription Topics:
  Current battery state
  /battery_status - sensor_msgs/BatteryState

  2D Pose of the base_link of the robot in the map frame
  /map_to_base_link_pose2d – std_msgs/Float64MultiArray
-------
Publishing Topics:
  Velocity command to navigate to the charging dock.
  /cmd_vel - geometry_msgs/Twist
-------
Author: Addison Sears-Collins
Website: AutomaticAddison.com
Date: November 26, 2021
"""

import math # Math library
import time  # Time library

from rclpy.duration import Duration # Handles time for ROS 2
import rclpy # Python client library for ROS 2
from rclpy.node import Node # Handles the creation of nodes
from rclpy.executors import MultiThreadedExecutor
from robot_navigator import BasicNavigator, NavigationResult # Helper module
from geometry_msgs.msg import PoseStamped # Pose with ref frame and timestamp
from geometry_msgs.msg import Twist # Velocity command
from sensor_msgs.msg import BatteryState # Battery status
from std_msgs.msg import Float64MultiArray # Handle float64 arrays

# Holds the current pose of the robot
current_x = 0.0
current_y = 2.0
current_yaw_angle = 0.0

# Holds the current state of the battery
this_battery_state = BatteryState()
prev_battery_state = BatteryState()

# Flag for detecting the change in the battery state
low_battery = False
low_battery_min_threshold = 0.25

class ConnectToChargingDockNavigator(Node):
    """
    Navigates and connects to the charging dock
    """
    def __init__(self):

      # Initialize the class using the constructor
      super().__init__('connect_to_charging_dock_navigator')

      # Create a publisher
      # This node publishes the desired linear and angular velocity of the robot
      self.publisher_cmd_vel = self.create_publisher(
        Twist,
        '/cmd_vel',
        10)
      timer_period = 0.1
      self.timer = self.create_timer(timer_period, self.navigate_to_dock)

      # Holds the goal poses of the robot
      self.goal_x = [-1.0, -1.0, -1.0]
      self.goal_y = [2.0, 1.4, 0.83]
      self.goal_yaw_angle = [-1.5708, -1.5708, -1.5708]

      # Keep track of which goal we're headed towards
      self.goal_idx = 0

      # Declare linear and angular velocities
      self.linear_velocity = 0.08  # meters per second
      self.angular_velocity = 0.1 # radians per second

      # Declare distance metrics in meters
      self.distance_goal_tolerance = 0.05
      self.reached_distance_goal = False

      # Declare angle metrics in radians
      self.heading_tolerance = 0.05
      self.yaw_goal_tolerance = 0.05

    def navigate_to_dock(self):
      global low_battery

      if low_battery == False:
        return None

      self.get_logger().info('Navigating to the charging dock...')

      # Launch the ROS 2 Navigation Stack
      navigator = BasicNavigator()

      # Wait for navigation to fully activate. Use this line if autostart is set to true.
      navigator.waitUntilNav2Active()

      # If desired, you can change or load the map as well
      # navigator.changeMap('/path/to/map.yaml')

      # You may use the navigator to clear or obtain costmaps
      # navigator.clearAllCostmaps()  # also have clearLocalCostmap() and clearGlobalCostmap()
      # global_costmap = navigator.getGlobalCostmap()
      # local_costmap = navigator.getLocalCostmap()

      # Set the robot's goal pose
      goal_pose = PoseStamped()
      goal_pose.header.frame_id = 'map'
      goal_pose.header.stamp = navigator.get_clock().now().to_msg()
      goal_pose.pose.position.x = 0.0
      goal_pose.pose.position.y = 2.0
      goal_pose.pose.position.z = 0.25
      goal_pose.pose.orientation.x = 0.0
      goal_pose.pose.orientation.y = 0.0
      goal_pose.pose.orientation.z = 0.0
      goal_pose.pose.orientation.w = 1.0

      # Go to the goal pose
      navigator.goToPose(goal_pose)

      i = 0

      # Keep doing stuff as long as the robot is moving towards the goal
      while not navigator.isNavComplete():
        # Do something with the feedback
        i = i + 1
        feedback = navigator.getFeedback()
        if feedback and i % 5 == 0:
          print('Distance remaining: ' + '{:.2f}'.format(
            feedback.distance_remaining) + ' meters.')

          # Some navigation timeout to demo cancellation
          #if Duration.from_msg(feedback.navigation_time) > Duration(seconds=1800.0):
            #navigator.cancelNav()

      # Do something depending on the return code
      result = navigator.getResult()
      if result == NavigationResult.SUCCEEDED:
        print('Successfully reached charging dock staging area...')
        low_battery = False
        self.connect_to_dock()
      elif result == NavigationResult.CANCELED:
        print('Goal was canceled!')
      elif result == NavigationResult.FAILED:
        print('Goal failed!')
      else:
        print('Goal has an invalid return status!')

    def connect_to_dock(self):

      # While the battery is not charging
      while this_battery_state.power_supply_status != 1:

        # Publish the current battery state
        self.get_logger().info('NOT CHARGING...')

        if (self.goal_idx == 0):
          self.go_to_line()
          self.get_logger().info('Going to perpendicular line to ARTag...')
        elif (self.goal_idx == 1):
          self.go_to_line()
          self.get_logger().info('Going to perpendicular line to ARTag...')
        elif (self.goal_idx == 2):
          self.go_to_artag()
          self.get_logger().info('Going straight to ARTag...')
        else:
          # Stop the robot
          cmd_vel_msg = Twist()
          cmd_vel_msg.linear.x = 0.0
          cmd_vel_msg.angular.z = 0.0
          self.publisher_cmd_vel.publish(cmd_vel_msg)
          self.get_logger().info('Robot is idle...')

        time.sleep(0.02)

      self.get_logger().info('CHARGING...')
      self.get_logger().info('Successfully connected to the charging dock!')

    def get_distance_to_goal(self):
      """
      Get the distance between the current x,y coordinate and the desired x,y coordinate
      The unit is meters.
      """
      distance_to_goal = math.sqrt(math.pow(self.goal_x[self.goal_idx] - current_x, 2) + math.pow(
        self.goal_y[self.goal_idx] - current_y, 2))
      return distance_to_goal

    def get_heading_error(self):
      """
      Get the heading error in radians
      """
      delta_x = self.goal_x[self.goal_idx] - current_x
      delta_y = self.goal_y[self.goal_idx] - current_y
      desired_heading = math.atan2(delta_y, delta_x)
      heading_error = desired_heading - current_yaw_angle

      # Make sure the heading error falls within -PI to PI range
      if (heading_error > math.pi):
        heading_error = heading_error - (2 * math.pi)
      if (heading_error < -math.pi):
        heading_error = heading_error + (2 * math.pi)

      return heading_error

    def get_radians_to_goal(self):
      """
      Get the yaw goal angle error in radians
      """
      yaw_goal_angle_error = self.goal_yaw_angle[self.goal_idx] - current_yaw_angle

      return yaw_goal_angle_error

    def go_to_line(self):
      """
      Go to the line that is perpendicular to the AR tag
      """
      distance_to_goal = self.get_distance_to_goal()
      heading_error = self.get_heading_error()
      yaw_goal_error = self.get_radians_to_goal()

      cmd_vel_msg = Twist()

      # If we are not yet at the position goal
      if (math.fabs(distance_to_goal) > self.distance_goal_tolerance and self.reached_distance_goal == False):

        # If the robot's heading is off, fix it
        if (math.fabs(heading_error) > self.heading_tolerance):
          self.get_logger().info(str(heading_error))

          if heading_error > 0:
            cmd_vel_msg.angular.z = self.angular_velocity
          else:
            cmd_vel_msg.angular.z = -self.angular_velocity
        else:
          cmd_vel_msg.linear.x = self.linear_velocity

      # Orient towards the yaw goal angle
      elif (math.fabs(yaw_goal_error) > self.yaw_goal_tolerance):

        if yaw_goal_error > 0:
          cmd_vel_msg.angular.z = self.angular_velocity
        else:
          cmd_vel_msg.angular.z = -self.angular_velocity

        self.reached_distance_goal = True

      # Goal achieved, go to the next goal
      else:
        # Go to the next goal
        self.goal_idx = self.goal_idx + 1
        self.get_logger().info('Arrived at perpendicular line. Going straight to ARTag...')
        self.reached_distance_goal = False

      # Publish the velocity message
      self.publisher_cmd_vel.publish(cmd_vel_msg)

    def go_to_artag(self):
      """
      Go straight to the AR tag
      """
      distance_to_goal = self.get_distance_to_goal()
      heading_error = self.get_heading_error()
      yaw_goal_error = self.get_radians_to_goal()

      cmd_vel_msg = Twist()

      # If we are not yet at the position goal
      if (math.fabs(distance_to_goal) > self.distance_goal_tolerance and self.reached_distance_goal == False):

        # If the robot's heading is off, fix it
        if (math.fabs(heading_error) > self.heading_tolerance):

          if heading_error > 0:
            cmd_vel_msg.angular.z = self.angular_velocity
          else:
            cmd_vel_msg.angular.z = -self.angular_velocity
        else:
          cmd_vel_msg.linear.x = self.linear_velocity

      # Orient towards the yaw goal angle
      elif (math.fabs(yaw_goal_error) > self.yaw_goal_tolerance):

        if yaw_goal_error > 0:
          cmd_vel_msg.angular.z = self.angular_velocity
        else:
          cmd_vel_msg.angular.z = -self.angular_velocity

        self.reached_distance_goal = True

      # Goal achieved, go to the next goal
      else:
        # Go to the next goal
        self.goal_idx = self.goal_idx + 1
        self.get_logger().info('Arrived at the charging dock...')
        self.reached_distance_goal = True

      # Publish the velocity message
      self.publisher_cmd_vel.publish(cmd_vel_msg)

class BatteryStateSubscriber(Node):
    """
    Subscriber node to the current battery state
    """
    def __init__(self):

      # Initialize the class using the constructor
      super().__init__('battery_state_subscriber')

      # Create a subscriber
      # This node subscribes to messages of type
      # sensor_msgs/BatteryState
      self.subscription_battery_state = self.create_subscription(
        BatteryState,
        '/battery_status',
        self.get_battery_state,
        10)

    def get_battery_state(self, msg):
      """
      Update the current battery state.
      """
      global this_battery_state
      global prev_battery_state
      global low_battery
      prev_battery_state = this_battery_state
      this_battery_state = msg

      # Check for low battery
      if prev_battery_state.percentage >= low_battery_min_threshold and this_battery_state.percentage < low_battery_min_threshold:
        low_battery = True

class PoseSubscriber(Node):
    """
    Subscriber node to the current 2D pose of the robot
    """
    def __init__(self):

      # Initialize the class using the constructor
      super().__init__('pose_subscriber')

      # Create a subscriber
      # This node subscribes to messages of type
      # std_msgs/Float64MultiArray
      self.subscription_pose = self.create_subscription(
        Float64MultiArray,
        '/map_to_base_link_pose2d',
        self.get_pose,
        1)

    def get_pose(self, msg):
      """
      Update the current 2D pose.
      """
      global current_x
      global current_y
      global current_yaw_angle
      current_2d_pose = msg.data
      current_x = current_2d_pose[0]
      current_y = current_2d_pose[1]
      current_yaw_angle = current_2d_pose[2]

def main(args=None):
  """
  Entry point for the program.
  """

  # Initialize the rclpy library
  rclpy.init(args=args)

  try:

    # Create the nodes
    connect_to_charging_dock_navigator = ConnectToChargingDockNavigator()
    battery_state_subscriber = BatteryStateSubscriber()
    pose_subscriber = PoseSubscriber()

    # Set up mulithreading
    executor = MultiThreadedExecutor(num_threads=4)
    executor.add_node(connect_to_charging_dock_navigator)
    executor.add_node(battery_state_subscriber)
    executor.add_node(pose_subscriber)

    try:
      # Spin the nodes to execute the callbacks
      executor.spin()
    finally:
      # Shutdown the nodes
      executor.shutdown()
      connect_to_charging_dock_navigator.destroy_node()
      battery_state_subscriber.destroy_node()
      pose_subscriber.destroy_node()

  finally:
    # Shutdown
    rclpy.shutdown()

if __name__ == '__main__':
  main()
Save the file, and close it.
Edit CMakeLists.txt
Now let’s update our CMakeLists.txt file.
cd ~/dev_ws/src/two_wheeled_robot
gedit CMakeLists.txt
Add the script to your CMakeLists.txt file.
Save the file, and close it.
Create the Launch File
Open a new terminal window, and type:
cd ~/dev_ws/src/two_wheeled_robot/launch/hospital_world
gedit hospital_world_connect_to_charging_dock_v2.launch.py
Add the following code.
# Author: Addison Sears-Collins
# Date: November 26, 2021
# Description: Launch a two-wheeled robot using the ROS 2 Navigation Stack.
#              The spawning of the robot is performed by the Gazebo-ROS spawn_entity node.
#              The robot must be in both SDF and URDF format.
#              If you want to spawn the robot in a pose other than the default, be sure to set that inside
#              the nav2_params_path yaml file: amcl ---> initial_pose: [x, y, z, yaw]
#              The robot will return to the charging dock when the /battery_status percentage is low.
# https://automaticaddison.com

import os
from launch import LaunchDescription
from launch.actions import DeclareLaunchArgument, IncludeLaunchDescription
from launch.conditions import IfCondition, UnlessCondition
from launch.launch_description_sources import PythonLaunchDescriptionSource
from launch.substitutions import Command, LaunchConfiguration, PythonExpression
from launch_ros.actions import Node
from launch_ros.substitutions import FindPackageShare

def generate_launch_description():
  package_name = 'two_wheeled_robot'
  robot_name_in_model = 'two_wheeled_robot'
  default_launch_dir = 'launch'
  gazebo_models_path = 'models'
  map_file_path = 'maps/hospital_world/hospital_world.yaml'
  nav2_params_path = 'params/hospital_world/nav2_connect_to_charging_dock_params.yaml'
  robot_localization_file_path = 'config/ekf.yaml'
  rviz_config_file_path = 'rviz/hospital_world/nav2_config.rviz'
  sdf_model_path = 'models/two_wheeled_robot_description/model.sdf'
  urdf_file_path = 'urdf/two_wheeled_robot.urdf'
  world_file_path = 'worlds/hospital.world'
  nav_to_charging_dock_script = 'navigate_to_charging_dock_v2.py'

  # Pose where we want to spawn the robot
  spawn_x_val = '0.0'
  spawn_y_val = '2.0'
  spawn_z_val = '0.25'
  spawn_yaw_val = '0.0'

  ########## You do not need to change anything below this line ###############

  # Set the path to different files and folders.
  pkg_gazebo_ros = FindPackageShare(package='gazebo_ros').find('gazebo_ros')
  pkg_share = FindPackageShare(package=package_name).find(package_name)
  default_launch_dir = os.path.join(pkg_share, default_launch_dir)
  default_urdf_model_path = os.path.join(pkg_share, urdf_file_path)
  robot_localization_file_path = os.path.join(pkg_share, robot_localization_file_path)
  default_rviz_config_path = os.path.join(pkg_share, rviz_config_file_path)
  world_path = os.path.join(pkg_share, world_file_path)
  gazebo_models_path = os.path.join(pkg_share, gazebo_models_path)
  os.environ["GAZEBO_MODEL_PATH"] = gazebo_models_path
  nav2_dir = FindPackageShare(package='nav2_bringup').find('nav2_bringup')
  nav2_launch_dir = os.path.join(nav2_dir, 'launch')
  sdf_model_path = os.path.join(pkg_share, sdf_model_path)
  static_map_path = os.path.join(pkg_share, map_file_path)
  nav2_params_path = os.path.join(pkg_share, nav2_params_path)
  nav2_bt_path = FindPackageShare(package='nav2_bt_navigator').find('nav2_bt_navigator')

  # Launch configuration variables specific to simulation
  autostart = LaunchConfiguration('autostart')
  headless = LaunchConfiguration('headless')
  map_yaml_file = LaunchConfiguration('map')
  namespace = LaunchConfiguration('namespace')
  params_file = LaunchConfiguration('params_file')
  rviz_config_file = LaunchConfiguration('rviz_config_file')
  sdf_model = LaunchConfiguration('sdf_model')
  slam = LaunchConfiguration('slam')
  urdf_model = LaunchConfiguration('urdf_model')
  use_namespace = LaunchConfiguration('use_namespace')
  use_robot_state_pub = LaunchConfiguration('use_robot_state_pub')
  use_rviz = LaunchConfiguration('use_rviz')
  use_sim_time = LaunchConfiguration('use_sim_time')
  use_simulator = LaunchConfiguration('use_simulator')
  world = LaunchConfiguration('world')

  # Map fully qualified names to relative ones so the node's namespace can be prepended.
  # In case of the transforms (tf), currently, there doesn't seem to be a better alternative
  # https://github.com/ros/geometry2/issues/32
  # https://github.com/ros/robot_state_publisher/pull/30
  # TODO(orduno) Substitute with `PushNodeRemapping`
  #              https://github.com/ros2/launch_ros/issues/56
  remappings = [('/tf', 'tf'),
                ('/tf_static', 'tf_static')]

  # Declare the launch arguments
  declare_namespace_cmd = DeclareLaunchArgument(
    name='namespace',
    default_value='',
    description='Top-level namespace')

  declare_use_namespace_cmd = DeclareLaunchArgument(
    name='use_namespace',
    default_value='false',
    description='Whether to apply a namespace to the navigation stack')

  declare_autostart_cmd = DeclareLaunchArgument(
    name='autostart',
    default_value='true',
    description='Automatically startup the nav2 stack')

  declare_map_yaml_cmd = DeclareLaunchArgument(
    name='map',
    default_value=static_map_path,
    description='Full path to map file to load')

  declare_params_file_cmd = DeclareLaunchArgument(
    name='params_file',
    default_value=nav2_params_path,
    description='Full path to the ROS2 parameters file to use for all launched nodes')

  declare_rviz_config_file_cmd = DeclareLaunchArgument(
    name='rviz_config_file',
    default_value=default_rviz_config_path,
    description='Full path to the RVIZ config file to use')

  declare_sdf_model_path_cmd = DeclareLaunchArgument(
    name='sdf_model',
    default_value=sdf_model_path,
    description='Absolute path to robot sdf file')

  declare_simulator_cmd = DeclareLaunchArgument(
    name='headless',
    default_value='False',
    description='Whether to execute gzclient')

  declare_slam_cmd = DeclareLaunchArgument(
    name='slam',
    default_value='False',
    description='Whether to run SLAM')

  declare_urdf_model_path_cmd = DeclareLaunchArgument(
    name='urdf_model',
    default_value=default_urdf_model_path,
    description='Absolute path to robot urdf file')

  declare_use_robot_state_pub_cmd = DeclareLaunchArgument(
    name='use_robot_state_pub',
    default_value='True',
    description='Whether to start the robot state publisher')

  declare_use_rviz_cmd = DeclareLaunchArgument(
    name='use_rviz',
    default_value='True',
    description='Whether to start RVIZ')

  declare_use_sim_time_cmd = DeclareLaunchArgument(
    name='use_sim_time',
    default_value='true',
    description='Use simulation (Gazebo) clock if true')

  declare_use_simulator_cmd = DeclareLaunchArgument(
    name='use_simulator',
    default_value='True',
    description='Whether to start the simulator')

  declare_world_cmd = DeclareLaunchArgument(
    name='world',
    default_value=world_path,
    description='Full path to the world model file to load')

  # Specify the actions

  # Start Gazebo server
  start_gazebo_server_cmd = IncludeLaunchDescription(
    PythonLaunchDescriptionSource(os.path.join(pkg_gazebo_ros, 'launch', 'gzserver.launch.py')),
    condition=IfCondition(use_simulator),
    launch_arguments={'world': world}.items())

  # Start Gazebo client
  start_gazebo_client_cmd = IncludeLaunchDescription(
    PythonLaunchDescriptionSource(os.path.join(pkg_gazebo_ros, 'launch', 'gzclient.launch.py')),
    condition=IfCondition(PythonExpression([use_simulator, ' and not ', headless])))

  # Launch the robot
  spawn_entity_cmd = Node(
    package='gazebo_ros',
    executable='spawn_entity.py',
    arguments=['-entity', robot_name_in_model,
               '-file', sdf_model,
                  '-x', spawn_x_val,
                  '-y', spawn_y_val,
                  '-z', spawn_z_val,
                  '-Y', spawn_yaw_val],
       output='screen')

  # Start robot localization using an Extended Kalman filter
  start_robot_localization_cmd = Node(
    package='robot_localization',
    executable='ekf_node',
    name='ekf_filter_node',
    output='screen',
    parameters=[robot_localization_file_path,
    {'use_sim_time': use_sim_time}])

  # Subscribe to the joint states of the robot, and publish the 3D pose of each link.
  start_robot_state_publisher_cmd = Node(
    condition=IfCondition(use_robot_state_pub),
    package='robot_state_publisher',
    executable='robot_state_publisher',
    namespace=namespace,
    parameters=[{'use_sim_time': use_sim_time,
    'robot_description': Command(['xacro ', urdf_model])}],
    remappings=remappings,
    arguments=[default_urdf_model_path])

  # Launch RViz
  start_rviz_cmd = Node(
    condition=IfCondition(use_rviz),
    package='rviz2',
    executable='rviz2',
    name='rviz2',
    output='screen',
    arguments=['-d', rviz_config_file])

  # Launch navigation to the charging dock
  start_navigate_to_charging_dock_cmd = Node(
    package=package_name,
    executable=nav_to_charging_dock_script)

  # Launch navigation to the charging dock
  start_map_to_base_link_transform_cmd = Node(
    package=package_name,
    executable='map_to_base_link_transform.py')

  # Launch the ROS 2 Navigation Stack
  start_ros2_navigation_cmd = IncludeLaunchDescription(
    PythonLaunchDescriptionSource(os.path.join(nav2_launch_dir, 'bringup_launch.py')),
    launch_arguments = {'namespace': namespace,
                        'use_namespace': use_namespace,
                        'slam': slam,
                        'map': map_yaml_file,
                        'use_sim_time': use_sim_time,
                        'params_file': params_file,
                        'autostart': autostart}.items())

  # Create the launch description and populate
  ld = LaunchDescription()

  # Declare the launch options
  ld.add_action(declare_namespace_cmd)
  ld.add_action(declare_use_namespace_cmd)
  ld.add_action(declare_autostart_cmd)
  ld.add_action(declare_map_yaml_cmd)
  ld.add_action(declare_params_file_cmd)
  ld.add_action(declare_rviz_config_file_cmd)
  ld.add_action(declare_sdf_model_path_cmd)
  ld.add_action(declare_simulator_cmd)
  ld.add_action(declare_slam_cmd)
  ld.add_action(declare_urdf_model_path_cmd)
  ld.add_action(declare_use_robot_state_pub_cmd)
  ld.add_action(declare_use_rviz_cmd)
  ld.add_action(declare_use_sim_time_cmd)
  ld.add_action(declare_use_simulator_cmd)
  ld.add_action(declare_world_cmd)

  # Add any actions
  ld.add_action(start_gazebo_server_cmd)
  ld.add_action(start_gazebo_client_cmd)
  #ld.add_action(spawn_entity_cmd)
  ld.add_action(start_robot_localization_cmd)
  ld.add_action(start_robot_state_publisher_cmd)
  ld.add_action(start_rviz_cmd)
  ld.add_action(start_navigate_to_charging_dock_cmd)
  ld.add_action(start_map_to_base_link_transform_cmd)
  ld.add_action(start_ros2_navigation_cmd)

  return ld
Build the file.
cd ~/dev_ws/
colcon build
Update the Parameters
Open a new terminal window, and type:
cd ~/dev_ws/src/two_wheeled_robot/params/hospital_world
gedit nav2_connect_to_charging_dock_params.yaml
Add these parameters.
Save the file, and close it.
Launch the Robot
Open a new terminal window, and run the following message to indicate the battery is at full charge. All of this is a single command.
ros2 topic pub /battery_status sensor_msgs/BatteryState '{voltage: 9.0, percentage: 1.0, power_supply_status: 3}'
Open a new terminal and launch the robot.
ros2 launch two_wheeled_robot hospital_world_connect_to_charging_dock_v2.launch.py
Select the Nav2 Goal button at the top of RViz and click somewhere on the map to command the robot to navigate to any reachable goal location.
The robot will move to the goal location.
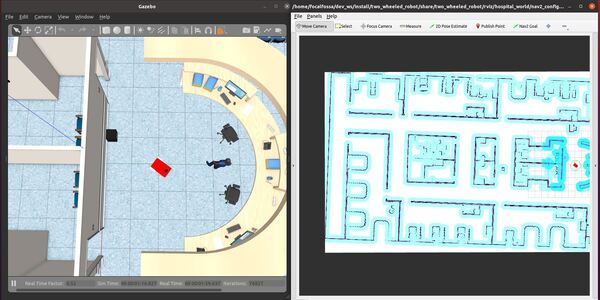
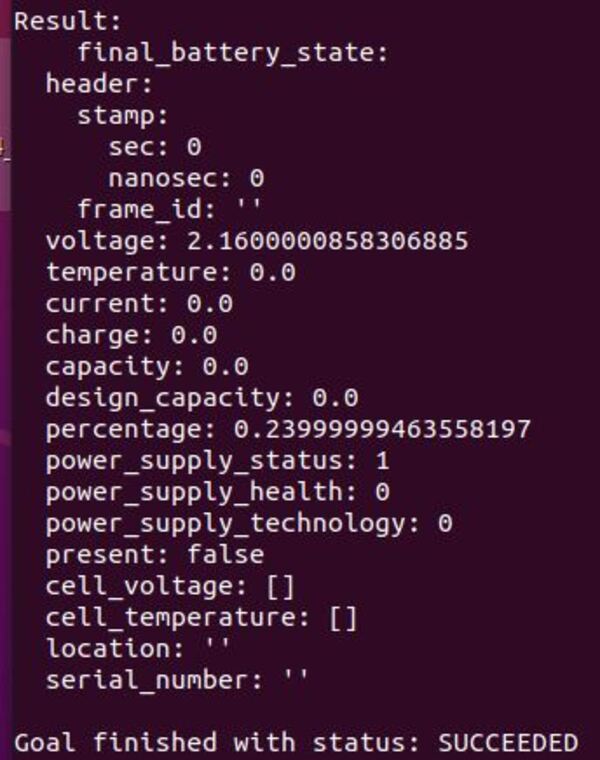
While the robot is moving, stop the /battery_status publisher.
CTRL + C
Now run this command to indicate low battery:
ros2 topic pub /battery_status sensor_msgs/BatteryState '{voltage: 2.16, percentage: 0.24, power_supply_status: 3}'
The robot will plan a path to the staging area and then move along that path.
Once the robot reaches the staging area, the robot will navigate to the charging dock (i.e. ARTag) using the algorithm we developed earlier in this post.
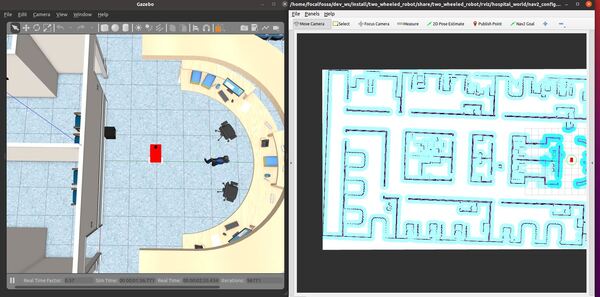
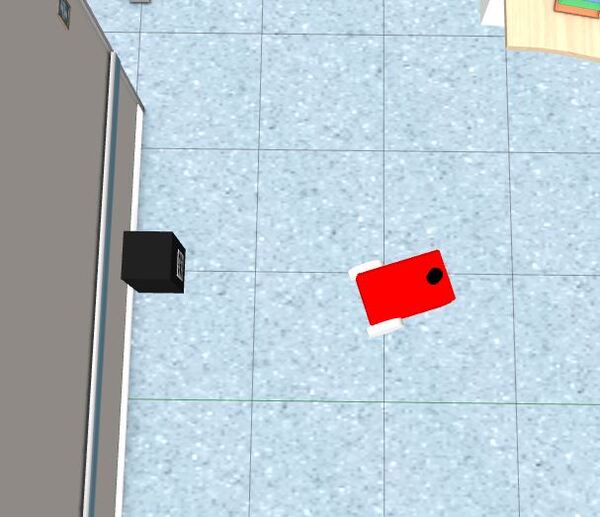
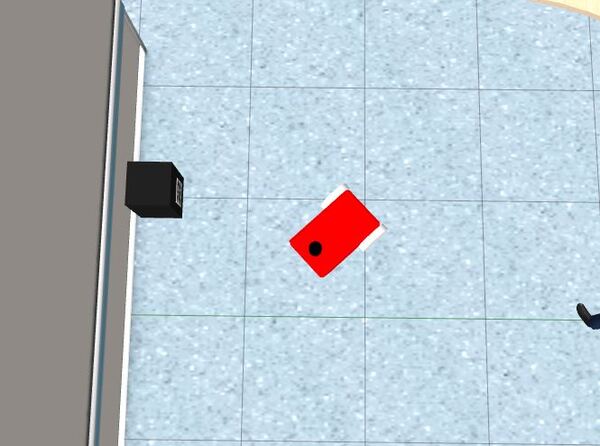
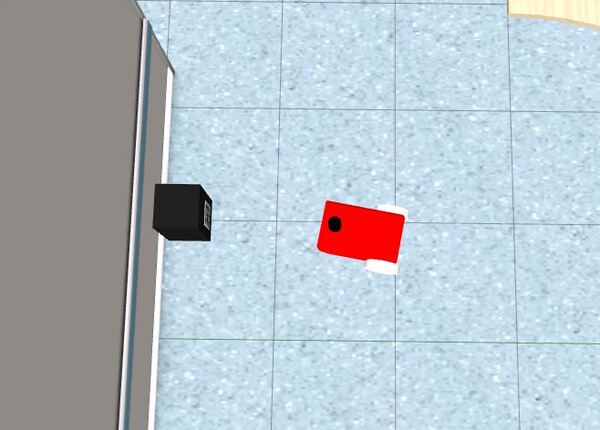
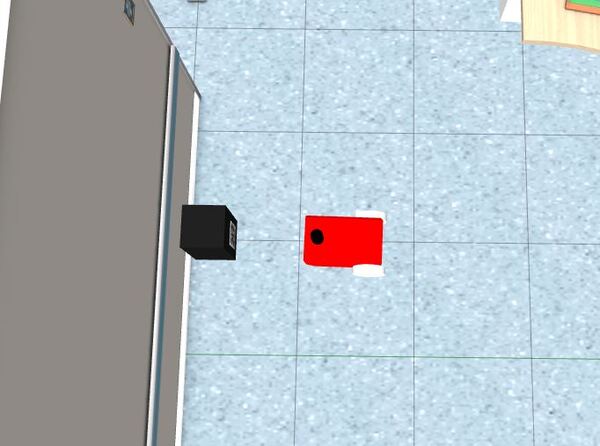
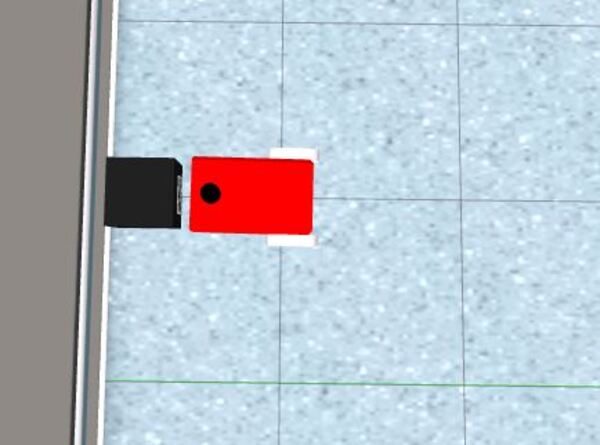
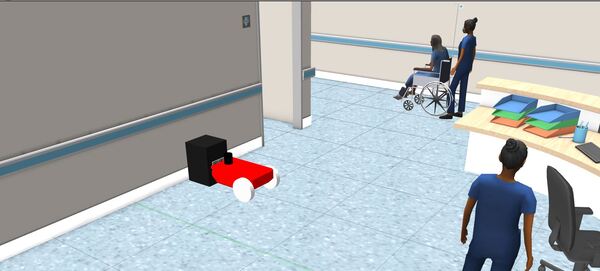
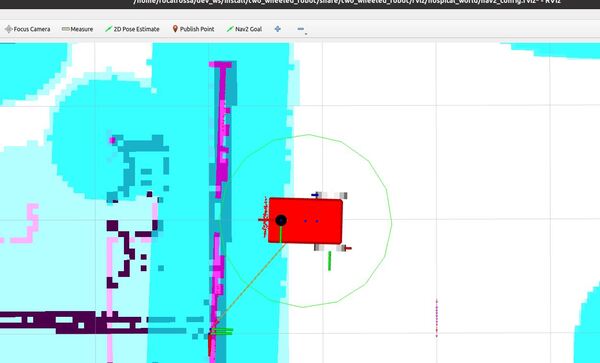
Once the robot has reached the charging dock, press CTRL + C to stop the /battery_status publisher, and type:
ros2 topic pub /battery_status sensor_msgs/BatteryState '{voltage: 2.16, percentage: 0.24, power_supply_status: 1}'
That 1 for the power_supply_status indicates the battery is CHARGING.
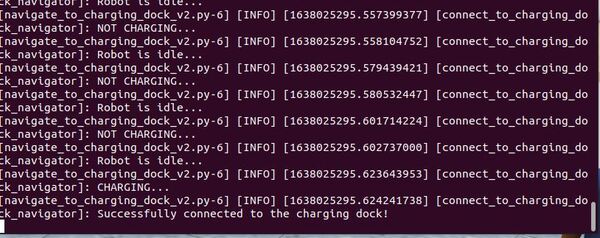
That’s it!
References
- Hao Dong Method on YouTube
- Bug2 Algorithm for Robot Motion Planning
- Line-following Robot Using Raspberry Pi
ArUco Marker or AR Tag Automatic Docking References
If you are interested in taking this application a step further, you can use ArUco Marker or AR Tag-based navigation to return to the docking station. You will need to have a camera on your robot.
Here are some helpful links:
ZEDbot
Neobotix
RoverRobotics
Note that some of the old ROS packages for AR Tag pose estimation are out of date. This package enables you to detect the tag and then calculate its pose.
The best tutorial for ArUco marker detection and pose estimation using OpenCV is here. You can also check out this tutorial this tutorial, and this book.
To learn how to convert the ArUco marker OpenCV output to a ROS-compatible format, check this out.
This YouTube video is also useful.
The key is to use OpenCV’s aruco.estimatePoseSingleMarkers(…) method, which returns the pose of an ArUco marker relative to the camera reference frame. Once you know that, you can use tf to calculate the pose of the ArUco marker relative to the base_link frame. You then modify the algorithm we wrote above to center the base_link frame with the ArUco tag.
Infrared-based Automatic Docking References
I did not use infrared receivers and transmitters in this tutorial, but if you’re interested in using this technique, below are some helpful links to get you started.
- Cheap Setup on YouTube
- iRobot Roomba 1
- iRobot Roomba 2
- Kobuki
- YouTube (Magnetically activated charge contacts — Good Design)
- Humanoid robot autodocking on YouTube
- Magnetic alignment and capture slots
- An innovative way to straighten out a differential drive robot once it reaches the dock on YouTube
- Pololu
- Wennycooper GitHub 1
- Wennycooper GitHub 2
Keep building!

