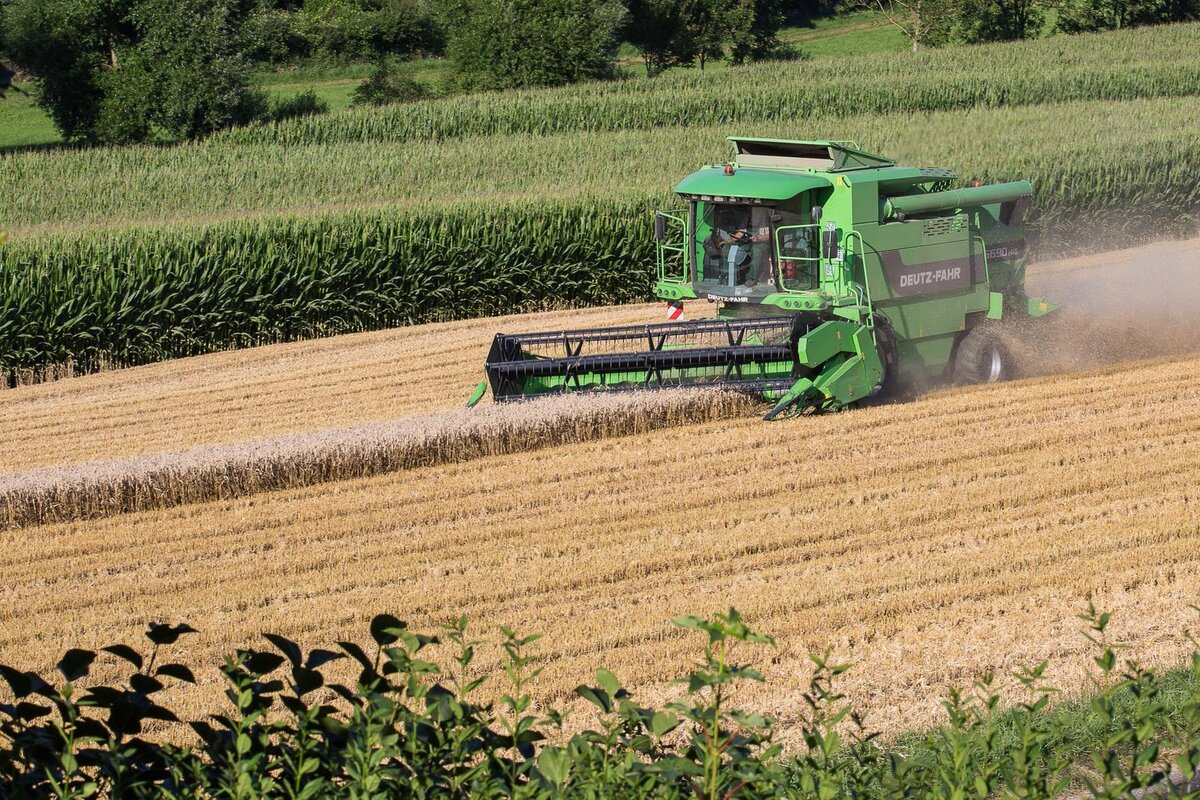
In this tutorial, I will present a template for the system design and architecture for an autonomous agricultural robot. This template could be modified for designing any autonomous mobile robot. These requirements are not an exhaustive list.
System Requirements
Mandatory Functional Requirements
Functional requirements define what a system must do. These requirements are typically specified by the user.
M.F.1. The system must accept a map of the farm.
M.F.2. The system must harvest wheat.
M.F.3. The system must detect static objects.
M.F.4. The system must detect dynamic objects.
M.F.5. The system must return to the home location after harvesting.
M.F.6. The system must indicate when fuel is low.
M.F.7. The system must generate an estimate of crop production, including acreage, area harvested, and yield.
Mandatory Non-Functional Requirements
Non-functional requirements define the constraints that impact how the system should fulfill the functional requirements. These requirements are typically specified by the engineer.
M.N.1. The system shall harvest 95% of crops on flat, unobstructed terrain.
M.N.2. The system shall send a notification when the fuel level gets to 5% of a full tank.
M.N.3. The system must cover 0.25 acres on flat, unobstructed terrain in 20 minutes.
M.N.4. The system shall navigate on a 15-degree sloped hill.
M.N.5. The system shall detect >99% of static objects greater than 0.3 meters in height and 0.2 meters in width.
M.N.6. The system shall detect >99% of dynamic objects greater than 0.3 meters in height and 0.2 meters in width.
Desired Functional Requirements
D.F.1. The system must generate a report of crop health.
Desired Non-Functional Requirements
D.N.1. The system shall navigate on a 25-degree sloped hill.
D.N.2. The system shall harvest 99% of crops on flat, unobstructed terrain.
Functional Architecture
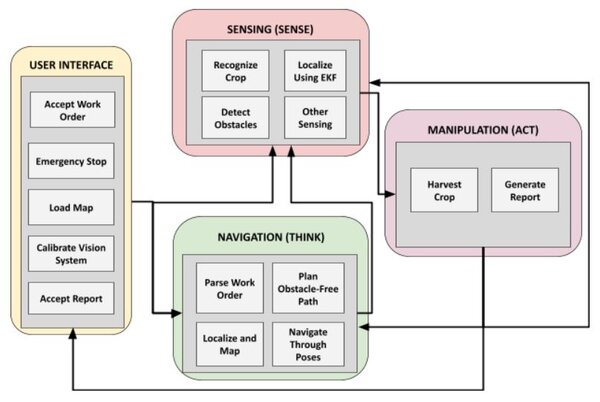
EKF = Extended Kalman Filter
Cyber-physical Architecture
The cyber-physical architecture maps the functional architecture to the hardware and software components of the robotic system.
User Interface
Hardware
- LCD Monitor
- Computer
- Joystick for manual control
Software
Navigation
Hardware
- On-board computer
- Vehicle (Including Motors)
Software
Sensing
Hardware
- Depth Camera (Front)
- Depth Camera (Back)
- GPS
- Inertial Measurement Unit (IMU)
- LIDAR
- On-board computer
- Radar
- Ultrasonic Sensor
- Wheel encoders
Software
- Extended Kalman Filter for Sensor Fusion
- OpenCV
- SLAM
- TensorFlow
Manipulation
Hardware
- Microcontroller
- On-board computer
- Vehicle