
In this tutorial, we will integrate GPS data into a mobile robot in order to localize in an environment.
The official instructions for doing this are on this page, but we will walk through the entire process below.
You can get the entire code for this project here.
Let’s get started!
Prerequisites
You have completed the Ultimate Guide to the ROS 2 Navigation Stack (also known as Nav2). We will not be using the Navigation Stack, but that Ultimate Guide helps you set up all the packages that you will use in this tutorial.
If you know ROS 2 and understand how to read Launch files, you should be able to follow along with this tutorial quite well without having to go through the Ultimate Guide.
Calculate the Magnetic Declination of Your Location
First, we need to calculate the magnetic declination in radians.
Go to this page.
Enter your latitude and longitude, and click “Calculate”. If you don’t know your latitude and longitude, you can look it up by zip code.
My magnetic declination is 5° 20′ W.
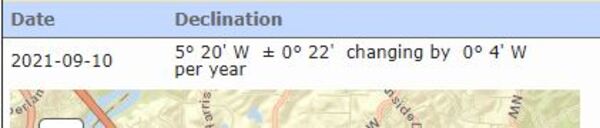
Convert that value to decimal format. Since the units above are 5 degrees and 20 minutes, this value is the following in decimal format:
5.333333 degrees
Now we need to convert that value to radians.
5.333333 degrees = 0.093084220955 radians.
Set the Latitude, Longitude, and Elevation in the World File
We need to set the latitude, longitude, and elevation of the origin in Gazebo.
Go to your world file. Open a terminal window, and type:
colcon_cd basic_mobile_robot
cd worlds/basic_mobile_bot_world
gedit smalltown.world
Inside the <spherical_coordinates> tag at the bottom of the file, modify the latitude, longitude, and elevation to wherever you are. Here is my smalltown.world file.
I am in Atlanta, Georgia. My latitude is 33.83, and my longitude is -84.42. The elevation at this location is 836.6 feet, which is 254.99568 meters.
Save the file and close it.
When we load Gazebo:
- x = East
- y = North
- z = Up
So, for example, if the robot is in Atlanta and heading in the positive x-direction in the world coordinate frame, the robot is moving eastward, and we should expect the longitude to get less negative (i.e. move towards 0).
If the robot is heading in the positive y-direction in the world coordinate frame, the robot is moving northward, and we should expect the latitude to increase (i.e. move towards 90 degrees).
Set the Configuration Parameters
We now need to specify the configuration parameters of the ekf_node by creating a YAML file.
Open a new terminal window, and type the following command to move to the basic_mobile_robot package:
colcon_cd basic_mobile_robot
cd config
gedit ekf_with_gps.yaml
Copy and paste this code inside the YAML file.
Save and close the file.
You can get a complete description of all the parameters on this page.
Create a Launch File
Open a new terminal window, and move to your launch folder.
colcon_cd basic_mobile_robot
cd launch
gedit basic_mobile_bot_v6.launch.py
Copy and paste this code into the file.
Save the file, and close it.
Build the Package
Now build the package by opening a terminal window, and typing the following command:
cd ~/dev_ws
colcon build --packages-select basic_mobile_robot
Launch the Robot
Open a new terminal, and launch the robot.
cd ~/dev_ws/
ros2 launch basic_mobile_robot basic_mobile_bot_v6.launch.py
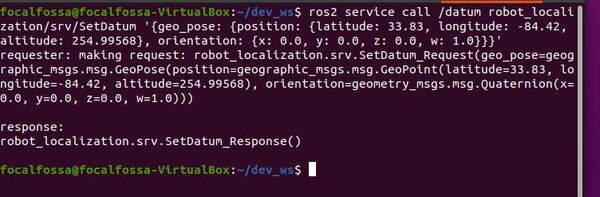
Call a ROS service to set the GPS’s origin for the navsat_transform node.
ros2 service call /datum robot_localization/srv/SetDatum '{geo_pose: {position: {latitude: 33.83, longitude: -84.42, altitude: 254.99568}, orientation: {x: 0.0, y: 0.0, z: 0.0, w: 1.0}}}'
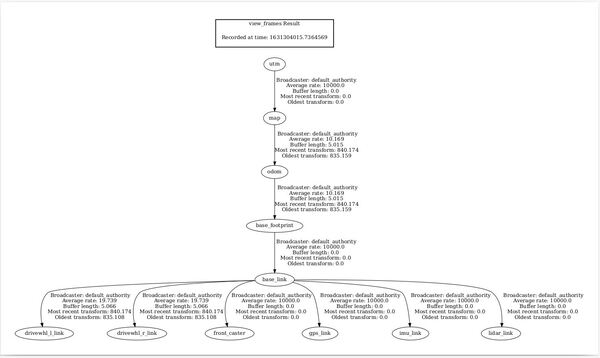
Now let’s check out the coordinate frames. Open a new terminal window, and type:
ros2 run tf2_tools view_frames.py
In newer versions of ROS 2, you might have to type:
ros2 run tf2_tools view_frames
In the current working directory, you will have a file called frames.pdf. Open that file.
evince frames.pdf
Here is what my coordinate transform (i.e. tf) tree looks like:
Check out the topics.
ros2 topic list
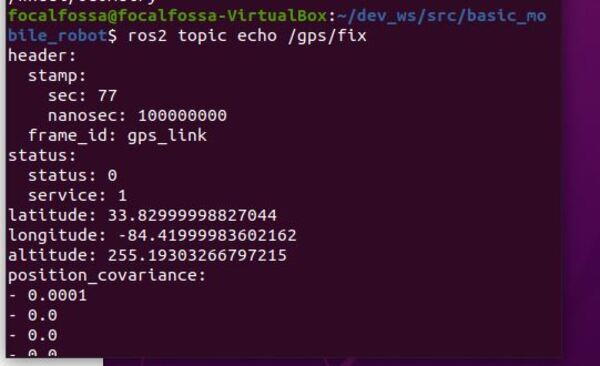
We can see the raw GPS data.
ros2 topic echo /gps/fix
We can see the GPS data after we have processed the raw GPS data through an Extended Kalman Filter.
ros2 topic echo /gps/filtered
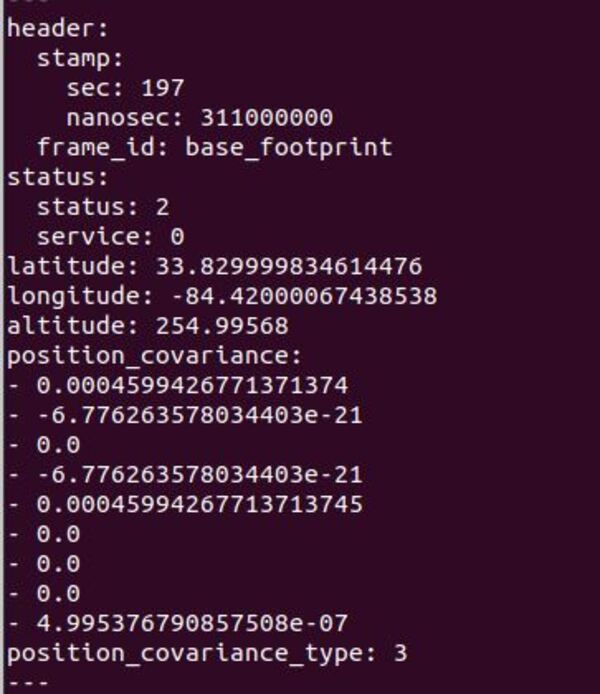
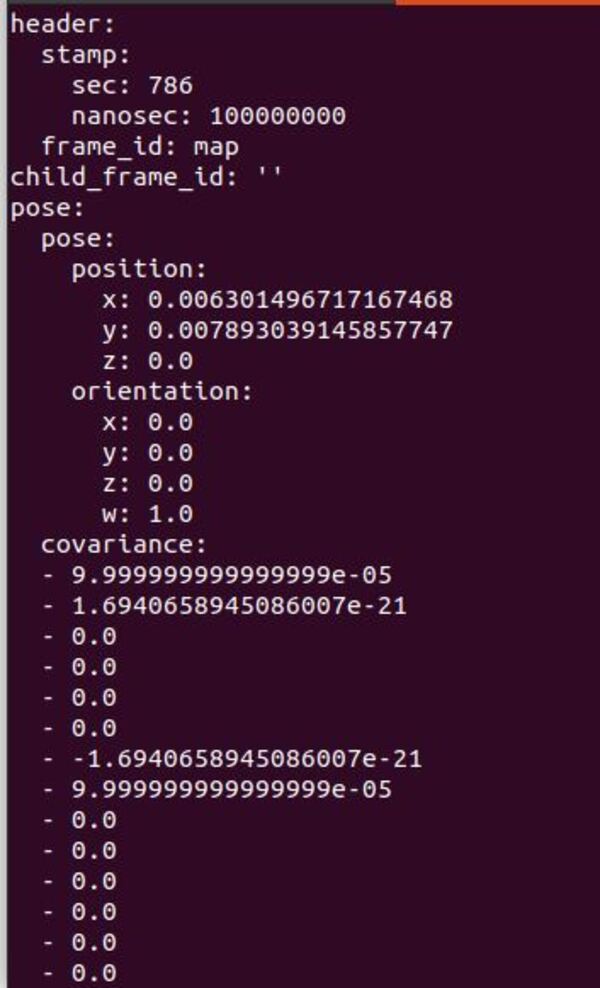
The pose of the robot in the map frame before data processing through an Extended Kalman Filter.
ros2 topic echo /odometry/gps
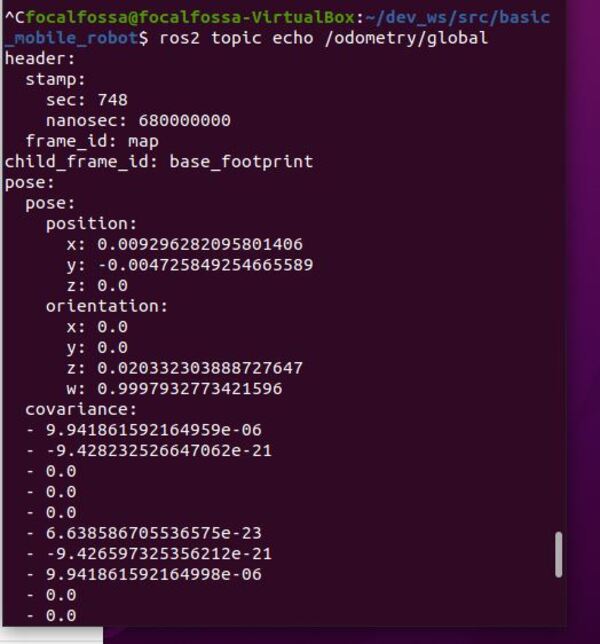
The pose of the robot in the map frame after data processing through an Extended Kalman Filter. This value below is a combination of wheel encoder information, IMU data, and GPS data.
ros2 topic echo /odometry/global
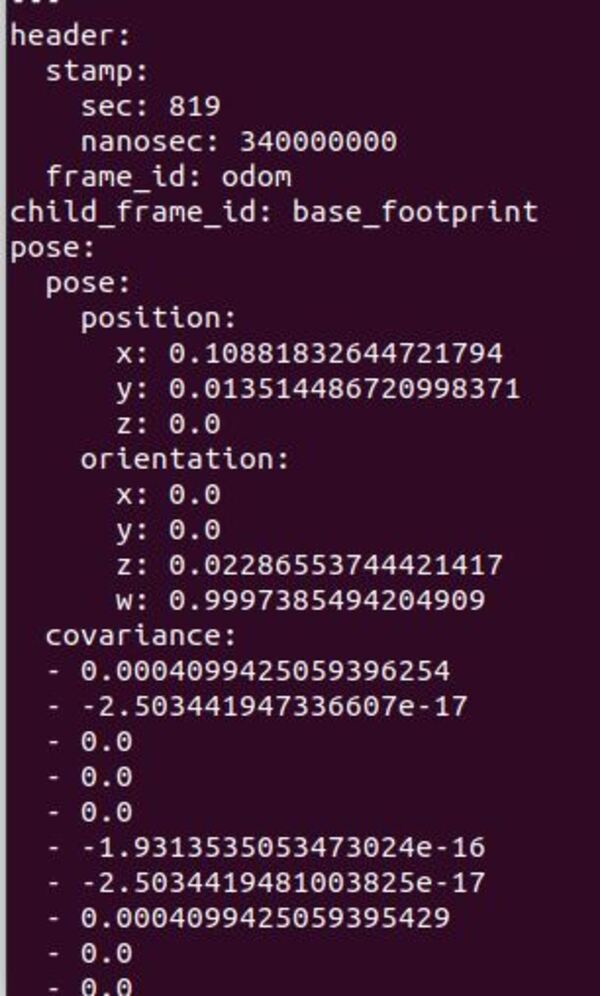
The pose of the robot with respect to the starting point of the robot (i.e. with respect to the odom frame). This value below is a combination of wheel encoder information and IMU data.
ros2 topic echo /odometry/local
To steer the robot, open a new terminal window, and type the following command:
rqt_robot_steering
If you go straight down the positive x-axis, you will notice that the latitude value is getting less negative. This trend makes sense given the robot’s eastward trajectory.
That’s it! Keep building!