Biometric Fingerprint Scanner | Image Processing Applications

In this post, I will discuss an application that relies heavily on image processing.

Biometric Fingerprint Scanner

Description

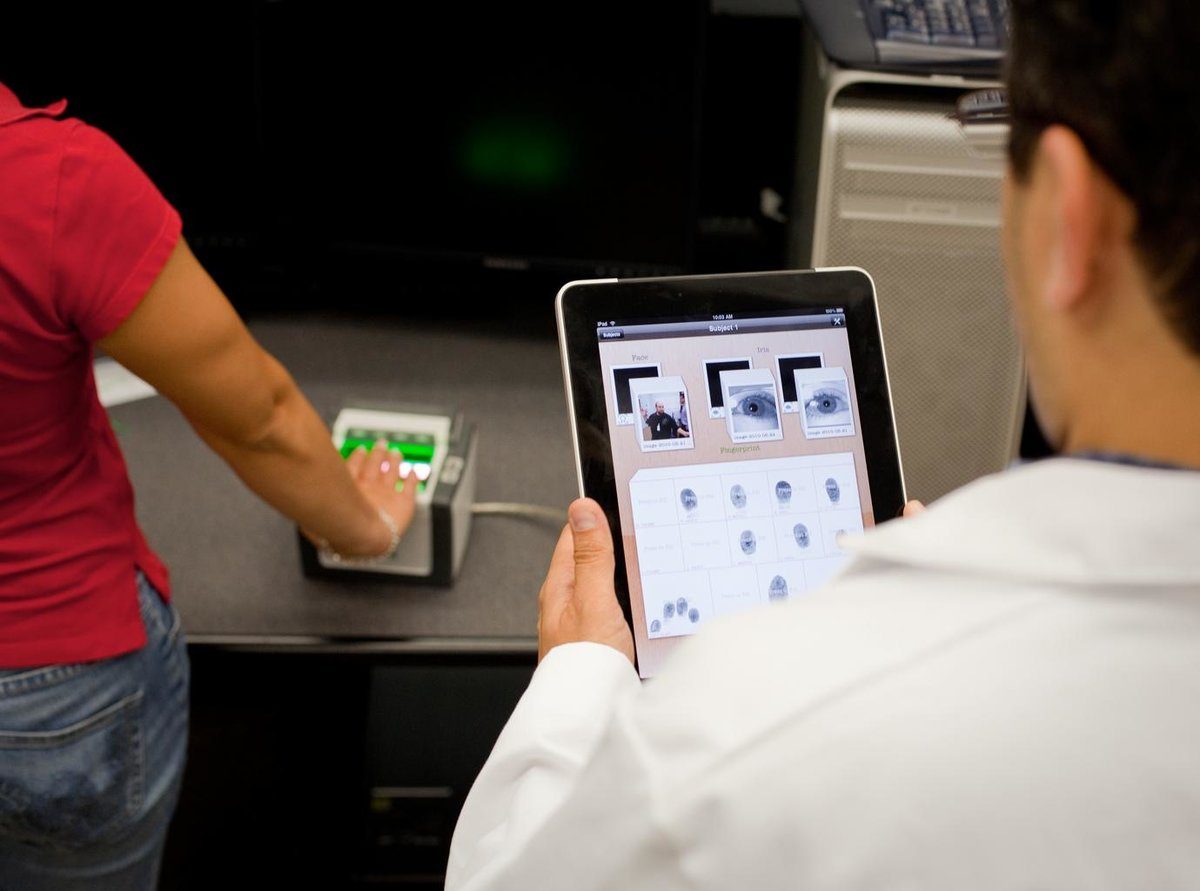
I am currently in an apartment complex that has no doorman. Instead, in order to enter the property, you have to scan your fingerprint on the fingerprint scanner next to the entry gate on the main walkway that enters the complex.

How It Works

In order to use the fingerprint scanner, I had to go to the administration for the apartment complex and have all of my fingerprints scanned. The receptionist took my hand and individually scanned each finger on both hands until clear digital images were produced of all my fingers. There were a number of times when the receptionist tried to scan one of my fingers, and the fingerprints failed to be read by the scanner. In these situations, I had to rotate my finger to the left and to the right until the scanner beeped, indicating that it had registered a clear digital image of my fingerprint. This whole process took about 20 minutes. 

After registering all of my fingerprints, I went to the front entry door to test if I was able to enter using my finger. I typically use my thumb to enter since it provides the biggest fingerprint image and is easier for the machine to read.

Once everything was all set up, I was able enter the building freely, using only my finger.

Strengths

The strength of the fingerprint scanning system is that it is totally keyless entry. I do not need to carry multiple keys in order to enter the building, the swimming pool, and the gym. Traditionally, I had to have separate keys for each of the doors that entered into common areas of the community. Now with the biometric fingerprint scanner all I needed to do was scan my fingerprint on any of the doors, and I could access anywhere in the complex. 

Keyless entry also comes in handy because I often lose my keys, or I forget my keys inside the house. Your fingers, fortunately, go wherever you go.

Another strength of using a biometric fingerprint scanner is that it is more environmentally friendly. For the creation of a key, metal needs to be extracted from the Earth somewhere. 

One final strength of the biometric fingerprint scanner is that it is easy when I have guests come to town. I do not need to create a spare key or give them a copy of my key. All I need to do is take them down to the administration and have their fingerprints registered.

Weaknesses

One of the main weaknesses of this keyless entry is that it is not sanitary. Not everybody has the cleanest hands. When everybody in the entire complex is touching the fingerprint scanner, bacteria can really build up. Facial recognition would be a good alternative to solving this problem because I wouldn’t actually have to touch anything upon entry. 

I’m also not sure how secure the fingerprint scanner is. Imagine somebody who has been evicted out of their apartment for failure to pay rent. There has to be an ironclad management to make sure that as soon as somebody is evicted from their apartment, his or her fingerprints are automatically removed from the system. 

Another weakness is that the fingerprint scanner is not flawless. Often I have to try five or even sometimes six times using different angles of my thumb and forefinger to register a successful reading to enter the door. The fingerprint scanner is highly sensitive to the way in which you put your finger on the scanner. A slight twist to the left or right might not register a successful reading. 

Also, for some odd reason, when I return from a long vacation, the fingerprint scanner never reads my fingerprints accurately. This happens because the administration likes to reset the fingerprint scanner every so often. When this happens, I have to go to the administration to re-register my fingerprints.

While I like the biometric fingerprint scanner, other techniques are a lot more foolproof. For example, typing in a PIN code will work virtually 100% of the time I try to open the door. Whereas with a fingerprint scanner, putting my fingerprint on the scanner opens the door at most 80 to 90% of the time on the first try.

How to Set Up Anaconda for Windows 10

In this post, I will show you how to set up Anaconda. Anaconda is a free, open-source distribution of Python (and R). The goal of Anaconda is to be a free “one-stop-shop” for all your Python data science and machine learning needs. It contains the key packages you need to build cool machine learning projects.

Requirements

Here are the requirements:

  • Set up Anaconda.
  • Set up Jupyter Notebook.
  • Install important libraries.
  • Learn basic Anaconda commands.

Directions

Install Anaconda

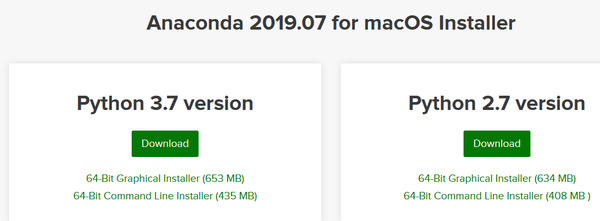
Go to the Anaconda website and click “Download.”

setting-up-anaconda-1

Choose the latest version of Python. In my case, that is Python 3.7. Click “Download” to download the Anaconda installer for your operating system type (i.e. Windows, macOS, or Linux). 

setting-up-anaconda-2

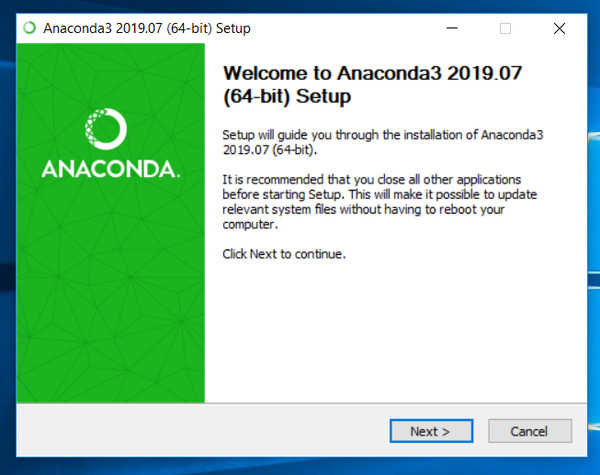
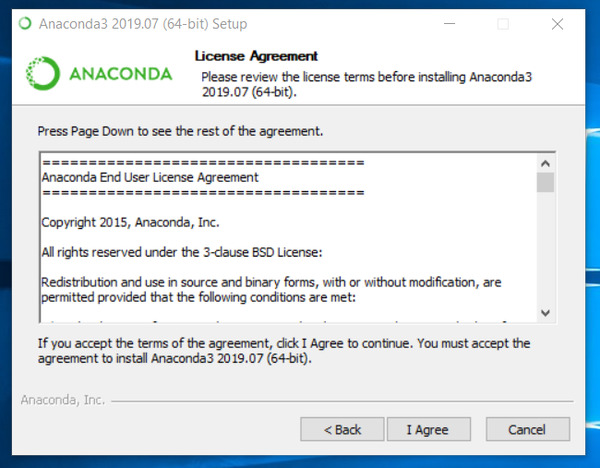
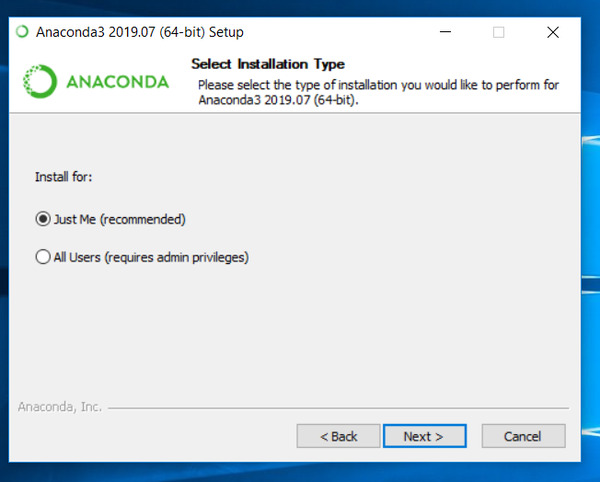
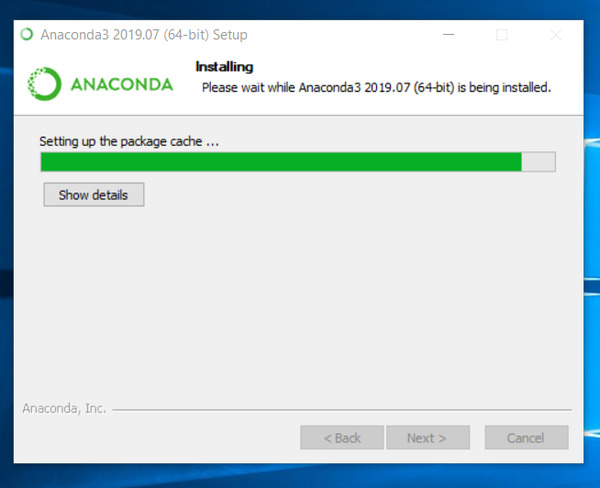
Follow the instructions to install the program:

setting-up-anaconda-3
setting-up-anaconda-4
setting-up-anaconda-5
setting-up-anaconda-6

Verify Anaconda is installed by searching for “Anaconda Navigator” on your computer.

Open Anaconda Navigator.

setting-up-anaconda-7

Follow the instructions here for creating a “Hello World” program. You can use Spyder, Jupyter Notebooks, or the Anaconda Prompt (terminal). If you use Jupyter Notebooks, you will need to open the notebooks in Firefox, Google Chrome or another web browser.

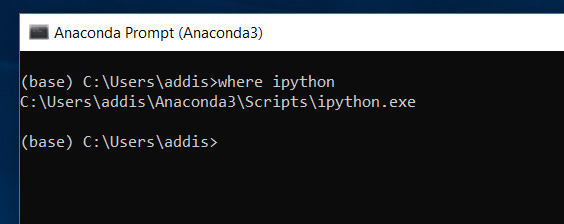
Check to make sure that you have IPython installed. Use the following command (in an Anaconda Prompt window) to check:

where ipython
setting-up-anaconda-8

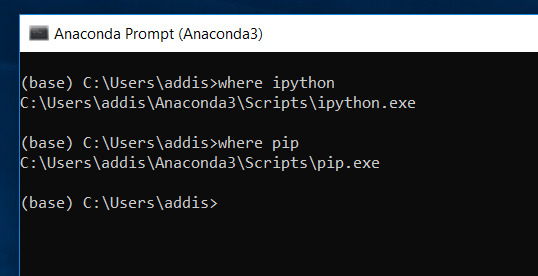
Make sure that you have pip installed. Pip is the package management system for Python.

where pip
setting-up-anaconda-9

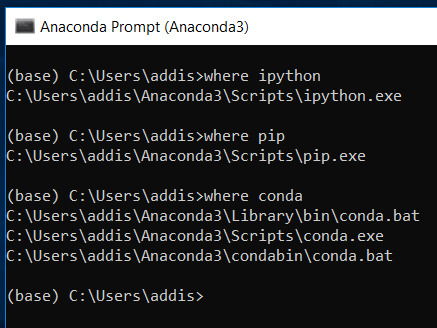
Make sure that you have conda installed. Conda is Anaconda’s package management system.

where conda
setting-up-anaconda-10

Install Some Libraries

Install OpenCV

To install OpenCV, use the following command in the Anaconda Prompt:

pip install opencv-contrib-python

Type the following command to get a list of packages and make sure opencv-contrib-python is installed.

conda list

Install dlib

Install cmake.

pip install cmake

Install the C++ library called dlib

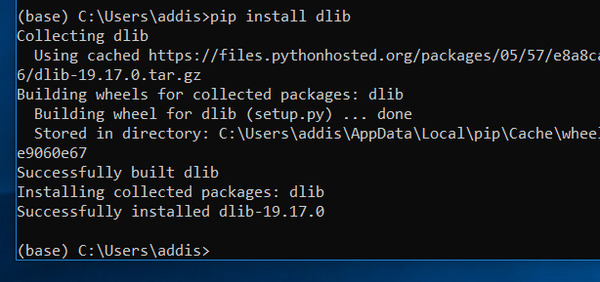
pip install dlib
setting-up-anaconda-11

Type the following command and take a look at the list to see if dlib is successfully installed:

conda list

Install Tesseract

Go to Tesseract at UB Mannheim.

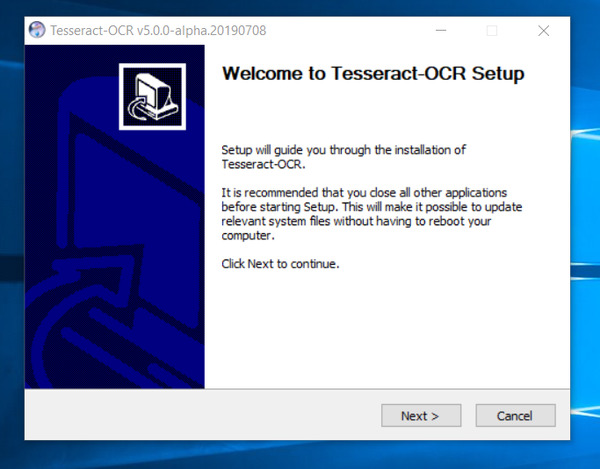
Download the Tesseract for your system.

Set it up by following the prompts.

setting-up-anaconda-12

Once Tesseract OCR is downloaded, find it on your system.

Copy the name of the file it is located in. In my case, that is:

C:\Program Files\Tesseract-OCR

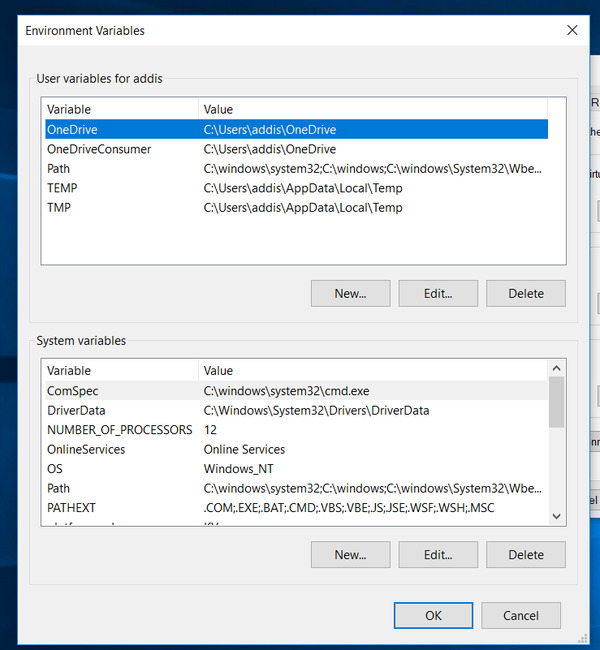
Search for “Environment Variables” on your computer.

setting-up-anaconda-13

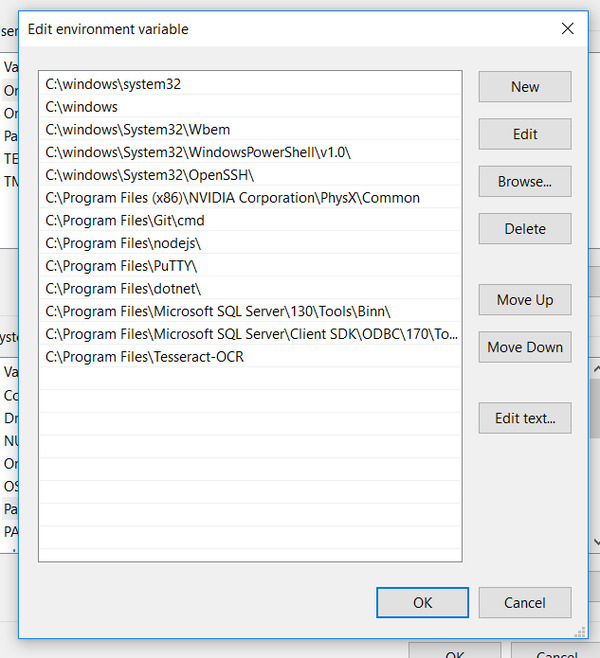
Under “System Variables,” click “Path,” and then click Edit.

Add the path: C:\Program Files\Tesseract-OCR

setting-up-anaconda-14

Click OK a few times to close all windows.

Open up the Anaconda Prompt.

Type this command to see if tesseract is installed on your system.

where tesseract

Now, apply the Python binding to the packages using the following commands:

pip install tesseract
pip install pytesseract

Install TensorFlow

Type the following command in the Anaconda Prompt:

pip install tensorflow

Install TensorFlow hub using this command:

pip install tensorflow-hub

Now install tflearn.

pip install tflearn

Now, install the Keras neural network library.

pip install keras

Install the Rest of the Libraries

Type the following commands to install the rest of the libraries:

pip install pillow
pip install SimpleITK

Learn Basic Anaconda Commands

Changing Directories

If you ever want to change directories to the D drive instead of the C drive, open Anaconda Prompt on your computer and type the following commands, in order

D:
cd D:\XXXX\XXXX\XXXX\XXXX

where D:\XXXX\XXXX\XXXX\XXXX is the file path.

Listing Directory Contents

Type the dir command to list the contents of a directory.

dir

Creating a Jupyter Notebook

Open Anaconda Prompt on your computer and type the following command:

jupyter notebook

Converting a Jupyter Notebook into Python Files

If you want to convert a Jupyter Notebook into Python files, change to that directory and type the following command:

jupyter nbconvert --to script *.ipynb

Congratulations if you made it this far! You have all the libraries installed that you need to do fundamental image processing and computer vision work in Python.