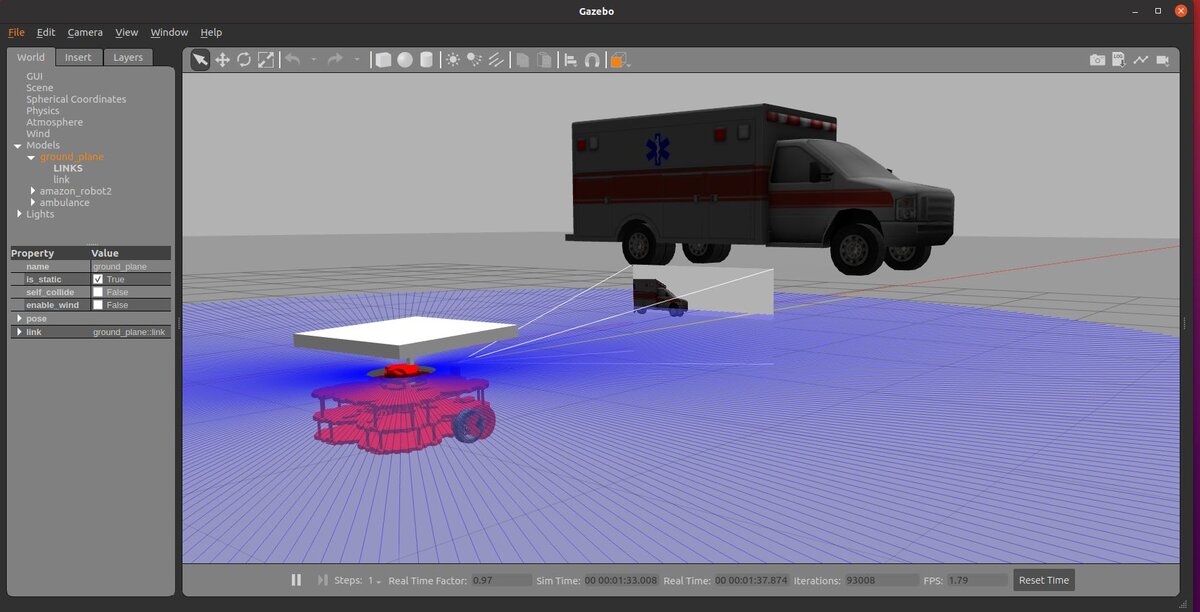
In the cover image, you can see a depth camera that was added to a simulated robot in Gazebo. An depth camera is useful for performing tasks like object recognition, facial recognition, obstacle avoidance, and more.
Adding a depth camera is important if you’re planning to build a robust robot for the real-world that will use the ROS 2 Navigation stack.
To add a simulated depth camera to your SDF file, you will need to add code that looks like this:
  <!-- *********************** DEPTH CAMERA ******************************  -->
  <!-- The depth camera (e.g. Intel Realsense camera). -->
  <link name="camera_depth_frame">
    <pose>0.12 0 0.65 -1.5708 0 -1.5708</pose>
  </link>

  <link name="camera_link">
    <pose>0.12 0 0.65 0 0 0</pose>

    <visual name="camera_visual">
      <pose>-0.005 0 0 0 0 0</pose>
      <geometry>
        <box>
          <size>0.015 0.08 0.022</size>
        </box>
      </geometry>
      <material>
        <ambient>0 0 0 1.0</ambient>
        <diffuse>0 0 0 1.0</diffuse>
        <specular>0.0 0.0 0.0 1.0</specular>
        <emissive>0.0 0.0 0.0 1.0</emissive>
      </material>
    </visual>

    <sensor name="depth_camera" type="camera">
      <always_on>true</always_on>
      <visualize>false</visualize>
      <update_rate>5</update_rate>
      <camera name="camera">
        <horizontal_fov>1.02974</horizontal_fov>
        <image>
          <width>640</width>
          <height>480</height>
          <format>R8G8B8</format>
        </image>
        <clip>
          <near>0.02</near>
          <far>10</far>
        </clip>
        <noise>
          <type>gaussian</type>
          <!-- Noise is sampled independently per pixel on each frame.
               That pixel's noise value is added to each of its color
                channels, which at that point lie in the range [0,1]. -->
          <mean>0.0</mean>
          <stddev>0.007</stddev>
        </noise>
      </camera>
      <plugin name="depth_camera_controller" filename="libgazebo_ros_camera.so">
        <camera_name>depth_camera</camera_name>
        <frame_name>camera_depth_frame</frame_name>
        <hack_baseline>0</hack_baseline>
        <min_depth>0.001</min_depth>
      </plugin>
    </sensor>
  </link>
When you launch RViz along with Gazebo, you will need to add the Image sensor option so that you can visualize the depth camera output. Be sure to select “Best Effort” for the reliability policy.
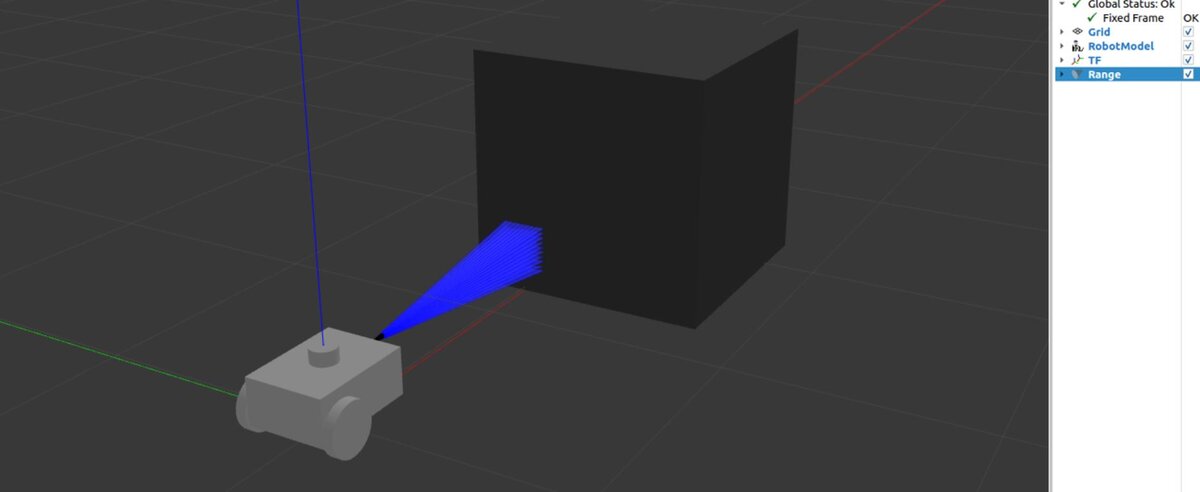
In the cover image you can see an ultrasonic sensor that was added to a simulated robot in Gazebo. An ultrasonic sensor is useful because, unlike LIDAR, an ultrasonic sensor can detect glass. Detection of glass is important if you’re planning to build a robot for the real-world that will use the ROS 2 Navigation stack.
To add a simulated ultrasonic sensor to your SDF file, you will need to add code that looks like this:
When you launch RViz along with Gazebo, you will need to add the Range sensor option so that you can visualize the ultrasonic sensor output. Be sure to select “Best Effort” for the reliability policy.
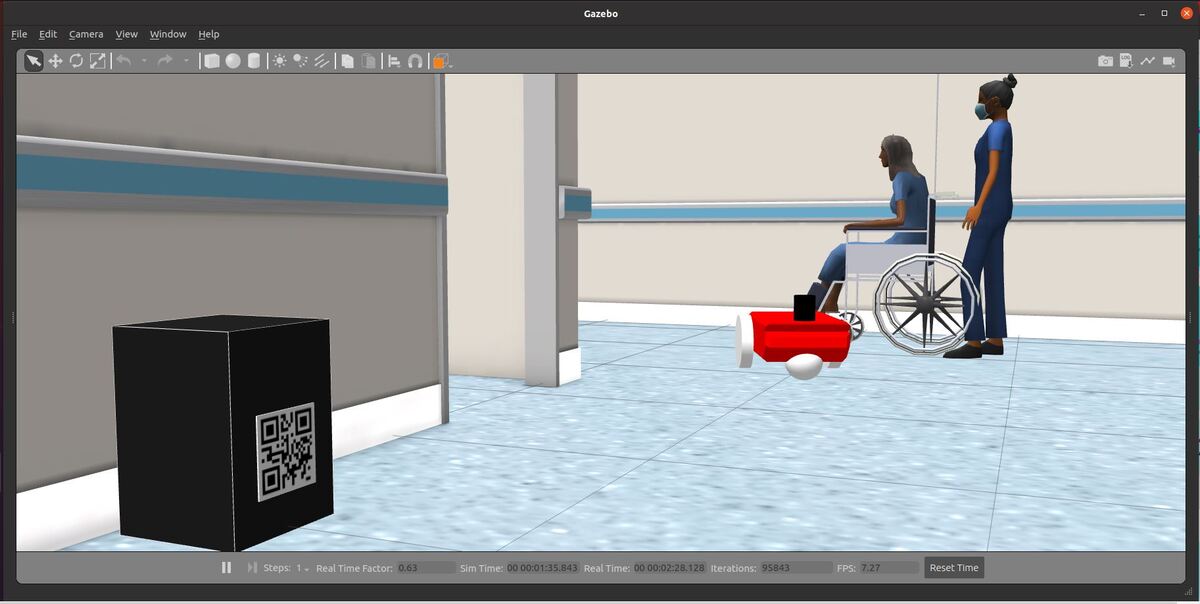
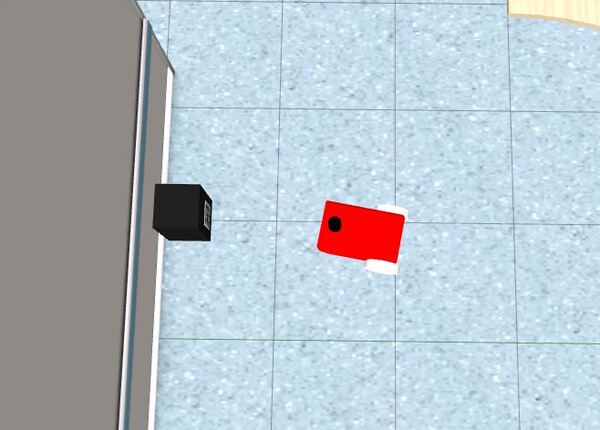
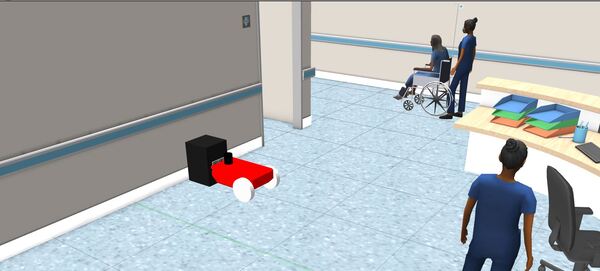
In this tutorial, I will show you how to create an autonomous docking application for a two-wheeled mobile robot. When the battery gets low, we want the robot to automatically go to a charging station (also known as docking station) to recharge its battery.
The two most common ways to implement autonomous docking are:
Infrared Receiver and Transmitter (e.g. iRobot Roomba)
In this tutorial, we will assume we know the location of the battery charging station. You can use what we develop here as a template for ARTag or Infrared-based automatic docking.
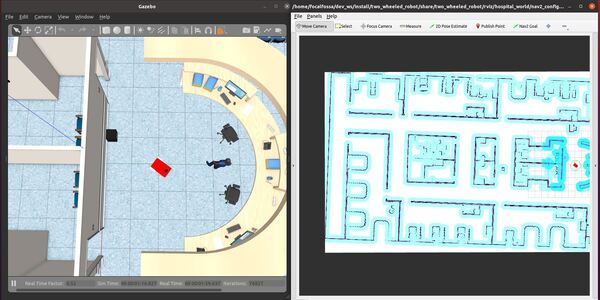
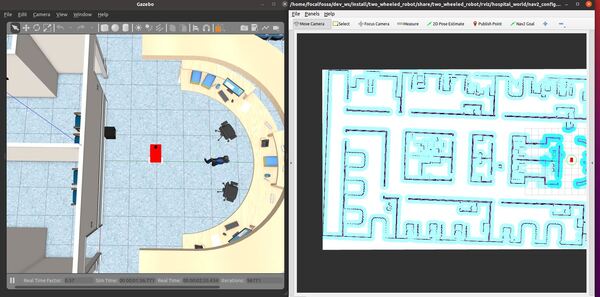
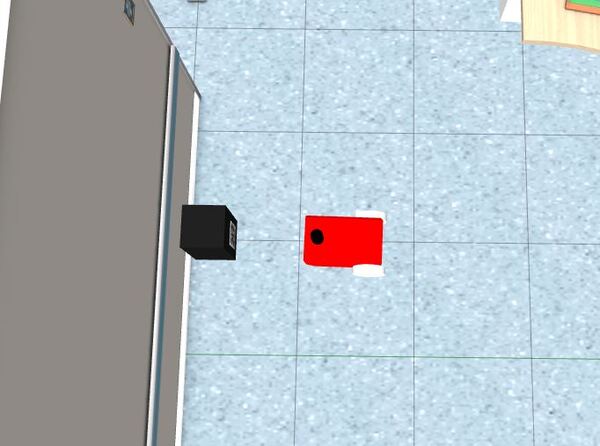
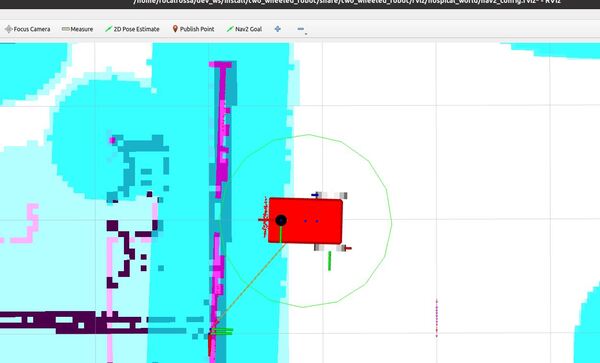
Here is the output you will be able to achieve after completing this tutorial:
Now, let’s create a script that will make the mobile robot navigate to the charging dock when the battery gets low. Credit to this GitHub repository for the inspiration for this method.
On a high level, the algorithm does the following:
Navigate to the perpendicular line to the ARTag.
Adjust heading.
Go to a waypoint in front of the charging dock.
Adjust heading.
Go straight to the ARTag.
Open a terminal window, and go to the following folder.
cd ~/dev_ws/src/two_wheeled_robot/scripts
gedit navigate_to_charging_dock_v2.py
#! /usr/bin/env python3
"""
Description:
Navigate to a charging dock once the battery gets low.
-------
Subscription Topics:
Current battery state
/battery_status - sensor_msgs/BatteryState
2D Pose of the base_link of the robot in the map frame
/map_to_base_link_pose2d – std_msgs/Float64MultiArray
-------
Publishing Topics:
Velocity command to navigate to the charging dock.
/cmd_vel - geometry_msgs/Twist
-------
Author: Addison Sears-Collins
Website: AutomaticAddison.com
Date: November 26, 2021
"""
import math # Math library
import time # Time library
from rclpy.duration import Duration # Handles time for ROS 2
import rclpy # Python client library for ROS 2
from rclpy.node import Node # Handles the creation of nodes
from rclpy.executors import MultiThreadedExecutor
from robot_navigator import BasicNavigator, NavigationResult # Helper module
from geometry_msgs.msg import PoseStamped # Pose with ref frame and timestamp
from geometry_msgs.msg import Twist # Velocity command
from sensor_msgs.msg import BatteryState # Battery status
from std_msgs.msg import Float64MultiArray # Handle float64 arrays
# Holds the current pose of the robot
current_x = 0.0
current_y = 2.0
current_yaw_angle = 0.0
# Holds the current state of the battery
this_battery_state = BatteryState()
prev_battery_state = BatteryState()
# Flag for detecting the change in the battery state
low_battery = False
low_battery_min_threshold = 0.25
class ConnectToChargingDockNavigator(Node):
"""
Navigates and connects to the charging dock
"""
def __init__(self):
# Initialize the class using the constructor
super().__init__('connect_to_charging_dock_navigator')
# Create a publisher
# This node publishes the desired linear and angular velocity of the robot
self.publisher_cmd_vel = self.create_publisher(
Twist,
'/cmd_vel',
10)
timer_period = 0.1
self.timer = self.create_timer(timer_period, self.navigate_to_dock)
# Holds the goal poses of the robot
self.goal_x = [-1.0, -1.0, -1.0]
self.goal_y = [2.0, 1.4, 0.83]
self.goal_yaw_angle = [-1.5708, -1.5708, -1.5708]
# Keep track of which goal we're headed towards
self.goal_idx = 0
# Declare linear and angular velocities
self.linear_velocity = 0.08 # meters per second
self.angular_velocity = 0.1 # radians per second
# Declare distance metrics in meters
self.distance_goal_tolerance = 0.05
self.reached_distance_goal = False
# Declare angle metrics in radians
self.heading_tolerance = 0.05
self.yaw_goal_tolerance = 0.05
def navigate_to_dock(self):
global low_battery
if low_battery == False:
return None
self.get_logger().info('Navigating to the charging dock...')
# Launch the ROS 2 Navigation Stack
navigator = BasicNavigator()
# Wait for navigation to fully activate. Use this line if autostart is set to true.
navigator.waitUntilNav2Active()
# If desired, you can change or load the map as well
# navigator.changeMap('/path/to/map.yaml')
# You may use the navigator to clear or obtain costmaps
# navigator.clearAllCostmaps() # also have clearLocalCostmap() and clearGlobalCostmap()
# global_costmap = navigator.getGlobalCostmap()
# local_costmap = navigator.getLocalCostmap()
# Set the robot's goal pose
goal_pose = PoseStamped()
goal_pose.header.frame_id = 'map'
goal_pose.header.stamp = navigator.get_clock().now().to_msg()
goal_pose.pose.position.x = 0.0
goal_pose.pose.position.y = 2.0
goal_pose.pose.position.z = 0.25
goal_pose.pose.orientation.x = 0.0
goal_pose.pose.orientation.y = 0.0
goal_pose.pose.orientation.z = 0.0
goal_pose.pose.orientation.w = 1.0
# Go to the goal pose
navigator.goToPose(goal_pose)
i = 0
# Keep doing stuff as long as the robot is moving towards the goal
while not navigator.isNavComplete():
# Do something with the feedback
i = i + 1
feedback = navigator.getFeedback()
if feedback and i % 5 == 0:
print('Distance remaining: ' + '{:.2f}'.format(
feedback.distance_remaining) + ' meters.')
# Some navigation timeout to demo cancellation
#if Duration.from_msg(feedback.navigation_time) > Duration(seconds=1800.0):
#navigator.cancelNav()
# Do something depending on the return code
result = navigator.getResult()
if result == NavigationResult.SUCCEEDED:
print('Successfully reached charging dock staging area...')
low_battery = False
self.connect_to_dock()
elif result == NavigationResult.CANCELED:
print('Goal was canceled!')
elif result == NavigationResult.FAILED:
print('Goal failed!')
else:
print('Goal has an invalid return status!')
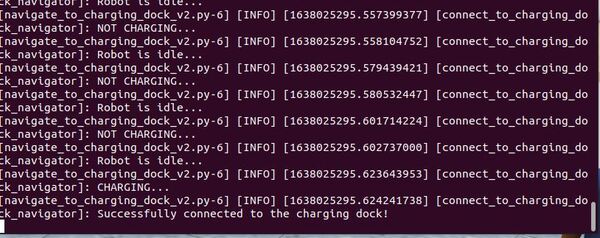
def connect_to_dock(self):
# While the battery is not charging
while this_battery_state.power_supply_status != 1:
# Publish the current battery state
self.get_logger().info('NOT CHARGING...')
if (self.goal_idx == 0):
self.go_to_line()
self.get_logger().info('Going to perpendicular line to ARTag...')
elif (self.goal_idx == 1):
self.go_to_line()
self.get_logger().info('Going to perpendicular line to ARTag...')
elif (self.goal_idx == 2):
self.go_to_artag()
self.get_logger().info('Going straight to ARTag...')
else:
# Stop the robot
cmd_vel_msg = Twist()
cmd_vel_msg.linear.x = 0.0
cmd_vel_msg.angular.z = 0.0
self.publisher_cmd_vel.publish(cmd_vel_msg)
self.get_logger().info('Robot is idle...')
time.sleep(0.02)
self.get_logger().info('CHARGING...')
self.get_logger().info('Successfully connected to the charging dock!')
def get_distance_to_goal(self):
"""
Get the distance between the current x,y coordinate and the desired x,y coordinate
The unit is meters.
"""
distance_to_goal = math.sqrt(math.pow(self.goal_x[self.goal_idx] - current_x, 2) + math.pow(
self.goal_y[self.goal_idx] - current_y, 2))
return distance_to_goal
def get_heading_error(self):
"""
Get the heading error in radians
"""
delta_x = self.goal_x[self.goal_idx] - current_x
delta_y = self.goal_y[self.goal_idx] - current_y
desired_heading = math.atan2(delta_y, delta_x)
heading_error = desired_heading - current_yaw_angle
# Make sure the heading error falls within -PI to PI range
if (heading_error > math.pi):
heading_error = heading_error - (2 * math.pi)
if (heading_error < -math.pi):
heading_error = heading_error + (2 * math.pi)
return heading_error
def get_radians_to_goal(self):
"""
Get the yaw goal angle error in radians
"""
yaw_goal_angle_error = self.goal_yaw_angle[self.goal_idx] - current_yaw_angle
return yaw_goal_angle_error
def go_to_line(self):
"""
Go to the line that is perpendicular to the AR tag
"""
distance_to_goal = self.get_distance_to_goal()
heading_error = self.get_heading_error()
yaw_goal_error = self.get_radians_to_goal()
cmd_vel_msg = Twist()
# If we are not yet at the position goal
if (math.fabs(distance_to_goal) > self.distance_goal_tolerance and self.reached_distance_goal == False):
# If the robot's heading is off, fix it
if (math.fabs(heading_error) > self.heading_tolerance):
self.get_logger().info(str(heading_error))
if heading_error > 0:
cmd_vel_msg.angular.z = self.angular_velocity
else:
cmd_vel_msg.angular.z = -self.angular_velocity
else:
cmd_vel_msg.linear.x = self.linear_velocity
# Orient towards the yaw goal angle
elif (math.fabs(yaw_goal_error) > self.yaw_goal_tolerance):
if yaw_goal_error > 0:
cmd_vel_msg.angular.z = self.angular_velocity
else:
cmd_vel_msg.angular.z = -self.angular_velocity
self.reached_distance_goal = True
# Goal achieved, go to the next goal
else:
# Go to the next goal
self.goal_idx = self.goal_idx + 1
self.get_logger().info('Arrived at perpendicular line. Going straight to ARTag...')
self.reached_distance_goal = False
# Publish the velocity message
self.publisher_cmd_vel.publish(cmd_vel_msg)
def go_to_artag(self):
"""
Go straight to the AR tag
"""
distance_to_goal = self.get_distance_to_goal()
heading_error = self.get_heading_error()
yaw_goal_error = self.get_radians_to_goal()
cmd_vel_msg = Twist()
# If we are not yet at the position goal
if (math.fabs(distance_to_goal) > self.distance_goal_tolerance and self.reached_distance_goal == False):
# If the robot's heading is off, fix it
if (math.fabs(heading_error) > self.heading_tolerance):
if heading_error > 0:
cmd_vel_msg.angular.z = self.angular_velocity
else:
cmd_vel_msg.angular.z = -self.angular_velocity
else:
cmd_vel_msg.linear.x = self.linear_velocity
# Orient towards the yaw goal angle
elif (math.fabs(yaw_goal_error) > self.yaw_goal_tolerance):
if yaw_goal_error > 0:
cmd_vel_msg.angular.z = self.angular_velocity
else:
cmd_vel_msg.angular.z = -self.angular_velocity
self.reached_distance_goal = True
# Goal achieved, go to the next goal
else:
# Go to the next goal
self.goal_idx = self.goal_idx + 1
self.get_logger().info('Arrived at the charging dock...')
self.reached_distance_goal = True
# Publish the velocity message
self.publisher_cmd_vel.publish(cmd_vel_msg)
class BatteryStateSubscriber(Node):
"""
Subscriber node to the current battery state
"""
def __init__(self):
# Initialize the class using the constructor
super().__init__('battery_state_subscriber')
# Create a subscriber
# This node subscribes to messages of type
# sensor_msgs/BatteryState
self.subscription_battery_state = self.create_subscription(
BatteryState,
'/battery_status',
self.get_battery_state,
10)
def get_battery_state(self, msg):
"""
Update the current battery state.
"""
global this_battery_state
global prev_battery_state
global low_battery
prev_battery_state = this_battery_state
this_battery_state = msg
# Check for low battery
if prev_battery_state.percentage >= low_battery_min_threshold and this_battery_state.percentage < low_battery_min_threshold:
low_battery = True
class PoseSubscriber(Node):
"""
Subscriber node to the current 2D pose of the robot
"""
def __init__(self):
# Initialize the class using the constructor
super().__init__('pose_subscriber')
# Create a subscriber
# This node subscribes to messages of type
# std_msgs/Float64MultiArray
self.subscription_pose = self.create_subscription(
Float64MultiArray,
'/map_to_base_link_pose2d',
self.get_pose,
1)
def get_pose(self, msg):
"""
Update the current 2D pose.
"""
global current_x
global current_y
global current_yaw_angle
current_2d_pose = msg.data
current_x = current_2d_pose[0]
current_y = current_2d_pose[1]
current_yaw_angle = current_2d_pose[2]
def main(args=None):
"""
Entry point for the program.
"""
# Initialize the rclpy library
rclpy.init(args=args)
try:
# Create the nodes
connect_to_charging_dock_navigator = ConnectToChargingDockNavigator()
battery_state_subscriber = BatteryStateSubscriber()
pose_subscriber = PoseSubscriber()
# Set up mulithreading
executor = MultiThreadedExecutor(num_threads=4)
executor.add_node(connect_to_charging_dock_navigator)
executor.add_node(battery_state_subscriber)
executor.add_node(pose_subscriber)
try:
# Spin the nodes to execute the callbacks
executor.spin()
finally:
# Shutdown the nodes
executor.shutdown()
connect_to_charging_dock_navigator.destroy_node()
battery_state_subscriber.destroy_node()
pose_subscriber.destroy_node()
finally:
# Shutdown
rclpy.shutdown()
if __name__ == '__main__':
main()
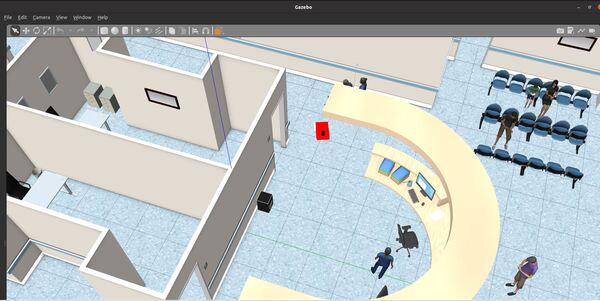
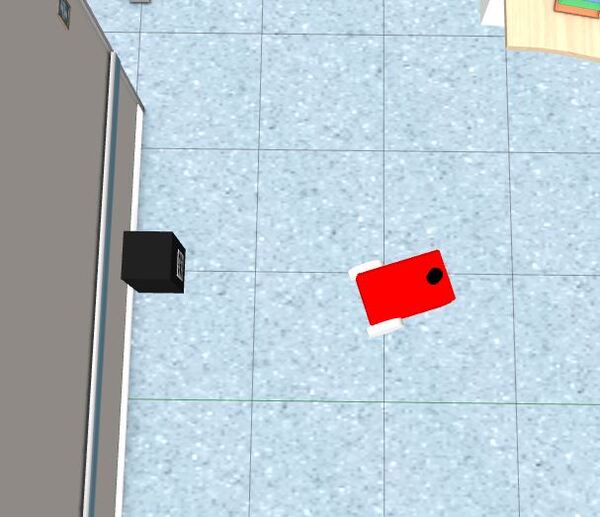
The robot will plan a path to the staging area and then move along that path.
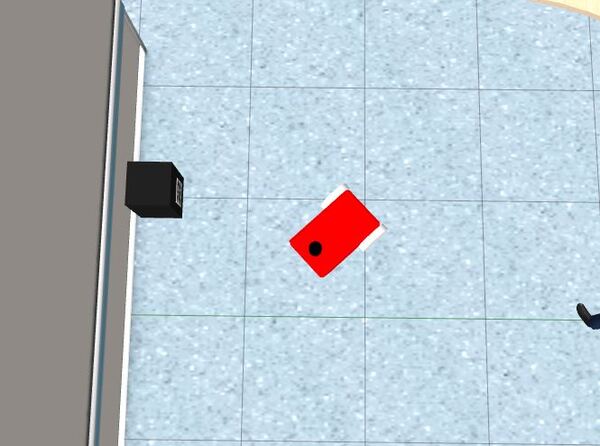
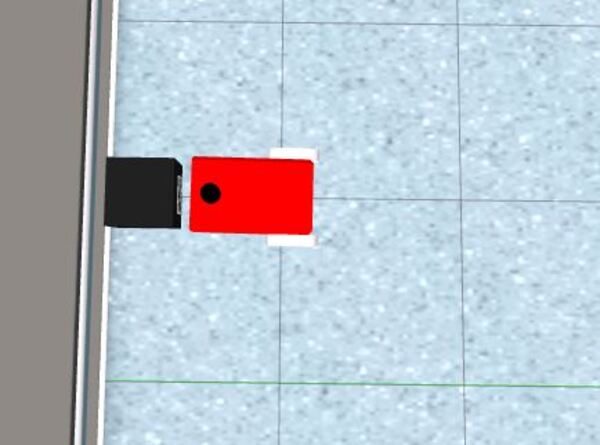
Once the robot reaches the staging area, the robot will navigate to the charging dock (i.e. ARTag) using the algorithm we developed earlier in this post.
Once the robot has reached the charging dock, press CTRL + C to stop the /battery_status publisher, and type:
ArUco Marker or AR Tag Automatic Docking References
If you are interested in taking this application a step further, you can use ArUco Marker or AR Tag-based navigation to return to the docking station. You will need to have a camera on your robot.
The key is to use OpenCV’s aruco.estimatePoseSingleMarkers(…) method, which returns the pose of an ArUco marker relative to the camera reference frame. Once you know that, you can use tf to calculate the pose of the ArUco marker relative to the base_link frame. You then modify the algorithm we wrote above to center the base_link frame with the ArUco tag.
Infrared-based Automatic Docking References
I did not use infrared receivers and transmitters in this tutorial, but if you’re interested in using this technique, below are some helpful links to get you started.