In this tutorial, we will go over how to create a C++ publisher for ROS 2.
In ROS 2 (Robot Operating System 2), a C++ publisher is a program (written in C++) that sends messages across the ROS network to other parts of the system.
The official instructions for creating a publisher are here, but I will walk you through the entire process, step by step.
We will be following the ROS 2 C++ Style Guide.
Let’s get started!
Prerequisites
- You have created a ROS 2 workspace.
- You have created a ROS 2 package.
- You have configured the package.xml and CMakeLists.txt file as explained in the middle of this blog post.
- You have Visual Studio code installed.
Directions
Open a terminal, and type these commands to open VS Code.
cd ~/ros2_wscode .Go to View -> Extensions
Search for the “Doxygen Documentation Generator” extension.
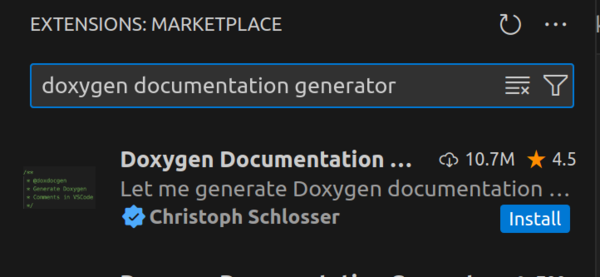
Install it.
Write the Code
Go back to the Explorer (Ctrl + Shift + E).
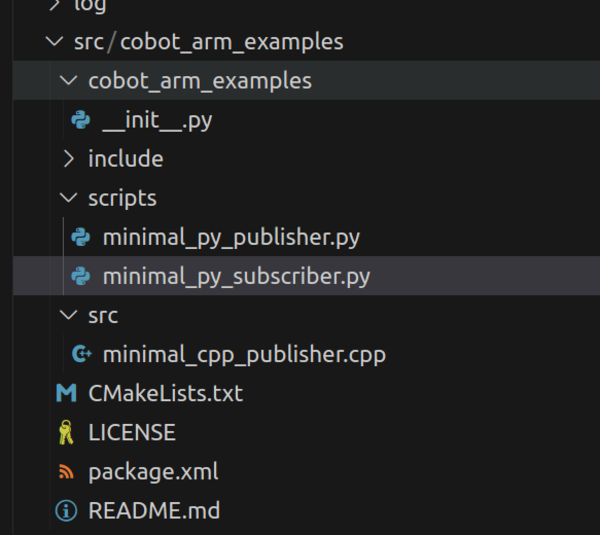
Right-click on the src folder to create a new file called “minimal_cpp_publisher.cpp”.
Type the following code inside minimal_cpp_publisher.cpp:
/**
 * @file minimal_cpp_publisher.cpp
 * @brief Demonstrates publishing string messages to a ROS 2 topic.
 *
 * Description: Demonstrates the basics of publishing messages within the ROS 2 framework.
 * The core functionality of this publisher is to repeatedly send out string messages
 * at a fixed frequency.
 *
 * -------
 * Subscription Topics:
 *   None
 * -------
 * Publishing Topics:
 *   String message
 *   /topic_cpp - std_msgs/String
 * -------
 * @author Addison Sears-Collins
 * @date 2024-02-12
 */

#include "rclcpp/rclcpp.hpp" // ROS 2 C++ client library for node creation and management
#include "std_msgs/msg/string.hpp" // Standard message type for string messages

using namespace std::chrono_literals; // Enables the specification of a time duration

/**
 * @class MinimalPublisher
 * @brief Defines a minimal ROS 2 publisher node.
 *
 * This class inherits from rclcpp::Node and demonstrates creating a publisher,
 * publishing messages, and using a timer callback in ROS 2.
 */
class MinimalPublisher : public rclcpp::Node
{
public:
    /**
     * @brief Constructs a MinimalPublisher node.
     *
     * Sets up a publisher for 'std_msgs::msg::String' messages on the "topic_cpp" topic
     * and initializes a timer to call the timerCallback method.
     */
    MinimalPublisher() : Node("minimal_publisher"), count_(0)
    {
        // Create a publisher object for sending string messages on the "topic_cpp" topic
        // with a queue size of 10.
        publisher_ = create_publisher<std_msgs::msg::String>("topic_cpp", 10);

	    // Set up a timer to call the timerCallback function
	    timer_ = create_wall_timer(500ms, std::bind(&MinimalPublisher::timerCallback, this));
        RCLCPP_INFO(get_logger(), "Publishing at 2 Hz");
    }

    /**
     * @brief Timer callback function.
     *
     * This method is called at a fixed interval. It publishes a string message
     * containing "Hello World" followed by a sequence number.
     *
     *  @return Void.
     */
    void timerCallback()
    {
        // Create a new String message object.
        auto message = std_msgs::msg::String();
        message.data = "Hello World! " +  std::to_string(count_++);

		// Publish the message
        publisher_->publish(message);
    }

private:
    // Member variables.
    size_t count_; // A counter to keep track of the number of messages published.
    rclcpp::Publisher<std_msgs::msg::String>::SharedPtr publisher_; // The publisher object.
    rclcpp::TimerBase::SharedPtr timer_; // Timer for scheduling the publishing task.
};

/**
 * @brief Main function.
 *
 * Initializes the ROS 2 system and runs the minimal_publisher node. It keeps the node
 * alive until it is manually terminated.
 */
int main(int argc, char * argv[])
{

  // Initialize ROS 2.
  rclcpp::init(argc, argv);

  // Create an instance of the MinimalPublisher node and keep it running.
  auto minimal_publisher_node = std::make_shared<MinimalPublisher>();
  rclcpp::spin(minimal_publisher_node);

  // Shutdown ROS 2 upon node termination.
  rclcpp::shutdown();

  // End of program.
  return 0;
}
Configure CMakeLists.txt
Now we need to modify the CMakeLists.txt file inside the package so that the ROS 2 system will be able to find the cost we just wrote.
Open up the CMakeLists.txt file that is inside the package.
Make it look like this:
cmake_minimum_required(VERSION 3.8)
project(cobot_arm_examples)

# Check if the compiler being used is GNU's C++ compiler (g++) or Clang.
# Add compiler flags for all targets that will be defined later in the
# CMakeLists file. These flags enable extra warnings to help catch
# potential issues in the code.
# Add options to the compilation process
if(CMAKE_COMPILER_IS_GNUCXX OR CMAKE_CXX_COMPILER_ID MATCHES "Clang")
  add_compile_options(-Wall -Wextra -Wpedantic)
endif()

# Locate and configure packages required by the project.
find_package(ament_cmake REQUIRED)
find_package(ament_cmake_python REQUIRED)
find_package(rclcpp REQUIRED)
find_package(rclpy REQUIRED)
find_package(std_msgs REQUIRED)

# Define a CMake variable named dependencies that lists all
# ROS 2 packages and other dependencies the project requires.
set(dependencies
  rclcpp
  std_msgs
)

# Add the specified directories to the list of paths that the compiler
# uses to search for header files. This is important for C++
# projects where you have custom header files that are not located
# in the standard system include paths.
include_directories(
  include
)

# Tells CMake to create an executable target named minimal_cpp_publisher
# from the source file src/minimal_cpp_publisher.cpp. Also make sure CMake
# knows about the program's dependencies.
add_executable(minimal_cpp_publisher src/minimal_cpp_publisher.cpp)
ament_target_dependencies(minimal_cpp_publisher ${dependencies})

add_executable(minimal_cpp_subscriber src/minimal_cpp_subscriber.cpp)
ament_target_dependencies(minimal_cpp_subscriber ${dependencies})

# Copy necessary files to designated locations in the project
install (
  DIRECTORY cobot_arm_examples scripts
  DESTINATION share/${PROJECT_NAME}
)

install(
  DIRECTORY include/
  DESTINATION include
)

# Install cpp executables
install(
  TARGETS
  minimal_cpp_publisher
  minimal_cpp_subscriber
  DESTINATION lib/${PROJECT_NAME}
)

# Install Python modules for import
ament_python_install_package(${PROJECT_NAME})

# Install Python executables
install(
  PROGRAMS
  scripts/minimal_py_publisher.py
  scripts/minimal_py_subscriber.py
  #scripts/example3.py
  #scripts/example4.py
  #scripts/example5.py
  #scripts/example6.py
  #scripts/example7.py
  DESTINATION lib/${PROJECT_NAME}
)

# Automates the process of setting up linting for the package, which
# is the process of running tools that analyze the code for potential
# errors, style issues, and other discrepancies that do not adhere to
# specified coding standards or best practices.
if(BUILD_TESTING)
  find_package(ament_lint_auto REQUIRED)
  # the following line skips the linter which checks for copyrights
  # comment the line when a copyright and license is added to all source files
  set(ament_cmake_copyright_FOUND TRUE)
  # the following line skips cpplint (only works in a git repo)
  # comment the line when this package is in a git repo and when
  # a copyright and license is added to all source files
  set(ament_cmake_cpplint_FOUND TRUE)
  ament_lint_auto_find_test_dependencies()
endif()

# Used to export include directories of a package so that they can be easily
# included by other packages that depend on this package.
ament_export_include_directories(include)

# Generate and install all the necessary CMake and environment hooks that
# allow other packages to find and use this package.
ament_package()
Configure package.xml
Now we need to configure the package.xml file.
Open the package.xml file, and make sure it looks like this:
<?xml version="1.0"?>
<?xml-model href="http://download.ros.org/schema/package_format3.xsd" schematypens="http://www.w3.org/2001/XMLSchema"?>
<package format="3">
  <name>cobot_arm_examples</name>
  <version>0.0.0</version>
  <description>Basic examples demonstrating ROS 2</description>
  <maintainer email="automaticaddison@example.com">Addison Sears-Collins</maintainer>
  <license>Apache-2.0</license>

  <!--Specify build tools that are needed to compile the package-->
  <buildtool_depend>ament_cmake</buildtool_depend>
  <buildtool_depend>ament_cmake_python</buildtool_depend>

  <!--Declares package dependencies that are required for building the package-->
  <depend>rclcpp</depend>
  <depend>rclpy</depend>
  <depend>std_msgs</depend>

  <!--Specifies dependencies that are only needed for testing the package-->
  <test_depend>ament_lint_auto</test_depend>
  <test_depend>ament_lint_common</test_depend>

  <export>
    <build_type>ament_cmake</build_type>
  </export>
</package>
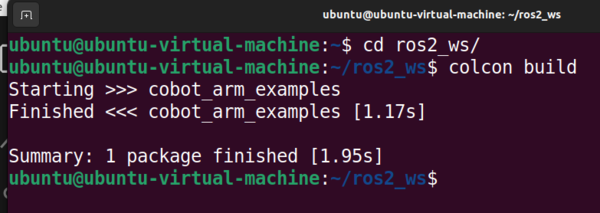
Build the Workspace
cd ~/ros2_wscolcon buildsource ~/.bashrcRun the Node
ros2 run cobot_arm_examples minimal_cpp_publisher 
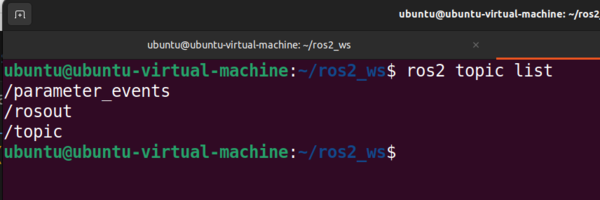
Let’s check out the list of topics.
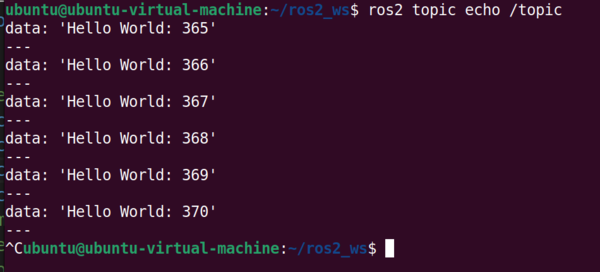
ros2 topic listLet’s check out the data coming over the topic_cpp topic.
ros2 topic echo /topic_cpp 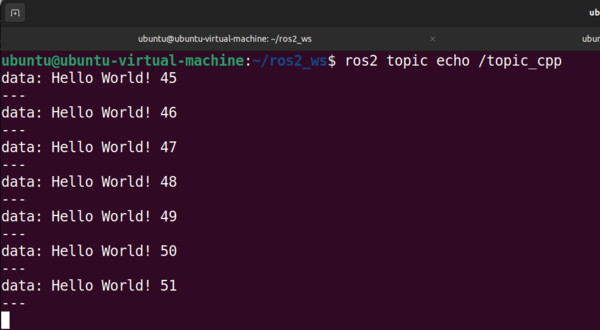
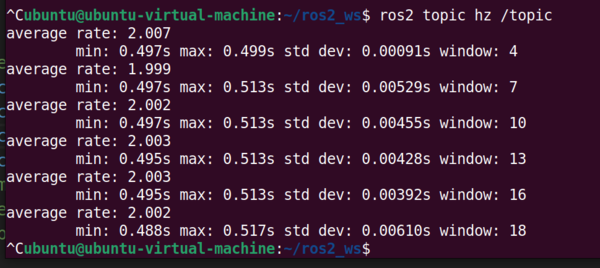
ros2 topic hz /topic_cppros2 topic info /topic_cpp --verbose