I have mentioned before that C++ and Python are the most popular languages in robotics.
C++ is the best language if you want great performance. For example, if you want to write a robot vision algorithm that needs to run in real time, use C++.
But if you are looking to quickly prototype something and don’t want the headaches of having errors fire all over your program because you forgot a semicolon, you should use Python.
While Python uses more computing resources than C++, it is much simpler and far more intuitive. And, for this reason, if you search for “robotics software engineer” on the job site Indeed or on LinkedIn, you will find that the majority of job listings require you to know Python.
In this tutorial, we will learn the fundamentals of Python. The fundamentals aren’t the most exciting stuff…that’s why they are called fundamentals.
The fundamentals never change (or only change ever so slightly). Getting your head around these fundamentals will help you immensely when you learn ROS, the most popular robot programming platform.
We will go over the pieces of the language you will use again and again as you program robots. This post covers the fundamental building blocks of every Python program you will ever write.
Python is a really big language, but you don’t have to know every tiny little detail to get started building powerful robots. In fact, there are really only a handful of things that you will use repeatedly.
If you have been following me for a while, you know that I’m a firm believer in the Pareto Principle (also known as the 80/20 rule). Don’t waste your time memorizing the language. I tried doing that early on in my career, only to realize later on that I wasted a lot of time learning stuff I never used again.
My advice is to get the basics of Python down, and then go out and build robots. Any time you see something you don’t understand, just look it up on Google. That’s how we learn in robotics.
This post has a lot of steps, but be patient and take your time as you work all the way through it. By the end, you will have a firm grounding in the most important pieces of Python and will be ready to get out there and start coding up real robots in the wild.
Let’s get started!
Table of Contents
- Install Python in Ubuntu Linux
- Install Pip
- Create a Virtual Environment
- Create Your First Program (“Hello World”)
- Create Your Second Program
- Make Your Second Program Executable
- Do Basic Calculations
- Comparison Operators
- Create Variables
- Work With Lists
- Create a Set
- Create a Tuple
- Create a Dictionary
- Using If-Else Statements to Make Decisions
- Do Stuff Again and Again Using Loops
- –For Loops
- –While Loops
- Accepting User Input
- Using String Functions
- Using Functions
- When Things Go Wrong: Handling Exceptions
- Get Comfortable With Classes and Objects
- –What is an Object?
- –What is a Class?
- A Basic Constructor
- Using Inheritance
- Overriding a Function
- Working With Files: Create, Write, Close, Append, and Read
- –Create a New File
- –Write to a File and Close
- –Append Data to a File and Read
- Working With Modules
- Practice Polymorphism
- Conclusion
You Will Need
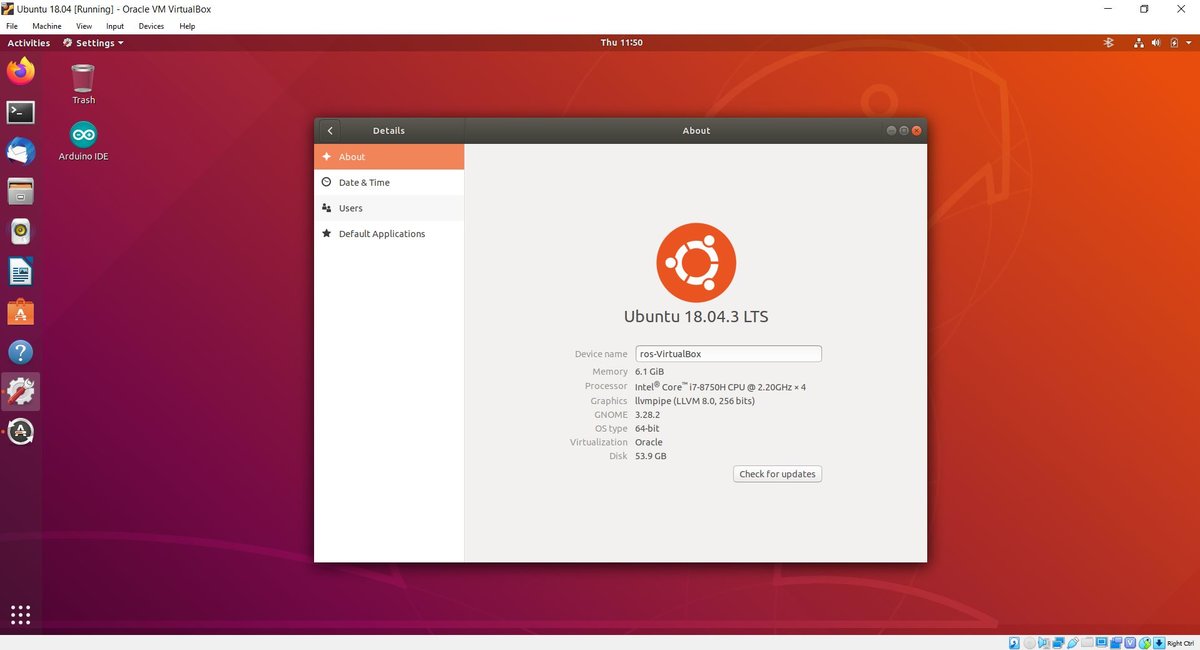
- You have ROS running on Ubuntu Linux (I’m running my Ubuntu Linux inside a virtual machine on Windows 10)
- You have a basic understanding of Linux commands.
Directions
Install Python in Ubuntu Linux
To install Python, open a new terminal window and type:
sudo apt-get install python python3
Find out what the default version of Python is on your system by typing:
python

The default is version 2.7.15 and higher.

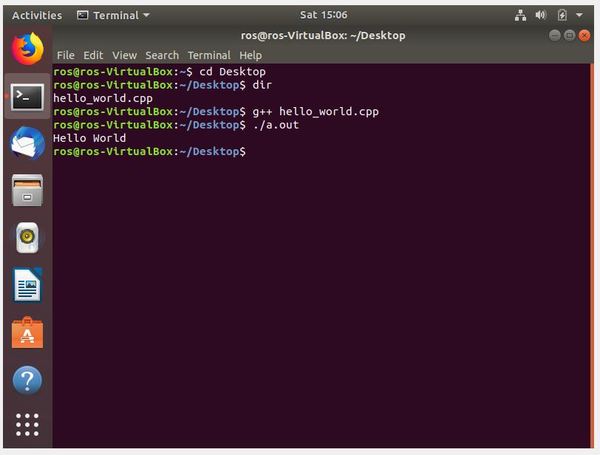
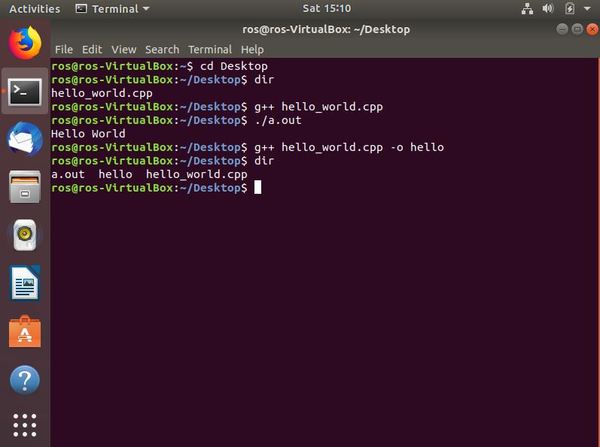
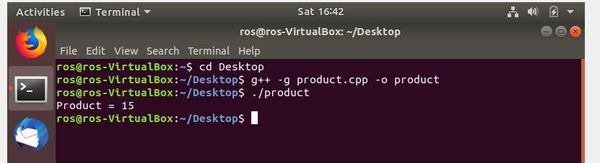
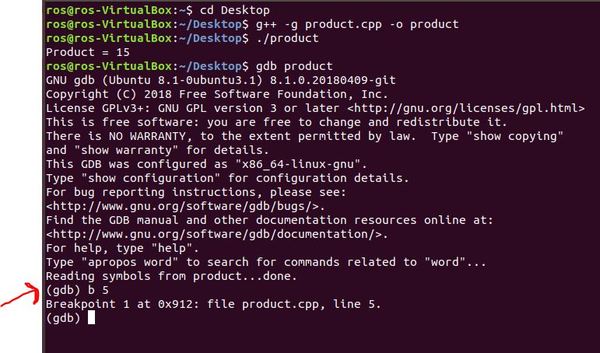
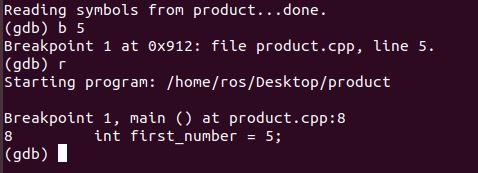
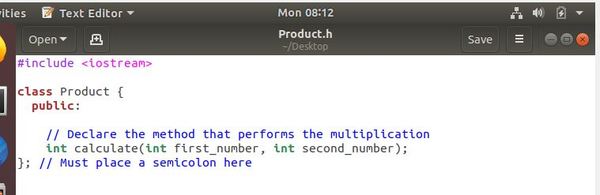
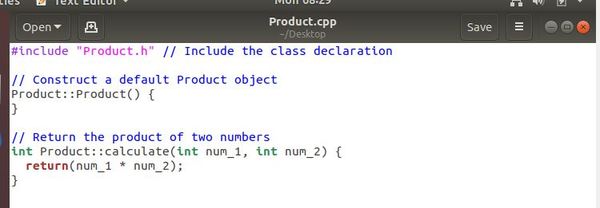
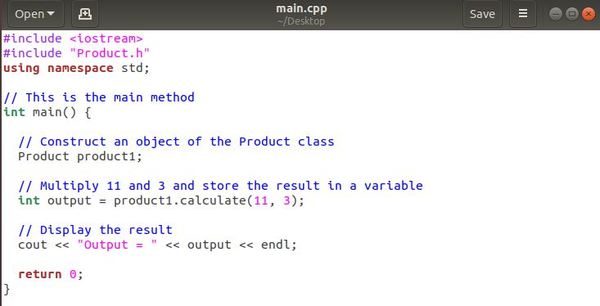
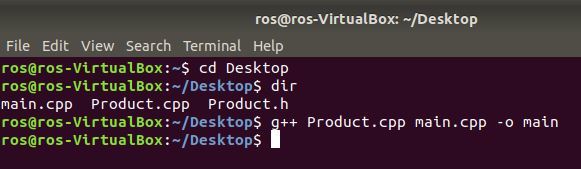
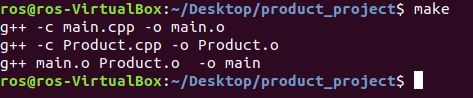
C++ is a “compiled” language. A compiled language is one in which you write code (i.e. source code), translate (i.e. compile) that code into code that your machine can understand, and then run that code. Python skips the compilation step, and instead runs (i.e. interprets) the source code directly without that compilation step.
To find out where the Python interpreter is located, type this command.
which python

You can also type the following command to get the location of the interpreter as well as the documentation and other Python-associated files.
whereis python

Install Pip
Let’s begin by installing pip. Pip is a tool that will help us manage software packages for Python.
Software packages are bundles of code written by someone else that are designed to solve a specific problem. Why write code to solve a specific problem from scratch, when someone else has already written code to solve that exact same problem? That is where software packages come into play. They prevent you from having to reinvent the wheel.
Open up a fresh Linux terminal window.
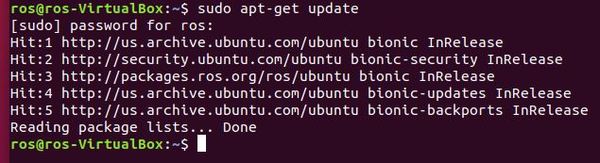
Type the following command to update the list of available packages that can be installed on your system.
sudo apt-get update
Type your password.
Upgrade all the packages. The -y flag in the following command is used to confirm to our computer that we want to upgrade all the packages.
sudo apt-get -y upgrade
Type the following command to check the version of Python you have installed.
python3 --version
My version is 3.6.9. Your version might be different. That’s fine.
Now, let’s install pip.
sudo apt-get install -y python3-pip
If at any point in the future you want to install a Python-related package using pip, you can use the following command:
pip3 install package_name
For example, to install the scientific computing package called Numpy, you would type:
pip3 install numpy
Create a Virtual Environment
In this section, we will set up a virtual environment. You can think of a virtual environment as an independent workspace with its own set of libraries, settings, packages, and programming language versions installed.
For example, you might have a project that needs to run using an older version of Python, like Python 2.7. You might have another project that requires Python 3.7. Setting up separate virtual environments for each project will make sure that the projects stay isolated from one another.
Let’s install the virtual environment package.
sudo apt-get install -y python3-venv
With the software installed, we can now create the virtual environment using the following command. The dot(.) in front of py3venv makes the directory a hidden directory (the dot is optional):
python3 -m venv .py3venv
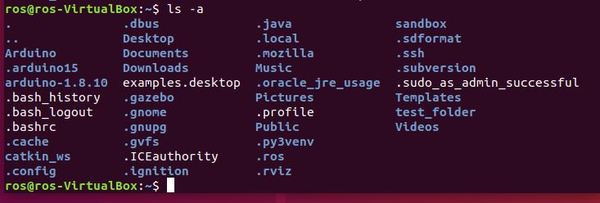
Type the following command to get a list of all the directories. You should see the .py3venv folder there.
ls -a
List all the contents inside the .py3venv folder.
ls .py3venv/

Now that the virtual environment has been created, we can activate it using the following command:
source ~/.py3venv/bin/activate

Look what happened. There is a prefix on the current line that has the name of the virtual environment we created. This prefix means that the .py3venv virtual environment is currently active.
When a virtual environment is active that means that when we create software programs here in Python, these programs will use the settings and packages of just this virtual environment.
Keep your terminal window open. We’re not ready to close it just yet. Move on to the next section so that we can write our first program in Python.
Create Your First Program (“Hello World”)
Let’s create our first program. Programs in Python are often called scripts. In this post, sometimes I will say scripts and sometimes I will say programs. Both words mean the same thing.
Create a new directory named python_for_robotics.
mkdir python_for_robotics

Move to that directory.
cd python_for_robotics
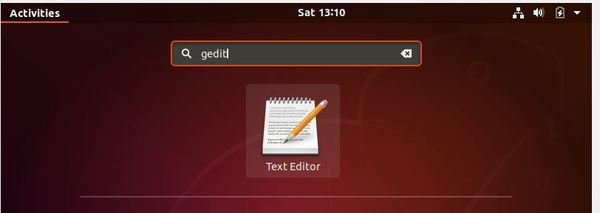
Create a new program named hello_world.py using gedit, the built-in text editor in Linux.
gedit hello_world.py
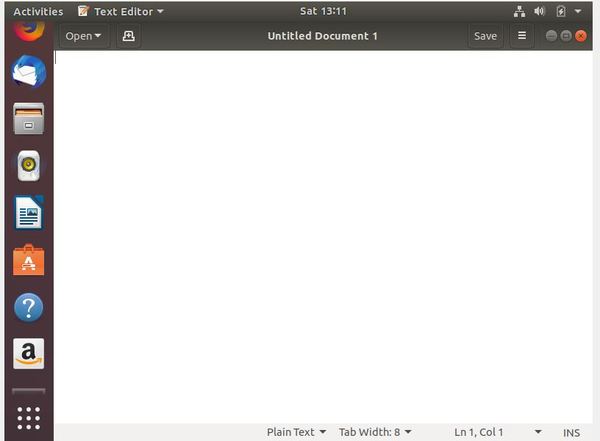
A blank screen should pop up. This is where we will write our program.
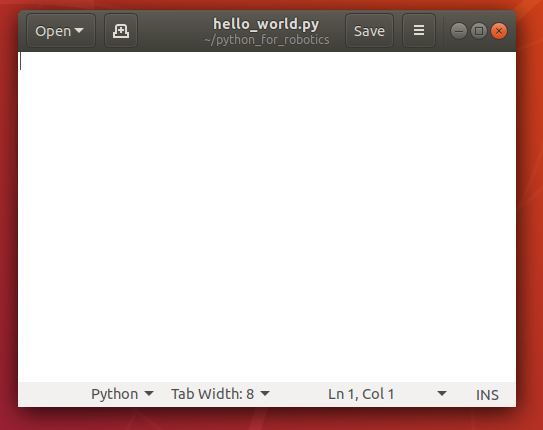
Now, type the following Python code in the text editor.
#!/usr/bin/env python

print("Hello, World!")
Click Save, and then close the text editor.
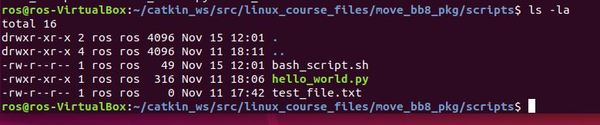
If you type ls and press Enter, you will see your program there.

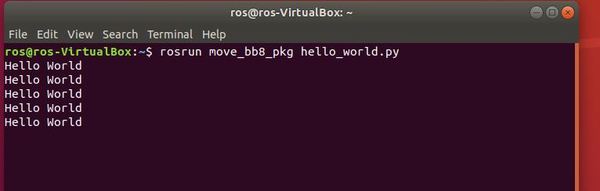
Now, run the program by typing:
python hello_world.py
Here is the output you should get:

Let’s leave the virtual environment now by typing:
deactivate
You should see that the virtual environment prefix is gone.
Now return to your home directory.
cd ~
Create Your Second Program
For our second program in Python, we will write a program that prints “Hello World” to the screen again. Open up a terminal window and type:
python
Now type:
print(“Hello World”)
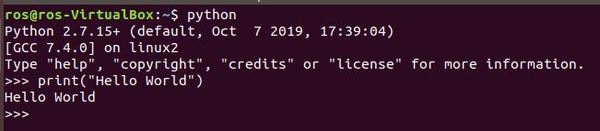
What I showed you above is how to write a program directly inside the Python interpreter. You can keep writing different Python commands as you please….you write a line of code, and the interpreter executes that code, one line at a time.
The more common way to write Python programs is to create Python files (called scripts) containing lots of lines of code. This is exactly what we did in the previous section. You then run those files using the Python interpreter.
Python files end with the .py extension. Let’s write another Python script now.
Open a terminal window.
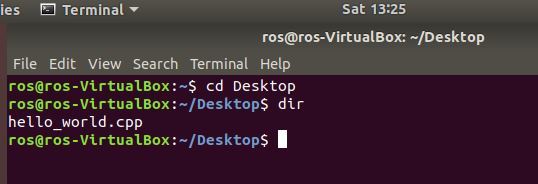
Move to your Desktop.
cd Desktop
Type gedit to open up the Linux text editor.
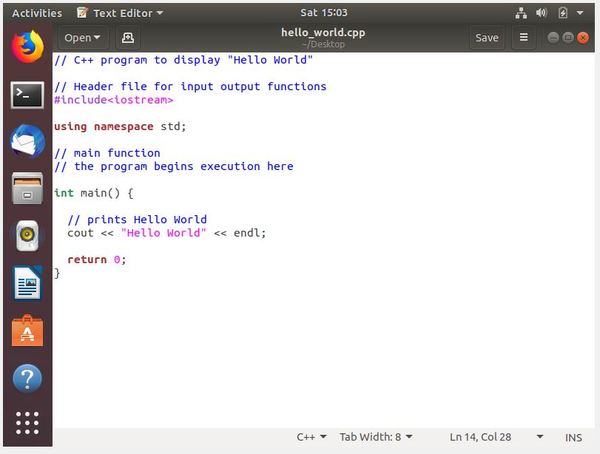
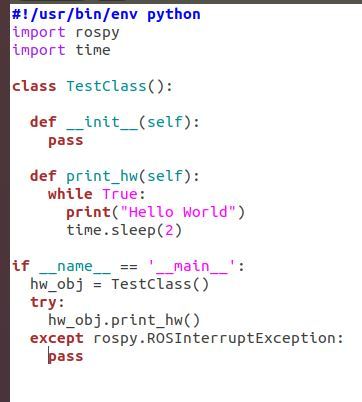
Type the following program, and save it as hello_world.py. I am following the Google Python Style Guide.
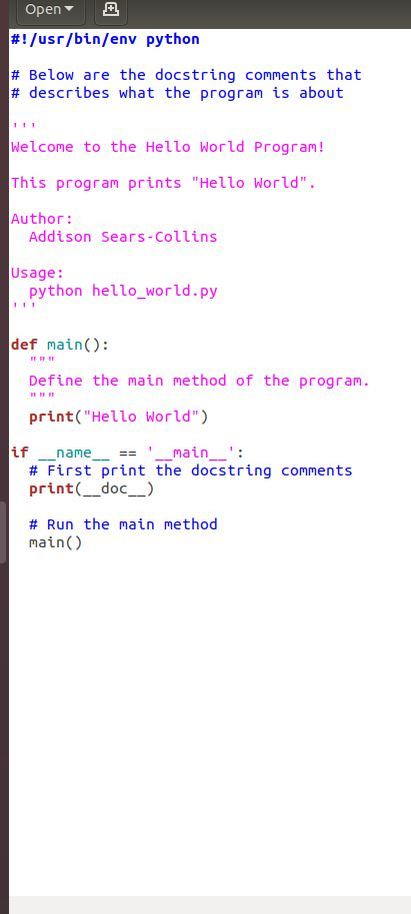
The program above might look a little intimidating at first. Don’t worry about trying to understand everything at this stage. We’ll cover everything by the end of this post.
Here is what you should know right now:
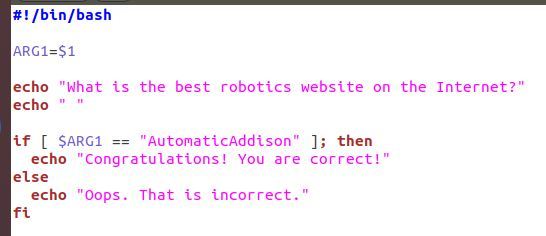
- In the first line I told the program where to find the Python interpreter (#! /usr/bin/env python). That line is known as Shebang.
- Then I wrote some comments to tell what the program does and what command to type in the terminal window to run the code (python hello_world.py).
- Then I defined a method named main. This is where we implement our code.
- The final block of code prints the comments and runs the main method.
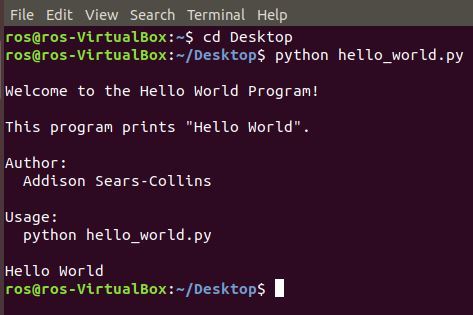
Now, let’s exit the terminal.
Open a terminal window and move to the directory where hello_world.py is located (mine is on the Desktop).
Run the program.
python hello_world.py
Make Your Second Program Executable
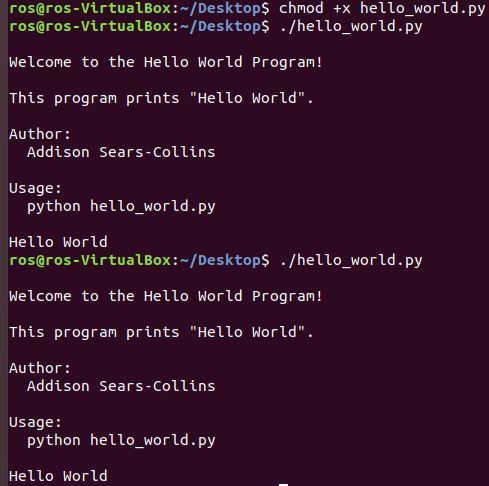
Another way is to run a program is to make a Python script executable, similar to what we do in C++.
Open a new terminal window, move to where your hello_world.py program is located, and type:
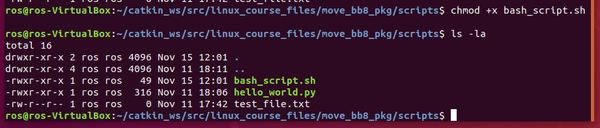
chmod +x hello_world.py
./hello_world.py
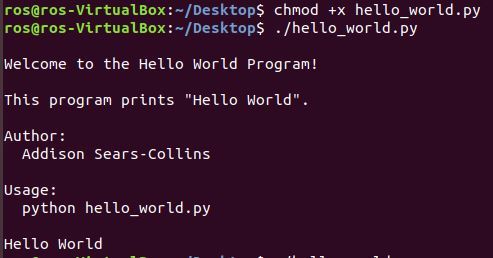
To rerun the program, you can press the up arrow on your keyboard to find the command again. Then press Enter.
Do Basic Calculations
Now that you have written some programs in Python, let’s see how we can do some basic mathematical calculations.
Open a fresh Linux terminal window.
As you saw earlier, you can launch Python directly in your terminal window without having to write all the code in an actual file. You can then run pieces of code, one at a time. Let’s do that now.
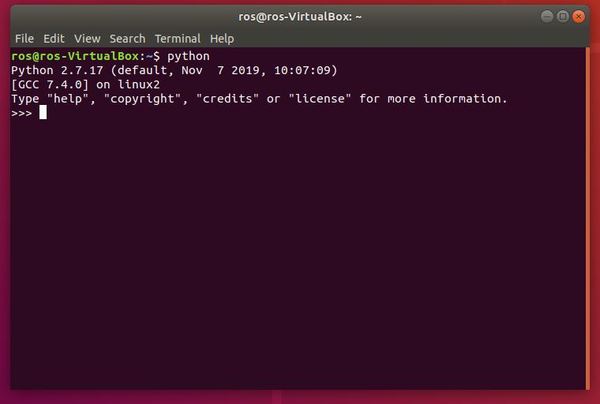
Type the following command to launch the Python interpreter.
python
Your screen should look like this:
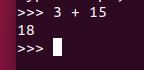
Let’s add two numbers together and see what Python produces for the output.
3 + 15
You should see 18, which is the sum of 3 and 15.
If we wanted to run this code in an actual file, we can do it. First, we need to exit the Python interpreter. Type this:
exit()
Go to the python_for_robotics directory.
cd python_for_robotics
Open a new Python file named add_two_numbers.py.
gedit add_two_numbers.py
We will create a Python program that adds two numbers together. Here is the Python code:
#!/usr/bin/env python

print(3 + 15)
Click Save and then close the window to go back to the terminal window.
To run the code you just wrote, type the following command:
python add_two_numbers.py
You should see 18.

In this example, we did addition, but you can do a lot of other mathematical operations such as subtraction, multiplication, and division.
Comparison Operators
Let’s take a look at the comparison operators. Here is what we have:
- Less than: <
- Greater than: >
- Less than or equal to: <=
- Greater than or equal to: >=
- Equal: ==
- Not equal: !=
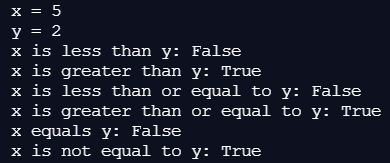
Here is some code you can run:
x = 5
y = 2
print(f'x = {x}')
print(f'y = {y}')
print(f'x is less than y: {x<y}')
print(f'x is greater than y: {x>y}')
print(f'x is less than or equal to y: {x<=y}')
print(f'x is greater than or equal to y: {x>=y}')
print(f'x equals y: {x==y}')
print(f'x is not equal to y: {x!=y}')
Here is the output:
Create Variables
Now let’s explore how to create variables. What are variables? Variables are containers. They are just like the plastic containers you use to store food in your refrigerator; except, variables don’t store food…they store information such as numbers, text, and lists of numbers and text. Variables have names as well, which helps us distinguish one variable from another.
Your first encounter with variables was probably when you were a teenager taking your first class in algebra. For example, look at this mathematical expression.
x = 10
x in this case is a variable. It contains the value 10. The name of this variable is x.
Variables are called variables because they can vary in value. Let’s take a look at this a little bit closer.
Open up a fresh terminal window in Linux.
Launch the Python interpreter (remember that any code that you run directly in the Python interpreter can also be placed in a .py file and run using the python <file name goes here> command).
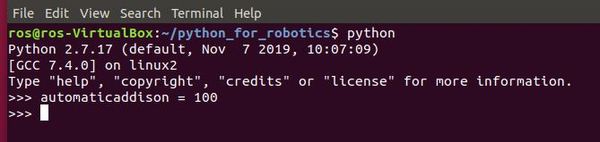
python
Let’s create a variable named automaticaddison and assign it a value of 100.
automaticaddison = 100
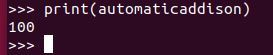
Print the variable.
print(automaticaddison)
Let’s create another variable named number and assign it the value 34.25.
number = 34.25
Now print it.
print(number)
You should see the number print to your screen.
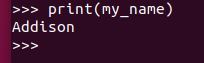
Let’s create another variable named my_name and assign it the value of “Addison”. “Addison” in this case is known as a string. A string is a collection of letters. In Python, we always enclose strings in either single or double quotes. It doesn’t matter which one you choose, just stay consistent.
my_name = "Addison"
Print it.
print(my_name)
Here is the output.
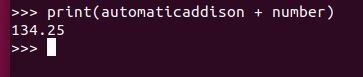
Can we do mathematical operations using just variables? Yes we can. Let’s add the automaticaddison and number variables and see what we get. We should get 134.25 because the value of automaticaddison is 100, and the value of number is 34.25.
print(automaticaddison + number)
Remember that variables are called variables because they can vary in value.
How about we change the value of automaticaddison from 100 to 1000?
automaticaddison = 1000
Now type this code and press Enter.
print(automaticaddison + number)
You should get 1034.25, which makes sense because 1000 + 34.25 = 1034.25.
Work With Lists
What if we want to create a list of numbers and assign this list to a variable? I’ll talk about that in this section.
Let’s start by creating a list of the numbers from 1-10. I’m going to open up a new terminal window.
Launch the Python interpreter.
python
Type the following code.
list_of_numbers = [1,2,3,4,5,6,7,8,9,10]
You just created a list of the numbers one through 10. A list in Python is enclosed in square brackets.
Let’s print the list.
print(list_of_numbers)
Here is what the output looks like.

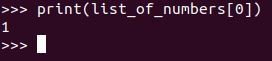
What do we do if we want to print the first item in the list? The first item in this list of 10 numbers is number 1. In Python, a list begins at index 0. Therefore, in order to print the first item in the list, we write the following code:
print(list_of_numbers[0])
Here is the output:
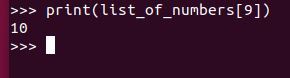
What about if we want to print out the last item in the list, number 10. 10 is at index 9, so we need to type this code:
print(list_of_numbers[9])
Lists aren’t just limited to numbers. We can make a list of strings as well.
Recall that a string is a collection of letters. Your name is a string, for example. AutomaticAddison is a string. A string can also include punctuation and spaces: What is the best website for robotics?
Earlier in this post, you worked with the string, Hello World.
Let’s create a list of strings. Remember that strings have to be enclosed in either double quotes (“) or single quotes (‘). The name of the list will be days_of_the_week.
days_of_the_week = ["Sunday","Monday", "Tuesday", "Wednesday", "Thursday", "Friday", "Saturday"]
Print the second day of the week.
print(days_of_the_week[1])
Here is what you should get:

What if we want to print all days of the week after Tuesday? Tuesday is at index 2 in the list, so we want everything from index 3 to the end of the list.
Here is the code that we write:
print(days_of_the_week[3:])
That colon (:) after the index in the list means “get everything from the index to the end of the list.”
That’s it for lists. Now let’s move on to tuples.
Create a Set
Let’s take a look at how to create a set. A set is like an unordered list, however, in contrast to a normal list, every element in a set is unique and cannot be changed.
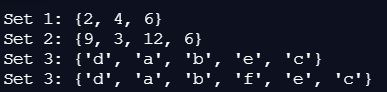
set_1 = {2, 4, 6} # Create a set with three elements
print(f'Set 1: {set_1}')

# Create a set from a list
set_2 = set([x * 3 for x in range(1, 5)])
print(f'Set 2: {set_2}')

# Create a set from a string
set_3 = set("abcdeee") # set_3 is {'a', 'b', 'c', 'd', 'e'}
print(f'Set 3: {set_3}')

set_3.add('f')
print(f'Set 3: {set_3}')
Here is the output:
Create a Tuple
In this section, we’ll take a look at how to create a tuple. Tuples are like lists except for two differences:
- Once you create a tuple, you cannot change it.
- Tuples are enclosed in parentheses while lists are enclosed in square brackets.
Aside from these differences, everything else is the same.
Let’s create a tuple of the first five letters of the alphabet.
alphabet = ("a","b","c","d","e")
Print it.
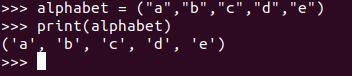
Let’s try to change the middle value of the tuple (the letter ‘c’). Let’s change ‘c’ to ‘z’. ‘c’ is located at index 2.
alphabet[2] = "z"
Here is the output:

You should see a message that says:
TypeError: ‘tuple’ object does not support item assignment.
You are seeing this error because you can’t modify the values in a tuple. If you want to change the value in a tuple, you need to have made it a list instead of a tuple. Remember this: tuples cannot change after you’ve created them.
Now that we have seen what tuples are, let’s move on to dictionaries, another built-in data type in Python.
Create a Dictionary
A dictionary in Python is a lot like a dictionary in the real world. In a real-world online dictionary, you type in a word, and the program outputs the definition of that word; in a Python dictionary, you type in a key, and the program outputs the value of that key.
A real-world dictionary is made up of word-definition pairs. A Python dictionary consists of key-value pairs. The value in a Python dictionary can be any data type you can think of (lists, tuples, numbers, strings, etc.).
Let’s see how to create a dictionary in Python. Open a new terminal window and launch the Python interpreter.
python
Let’s create a dictionary of capitals of some countries around the world. The name of the dictionary will be world_capitals.
First create the dictionary. To create the dictionary, you use curly brackets {}.
world_capitals = {}
Add a new item (i.e. key-value pair) to the dictionary.
world_capitals["United States"] = "Washington, D.C."
Print the dictionary.
print(world_capitals)

We could have also added multiple capitals all in a single line of code. Here is how we do that:
world_capitals = {"United States": "Washington, D.C.", "France": "Paris", "India": "New Delhi"}
What is the capital of France? To print the value for the “France” key in the dictionary we just created, type this code:
print(world_capitals["France"])

Let’s print a list of all the values.
print(world_capitals.values())

Print a list of all the keys.
print(world_capitals.keys())

Now let’s create another dictionary that has population values. We’ll then print it.
population = {"United States": 327000000, "France":66990000, "India": 1339000000}
print(population)

That’s it for dictionaries. If you want to have a handy reference for Python’s built-in methods for dictionaries, check out this list.
Our next stop in this post is the conditional statement.
Using If-Else Statements to Make Decisions
When programming robots, we often want a robot to take some action or return some data based on some condition. For example, imagine a security guard robot whose job is to check the age for each person wanting to enter a nightclub. Suppose this robot is naive. Instead of checking the person’s ID, the robot asks for the person’s age.
We want this robot to allow anybody inside the club who is 18 years old or older but turn away anyone who is under the age of 18. In other words, if the person is greater than or equal to 18 years old, let them in, otherwise, keep them out.

Let’s work through the code for this robot together.
Open up a fresh terminal window and navigate to the python_for_robotics directory.
cd python_for_robotics
Create a new Python file named robot_security.py.
gedit robot_security.py
Type the following code.
#!/usr/bin/env python
# Robot security guard for a nightclub
# Ask for the person's age
age = input("How old are you?: ")
# Make a decision based on the person's age
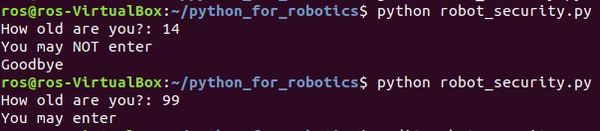
if age < 18:
print("You may NOT enter")
print("Goodbye")
else:
print("You may enter")
The hash # symbol is how we write comments in Python. Everything after the # symbol is a comment. When we run the program on our computer, the computer will ignore this line.
The input command is Python’s way of accepting input from the user (in this case, the person trying to enter the nightclub). We store the user’s input inside the variable named age.
The next piece of code is an if-else statement.
An if-else statement consists of the if keyword, followed by a condition (i.e. age greater than or equal to 18 years old) and a colon (🙂. All the code after the colon (but before the else keyword) will run if the condition is TRUE. Otherwise, if the condition is FALSE (the person is under the age of 18 years old), all the code in the block of code below the else keyword will run.
Note that I indented the blocks of code below the if and the else keywords.
Remember this as it is very important: In Python, indenting (i.e. leaving whitespace using either the Tab key on your computer or the Space bar) has meaning. Code that is at the same location in the program and is indented the same number of spaces from the left margin will run together.
This is just like indenting a paragraph in a book or essay. Programming statements are like sentences. Blocks of code (i.e. a grouped set of programming statements) are like paragraphs. Each time you indent in Python, you are creating a new block of code.
Now, let’s run the program. Click Save and exit the text editor (i.e. gedit).
Type:
python robot_security.py
Here is the output:
We can also add more conditions using what are known as elif (short for else-if) statements. Let’s modify our program so that anybody who is between the ages of 18-21 is allowed to enter, but they cannot drink alcohol.
Type the following command to open the program:
gedit robot_security.py
Write the following code. Make sure your code looks exactly like what you see here.
#!/usr/bin/env python
# Robot security guard for a nightclub
# Ask for the person's age
age = input("How old are you?: ")
# Make a decision based on the person's age
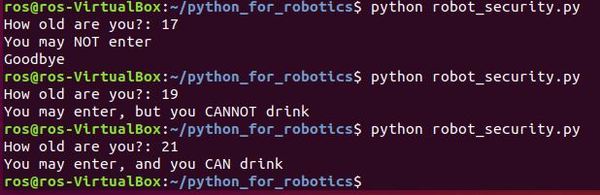
if age < 18:
print("You may NOT enter")
print("Goodbye")
elif age >= 18 and age < 21:
print("You may enter, but you CANNOT drink")
else:
print("You may enter, and you CAN drink")
Now save the file, exit the text editor, run the code, and observe the output.
There you have it…conditional statements in Python. These statements are useful for enabling a robot to make decisions based on a set of conditions.
Now let’s take a look at another Python structure: loops.
Do Stuff Again and Again Using Loops
When programming robots, we often want the robot to do something again and again. For example, we might want a security guard robot for a hotel to repeatedly walk up and down a hallway (move left → move right→ move left–> move right, etc.).
Python has two ways to run the same pieces of code again and again:
- For loops
- While loops
For Loops
For loops allow the code inside them to be executed repeatedly for a known number of times. Let’s look at an example.
Imagine we want our security guard robot to walk up and down the hall 5 times. Each time the robot moves, it prints its motion to the screen. One way to do this is by writing the following Python code:
print("robot moving right")
print("robot moving left")
print("robot moving right")
print("robot moving left")
print("robot moving right")
print("robot moving left")
print("robot moving right")
print("robot moving left")
print("robot moving right")
print("robot moving left")
Typing out the same code over and over gets tedious really fast. You will be happy to know there is a better way…and that is where the for loop comes into play.
Open up a fresh terminal window and type the following commands.
cd python_for_robotics
gedit security_guard.py
Now type the following code:
#!/usr/bin/env python
# Here is our for loop.
# We use the range keyword to specify
# the number of times we want the code inside
# the for loop to execute.
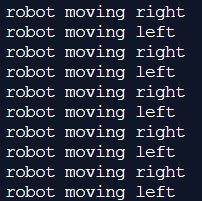
for i in range (5):
print("robot moving right")
print("robot moving left")
The variable i on the line of the for loop starts at 0 and ends at 5. It increases by 1 after each time the code inside the for loop executes.
We could have just as easily written the following equivalent code:
#!/usr/bin/env python

# From 0 to 5 (i.e. run the code 5 times)
for i in range (0, 5):
  print("robot moving right")
  print("robot moving left")
Save the program and close it to go back to the Linux terminal window.
Now type this command to run the code:
python security_guard.py
What did you get for the output? You should get something that looks like this?
We can also use for loops to move through each item in a list, one-by-one. Software engineers have a name for this process: iteration. Open your security_guard.py file.
gedit security_guard.py
Add the following code underneath the for loop.
#!/usr/bin/env python
# Here is our for loop.
# We use the range keyword to specify
# the number of times we want the code inside
# the for loop to execute.
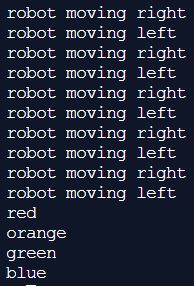
for i in range (5):
print("robot moving right")
print("robot moving left")
# Create the list
colors = ["red","orange","green","blue"]
# Here we are using x instead of i. We can use
# any character for this variable.
for x in colors:
print(x)
Save the program and close the window to return to the terminal window.
Now run the code:
python security_guard.py
Here is the output you should get:
That’s it for the basics of for loops. Now let’s move on to while loops.
While Loops
The other type of loop in Python is called a while loop. While loops execute a set of statements until a condition is FALSE (i.e. no longer true).
For example, let’s say we have a robot that operates in a three-dimensional space. The robot moves around the space and prints its x, y, and z coordinates. Once the robot gets more than 5 units from the origin (where x=0, y=0, and z=0), in either the x, y, or z direction, the robot stops printing its position. Let’s use a while loop to make this happen.
Open a fresh terminal window.
Change directories.
cd python_for_robotics
Create a new Python file called roaming_robot.py.
gedit roaming_robot.py
Write the following code:
#!/usr/bin/env python

# The robot begins at the origin (x=0, y=0, and z=0)
robot_x = 0
robot_y = 0
robot_z = 0

# Print the robot's starting position
print("Current Position: x=" + str(robot_x) + " y=" +
  str(robot_y) + " z=" + str(robot_z))

# Stop executing code once either x, y, or z exceeds 5
while (robot_x < 5 or robot_y < 5 or robot_z < 5):

  # Increment the robot's x position by 1
  robot_x += 1

  # Increment the robot's y position by 1
  robot_y += 1

  # Increment the robot's z position by 1
  robot_z += 1

  # Print the robot's current position
  print("Current Position: x=" + str(robot_x) + " y=" +
    str(robot_y) + " z=" + str(robot_z))

print("Mission complete.")
Save the file and close the terminal window.
Now type the following command to run the code:
python roaming_robot.py
Here is the output.
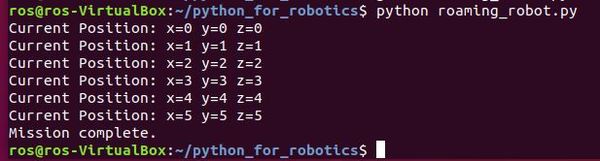
That’s it for while loops. Now let’s take a look at functions.
Accepting User Input
Let’s write a small script to accept user input from the console. We will then print out whatever the user types. Here is the code:
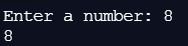
num = input('Enter a number: ')
print(num)
Here is the output:
Using String Functions
Python has a number of functions that operate on strings. Let’s take a look at an example:
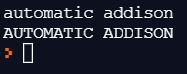
my_string = "automatic addison"
print(my_string)

# Convert the entire string to uppercase
my_string_capitalized = my_string.upper()
print(my_string_capitalized)
If you run the code above, here is the output:
Using Functions
A function in Python is a piece of code designed to perform a specific task. When you are writing big programs with hundreds of lines of code, programs without functions can be really hard to read and debug (i.e. debug means “to find errors”). In this case, you can use functions to group lines of code into separate bundles based on the specific task they are designed to perform.
Functions are really helpful because they allow you to reuse pieces of code rather than typing identical lines of code again and again.
For example, imagine if you had to add multiple pairs of numbers together and print out the sum each time. Let’s do this now.
Open a new Linux terminal, and type the following commands:
cd python_for_robotics
gedit basic_calculator.py
Now type the following code:
#!/usr/bin/env python

# Add 3 and 4 and print the result
a = 3 + 4
print("3 + 4 = " + str(a))

# Add 5 and 7 and print the result
b = 5 + 7
print("5 + 7 = " + str(b))

# Add 2 and 9 and print the result
c = 2 + 9
print("2 + 9 = " + str(c))
Save the code, and return to the terminal.
Run the script (Remember that a script is the same thing as a program in Python).
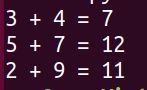
python basic_calculator.py
Here is the output.

Now, let’s rewrite the script using functions. Type this command:
gedit basic_calculator_with_functions.py
Write the following code. All functions need to first be defined before we can use them. The Python keyword def (which means define) is used right before you define a function:
#!/usr/bin/env python

# Define the add function.
# This function accepts two numbers
# and adds them together.
# The function also prints the sum.
def add(number1, number2):
  sum = number1 + number2
  print(str(number1) + " + " + str(
    number2) + " = " + str(sum))

# Define the main function.
# This method calls the add function above.
def main():
  add(3,4)
  add(5,7)
  add(2,9)
  add(25,30)

# When we run the program, this is where
# the program will start executing code.
main()
Save the script, return to the terminal, and run the script.
python basic_calculator_with_functions.py
Here is the output.
See how we condensed all of that tedious, repetitive code (in basic_calculator.py) using functions?
Now, when we want to add two numbers together, all we need to do is to add a single line of code inside the main function.
For example, if we want to add 25 and 30 together, we add this line of code inside the definition of the main function:
add(25, 30)
Functions can accept input, perform some calculation or processing, and then generate output. Functions are not required to accept input, but they often do.
When a function (e.g. add) is called by the main function, the code inside that function executes (e.g. numbers are added, and the sum is printed). Once the block of code inside the function executes, program control then goes back to the main program and continues where it left off.
That’s it for the basics of functions. Functions can do a lot more than what I have covered here, but this is really all you need to know at this stage.
If you’re interested in learning more about functions, you can check out this tutorial.
When Things Go Wrong: Handling Exceptions
You know that sometimes things do not go as planned when you write a piece of software. Your program might stop all of a sudden due to some unforeseen error.
You should anticipate errors that might appear when running a program and then find a way to handle them. Errors in Python are referred to as exceptions. I’ll show you below how to handle exceptions in Python.
Open a new Linux terminal, and type the following commands:
cd python_for_robotics
gedit exception_handling.py
Now type the following code:
#!/usr/bin/env python

# Here we will print the variable named automaticaddison.
print(automaticaddison)
Save the file, and exit the code editor to return to the terminal window.
Run the code that you have just written:
python exception_handling.py
Here is the output.

Whoa, that is ugly! What just happened?
The problem is that you tried to print a variable named automaticaddison, but you never defined the variable. Therefore, your program stops right dead in its tracks because it has no idea what automaticaddison means.
Let’s fix this error by using Python’s built-in error handling capabilities.
Type the following command:
gedit exception_handling.py
Delete all the code that is currently in the file.
Now type this code (The \n character puts the text after it on a new line):
#!/usr/bin/env python

try:

  print(automaticaddison)

except:

  print("An exception occurred.\nVariable automaticaddison is not defined.")
Save the file and return to the terminal window.
Run the code.
python exception_handling.py

Much better! What is happening in the code?
When you run the script, the try block is the first piece of code that gets executed. If there is an error inside the try block, the except (short for “exception”) block of code gets executed. If there is NOT an error inside the try block, program control skips the except block of code and moves on to whatever code follows that.
So the two keywords here are try and except.
- try contains the code you want to execute
- except contains the code for handling any exception thrown during the execution of the try block.
One other cool thing we can do is to add a third block of code after the except block that gets executed regardless if an exception arises or not. The name of this block is called the finally block.
Type the following command:
gedit exception_handling.py
Now add these lines of code right after the except block:
#!/usr/bin/env python

try:

  print(automaticaddison)

except:

  print("An exception occurred.\nVariable automaticaddison is not defined.")

finally:

  print("This program has finished executing. Thank you, and have a nice day!")
Save the file and return to the terminal window.
Run the script.
python exception_handling.py
Here is the output:

That’s it for handling exceptions. If you want to do a deep dive on this topic, check out this tutorial.
Get Comfortable With Classes and Objects
In this section, we’ll get comfortable with classes and objects in Python. Python uses classes and objects as a way to model things that exist in the real world.
What is an Object?
The world is full of objects. Your smartphone is an object. Your motorcycle is an object. You are an object. Your wheeled robot is an object. That elephant you saw on your African safari is an object.
Objects don’t even have to be things that you can touch. The program that you are watching on television is an object. Your favorite online video game is an object.
Your English teacher back in grade school might have referred to objects as “nouns.” Nouns share two things in common. They all have data (things the object “knows”) and functions (things the object can “do”).
For example, your motorcycle has data (i.e. things it knows) such as:
- Model (Honda)
- Color (red)
- Speed (200 miles per hour).
- Horsepower (200)
It has functions (i.e things it can do) such as:
- Speed up
- Slow down
- Stop
In Python, software objects are modeled after objects in the real world. And like objects in the real world, objects in Python are made up of data and functions.
In the real world, we often have multiple objects of the same type. For example, the motorcycle that you own is just one of many motorcycles that exist in the world. In the language of Python, we would say that your motorcycle is part of the motorcycle class. Let’s take a closer look at classes now.
What is a Class?
A class is a template for an object. You can think of a class as a cookie cutter, while the individual cookies made from that sheet are the objects. Classes and objects enable reuse of code in your Python programs.

For example, imagine you own a motorcycle factory and want to program robots to automatically manufacture motorcycles. It would be really tedious and inefficient to create a brand new template for each motorcycle you want the robots to produce.
The smarter thing to do is to create a single class (i.e. template or blueprint) called the motorcycle class. Then, when you want the robots to produce a single motorcycle (i.e. object), all you need to do is reuse the class (i.e. template). You can reuse a class (template) over and over to create as many motorcycle objects as you like.
Each individual motorcycle (i.e. object) that comes out of your factory will have its own data values (e.g. color, horsepower,etc.) but all the motorcycles will be made from the same general motorcycle class.
Let’s create a program now that does what I’ve explained above. You own a factory and need to code your robots to manufacture motorcycles.
In the program, we will:
- Define a class called Motorcycle
- Create three individual motorcycles (i.e. objects)
- Execute some of the functions of the objects
Open a new Linux terminal, and type the following commands:
cd python_for_robotics
gedit build_motorcycles.py
Now type the following code. I included a lot of comments so that you know what is going on at each step in the code. Read it slowly from top to bottom, one block at a time. Take your time. There is no hurry:
#!/usr/bin/env python

# Here is where we define the class named Motorcycle.
# It is the model (template) from which we will
# create individual motorcycles (objects)
class Motorcycle:

  #### Data ####

  # All classes have a function called __init__(),
  # which executes each time you create a new object
  # from the class. This function sets the initial
  # data values.
  # All new cars will start with a speed of 0 miles
  # per hour (mph)
  # The self parameter refers to the current object
  # being created by the class.
  def __init__(self, model, color, speed, horsepower):
    self.model = model
    self.color = color
    self.speed = 0
    self.hp = horsepower

  #### Functions ####
  # Function to speed up the car by a certain amount
  # The self parameter you see below is always the
  # first parameter in the function of a class.
  # It references the current object (i.e. individual
  # motorcycle).
  # The second parameter (input) is
  # speed_increase_in_mph which is how much we want to
  # increase a motorcycle object's speed by.
  def speed_up(self, speed_increase_in_mph):
    self.speed += speed_increase_in_mph
    print(self.model + " speed is now " +
      str(self.speed) + " mph")

  # Function to slow down the car by a certain amount.
  # It accepts just one parameter (input), the
  # desired reduction in speed.
  def slow_down(self, speed_decrease_in_mph):
    self.speed -= speed_decrease_in_mph

    # A car cannot go any slower than 0 mph, which is
    # why we take the maximum value of the car's speed
    # and 0 mph.
    print(self.model + " speed is now " +
      str(max(self.speed, 0)) + " mph")

  def stop(self):
    self.speed = 0
    print(self.model + " speed is now " + str(self.speed) +
      " mph. Car is now stopped.")

# Here is where we define the main function of the program.
def main():

   # The syntax below shows how to create an object of a class.
   # Using the Motorcycle class as a template, we will build
   # three individual motorcycles.
   # Each one will have a certain model name, color, speed, and
   # horsepower that we need to specify.
   motorcycle_1 = Motorcycle("motorcycle_1", "red", 0, 183)
   motorcycle_2 = Motorcycle("motorcycle_2", "white", 0, 200)
   motorcycle_3 = Motorcycle("motorcycle_3", "blue", 0, 118)

   # The syntax below shows how to call a function from an object.
   # Now that the motorcycles are built, we drive them out of the
   # factory at 60 mph, 100 mph, and 45mph, for motorcycles, 1, 2,
   # and 3, respectively.
   motorcycle_1.speed_up(60)
   motorcycle_2.speed_up(100)
   motorcycle_3.speed_up(45)

   # Slow down motorcycle 2 by 10 mph
   motorcycle_2.slow_down(10)

   # Stop all motorcycles
   motorcycle_1.stop()
   motorcycle_2.stop()
   motorcycle_3.stop()

# Run the main function.
# Code execution starts (and ends) here.
main()
Save the script and return to the Linux terminal.
Run the script you just developed.
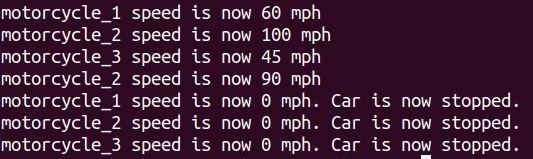
python build_motorcycles.py
Here is the output.
Whew! We’re finally done with objects and classes. If you want a good reference on objects and classes, take a look at this tutorial here.
A Basic Constructor
In the previous section, we looked at objects and classes. Let’s take a look at the constructor. A constructor is used to create an object.
Here is some code to create a simple constructor:
class AutomaticAddison:
# Default constructor
def __init__(self):
self.name = "AutomaticAddison"
# This method prints the data member
def printAutomaticAddison(self):
print(self.name)
# Create an object of the AutomaticAddison class
obj = AutomaticAddison()
# Call the printAutomaticAddison method
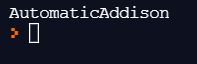
obj.printAutomaticAddison()
Here is the output:
Using Inheritance
In this section, we will examine inheritance. Inheritance is the capability of one class (i.e. child class) to inherit the functionality and properties of another class (i.e. parent class).
In this example, I will create a parent class named Robot and a child class named AddisonRobot. The AddisonRobot will inherit the functionality and properties of the Robot class.
class Robot:

  def __init__(self, name):
    self.name = name

  def say_hello(self):
    print("Hi, my name is " + self.name + ".")

class AddisonRobot(Robot):
    pass

my_robot = AddisonRobot("Addison")

my_robot.say_hello()
Here is the output:

Overriding a Function
Python enables you to override a function that a child class inherited from a parent class. Here is an example:
class Robot:

  def say_hello(self):
    print("Hi, my name is Robot.")

class AddisonRobot(Robot):
  def say_hello(self):
    print("Hi, my name is AddisonRobot.")

my_robot = AddisonRobot()

my_robot.say_hello()
Here is the output:

Working With Files: Create, Write, Close, Append, and Read
When you build a robotics project, you will often have to work with files. For example, imagine an underwater robot that needs to take periodic measurements of the water temperature. You might want to record all the information from the temperature sensor inside a text file.
In this section, I will show you how to create, write, close, append, and read from files.
Create a New File
Open a new Linux terminal, and type the following commands:
cd python_for_robotics
gedit working_with_files.py
Type in the following code. This program will create a new text file called my_file.txt.
#!/usr/bin/env python

# The open command opens a new file.
# The parameter 'w' indicates that you want
# to create a new file.
# The newly created file is stored inside a
# variable named 'f'
f = open("myfile.txt", "w")
Save this program and return to the terminal. Run working_with_files.py.
python working_with_files.py
Type the following command to list all the files in the current directory.
ls
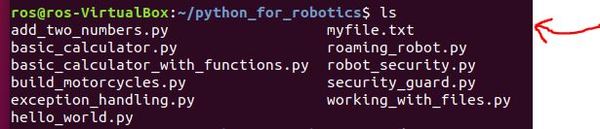
You should see my_file.txt.
Write to a File and Close
Now, open up your program again.
gedit working_with_files.py
Underneath the previous code you wrote, write the following Python code.
#!/usr/bin/env python

# The open command opens a new file.
# The parameter 'w' indicates that you want
# to create a new file.
# The newly created file is stored inside a
# variable named 'f'
f = open("myfile.txt", "w")

# We write this text to the text file
f.write("AutomaticAddison.com loves robotics.")

# Close the text file
f.close()
Save this program and return to the terminal.
Run working_with_files.py.
python working_with_files.py
Now type the following command to open the text file.
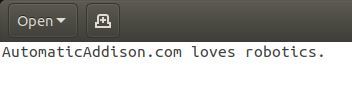
gedit myfile.txt
Here is what you should see.
Append Data to a File and Read
How do we add more text to the end of the text file? We’ll do that now.
Add the following lines of code to your program.
#!/usr/bin/env python

# The open command opens a new file.
# The parameter 'w' indicates that you want
# to create a new file.
# The newly created file is stored inside a
# variable named 'f'
f = open("myfile.txt", "w")

# We write this text to the text file
f.write("AutomaticAddison.com loves robotics.")

# Close the text file
f.close()

# Append (i.e. 'a') text to the existing text file
f = open("myfile.txt", "a")

# Here is the text we are appending.
# The '\n' symbol means to put the text on a new line.
f.write("\nNow we have some more text in this file!")
f.close()

# Open and read (i.e. 'r') the file
f = open("myfile.txt", "r")
print(f.read())
Save the file and return to the terminal.
Run working_with_files.py.
python working_with_files.py
Here is the output:
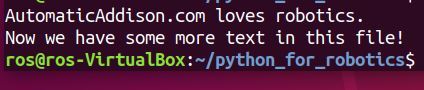
Now type the following command to open the text file.
gedit myfile.txt
Here is what you should see.

If you want an excellent reference on files, check out this tutorial at w3 schools.
Working With Modules
You have finally made it to the last section of this tutorial. We’re almost at the end here! Congrats on making it this far.
In this section, we will explore modules in Python.
What is a module? A module is a file that contains functions that you would like to include in your application.
Let’s write a module. This module will be used by a chat robot that will greet visitors who come to AutomaticAddison.com.
Open a new Linux terminal, and type the following commands:
cd python_for_robotics
gedit my_module.py
Type in the following code to create your module. This module will have only one function, but it could have many more.
#!/usr/bin/env python

def greet_website_visitors(name):
  print("Welcome to AutomaticAddison.com, " + name)
Save the file and return to the terminal.
Now open up a new file.
gedit chat_robot.py
Type the following code:
#!/usr/bin/env python

import my_module

# This line of code calls the
# greet_website_visitors() function that is inside of
# my_module.py
my_module.greet_website_visitors("Addison")
Save the file and return to the terminal.
Run chat_robot.py
python chat_robot.py
Here is the output:

That’s it! If you’re interested in a really good reference about modules, check out this post.
Practice Polymorphism
Polymorphism is an advanced concept in Python. To read more about Polymorphism, check out this link at GeeksforGeeks.
Conclusion
Congratulations on reaching the end of this post! What you have just learned is really important because Python is one of the most popular programming languages in robotics. We have covered the most important concepts of Python that you will use again and again for your career.
If you want an excellent Python reference, I recommend you check out the w3schools.com Python tutorial. I have it bookmarked. It covers the fundamentals I’ve walked through above plus some extra stuff that I left out.
If you want to try out your new Python skills on a robot in simulation, check out either of these posts:
- Launch the Turtlesim Robot Simulation in ROS
- Implementing the ROS Turtlesim Project with rospy (the Python library for ROS)
Otherwise, if you would like to go ahead and build and program a real physical robot using ROS, check out this post:
Keep building!