In this post, we will learn how to create a workspace for your ROS 2 application. A ROS 2 workspace is a directory that contains ROS 2 packages.
Software in ROS 2 is organized into packages. Each package might contain a mixture of code (e.g. ROS 2 nodes), data, libraries, images, documentation, etc. Every program you write in ROS 2 will need to be inside a package.
ROS 2 packages promote software reuse. The goal of a ROS 2 package is to be large enough to provide a specific useful functionality, but not so large and complicated that nobody wants to reuse it for their own project.
The official tutorial is located in the ROS 2 Foxy documentation, but we’ll run through the entire process step-by-step below.
You Will Need
In order to complete this tutorial, you will need:
Prerequisites
It is helpful if you’ve completed this tutorial on the Turtlesim package in ROS 2, but it is not required.
Setup
Open a new terminal window, and create a new workspace. You can call it any name, but we will call it “dev_ws”, which stands for “development workspace.” Inside the workspace, we will create a source (i.e. src) directory. This is where your packages will go.
mkdir -p ~/dev_ws/src
Navigate to the workspace.
cd ~/dev_ws/src
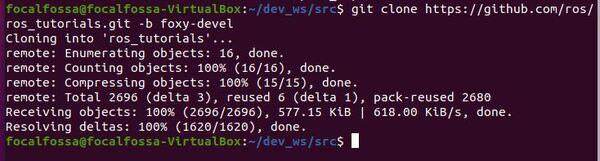
Now, I want to add pre-existing packages into this folder. We will add the ros_tutorials repository to our workspace. It contains the following packages: roscpp_tutorials, rospy_tutorials, ros_tutorials, and turtlesim.
git clone https://github.com/ros/ros_tutorials.git -b foxy-devel
If you type the following command, you can see that the package is in the src folder inside the dev_ws workspace.
dir

To see what packages are inside this repository, type:
ls ros_tutorials

Resolve Package Dependencies
Since we just added a bunch of packages inside our workspace, we need to make sure each package has the software dependencies it needs in order to run.
Type the following command:
cd ~/dev_ws/
Resolve the dependencies.
rosdep install -i --from-path src --rosdistro foxy -y

We can see that all the dependencies our packages need are already installed.
Build Your Workspace
Let’s build the packages. Go to the root of the workspace.
cd ~/dev_ws/
Make sure colcon is installed. Colcon is a tool used to build software packages.
sudo apt update
sudo apt install python3-colcon-common-extensions
Press Y and Enter to complete the install.
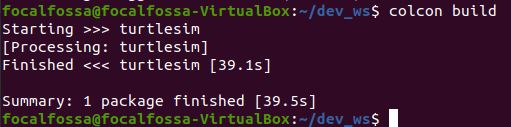
Build the packages.
colcon build
Type the following command to see what new directories were created.
dir

Source the Workspace
Finally, we need to add the packages in this workspace to the current environment.
If you don’t have gedit installed, be sure to install it before you run the command above.
sudo apt-get install gedit
Open a new terminal window, and open your .bashrc file:
gedit ~/.bashrc
Add this line of code to the very bottom of the .bashrc file.
source ~/dev_ws/install/setup.bash

Save the file, and close it.
That’s it! In the next tutorial, we’ll take a look at how to create a package.