In this tutorial, we will explore the Nav2 Simple Commander API, a powerful tool that simplifies robot navigation programming in Python. We’ll learn how to use this API to control a robot’s movement, plan paths, and execute various navigation tasks without getting bogged down in complex ROS 2 details. This guide will help you get started with the most important features of the Simple Commander API.
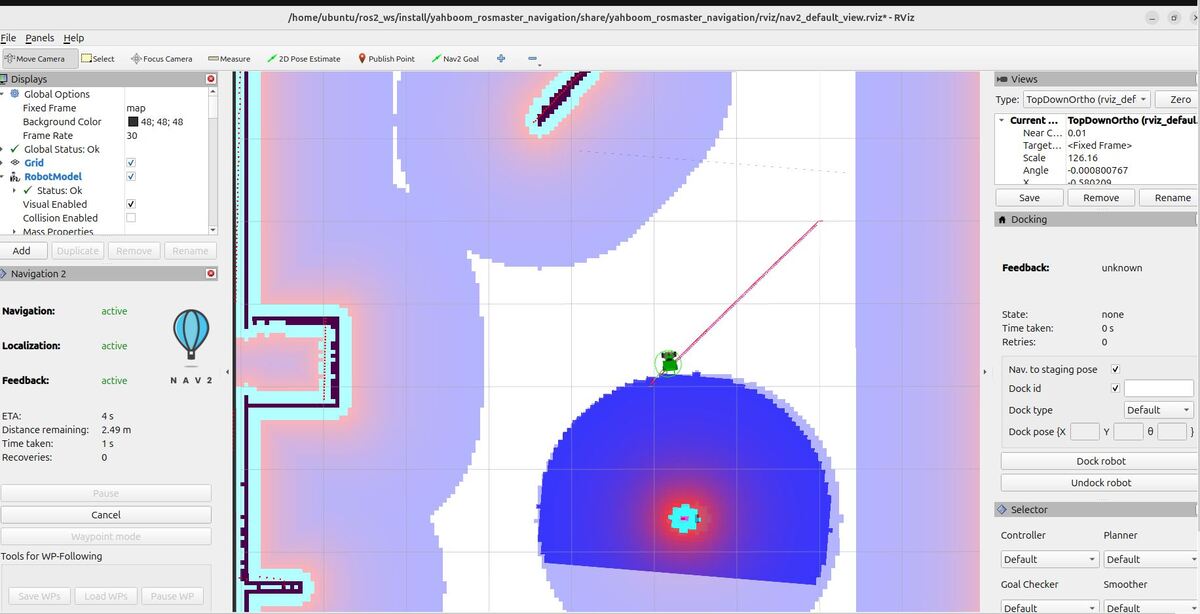
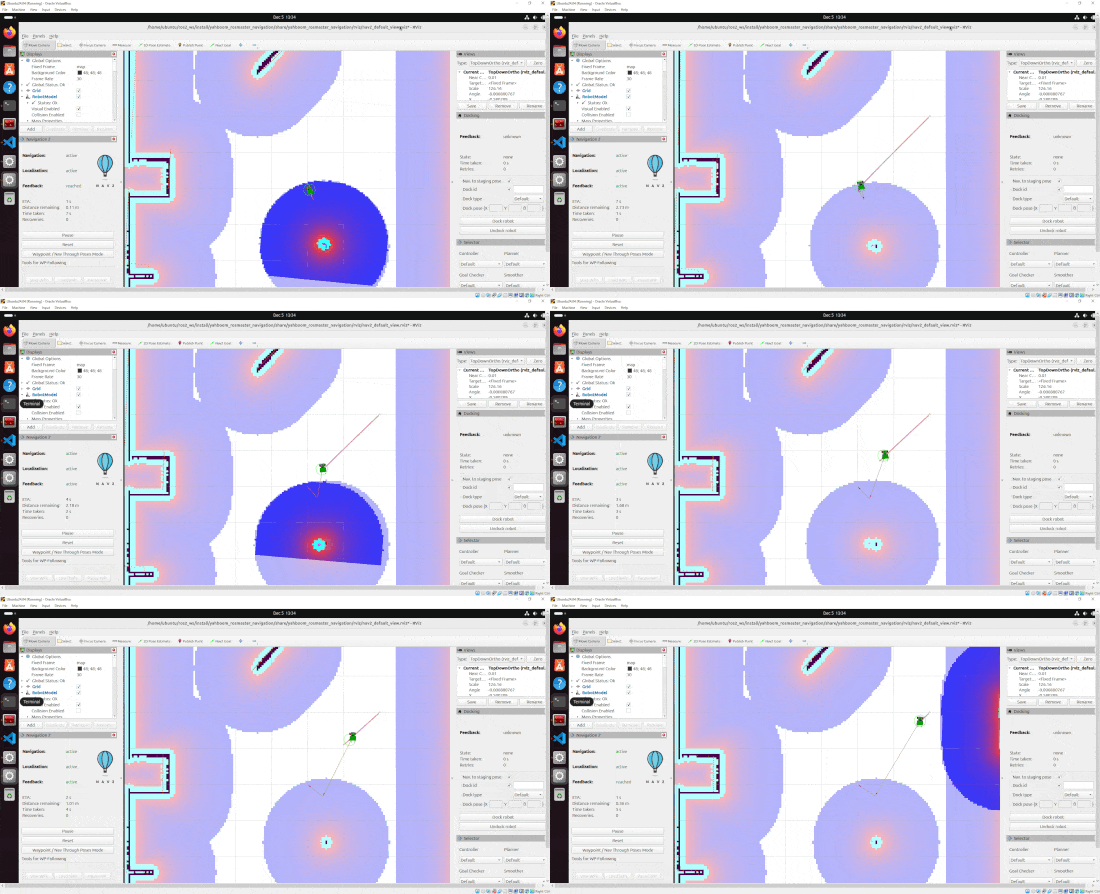
By the end of this tutorial, you will be able to build this:
Real-World Applications
You can use the Nav2 Simple Commander API in many real-world situations. Here are some examples:
- Home Help: You can create robots that clean your house or bring you things from other rooms.
- Warehouse Work: You can build robots that check items on shelves or pick up and move things around the warehouse.
- Farming: You can develop vehicles that plant, check, or pick crops.
- Security: You can make robots that patrol areas or quickly go to places where there might be trouble.
- Healthcare: You can create robots that bring medicine to hospital rooms or clean areas to keep them safe.
Prerequisites
- You have completed this tutorial: Autonomous Navigation for a Mobile Robot Using ROS 2 Jazzy.
All my code for this project is located here on GitHub.
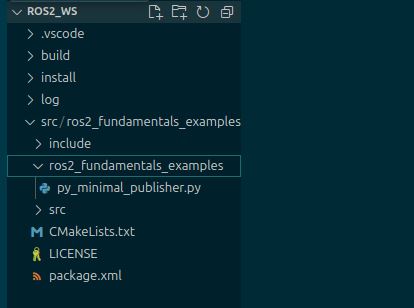
Create Folders
To get started with the Nav2 Simple Commander API, you’ll need to set up your workspace. Follow these steps to create the necessary folders:
Open a terminal window, and type the following command:
cd ~/ros2_ws/src/yahboom_rosmaster/yahboom_rosmaster_navigationCreate a folder for your Python scripts:
mkdir scriptsCreate a folder for the helper files you will create:
mkdir yahboom_rosmaster_navigationcd yahboom_rosmaster_navigationtouch __init__.pyCreate a Goal Pose Message Generator
Now we will create a goal pose message generator. This generator is important for our navigation tasks because:
- In ROS 2, robot positions and orientations are often represented using the PoseStamped message type.
- This message type includes not just the position and orientation, but also timing and reference frame information, which are essential for accurate navigation.
- Creating a function to generate these messages will simplify our code when we need to specify goal positions for our robot.
Open a terminal window:
cd ~/ros2_ws/src/yahboom_rosmaster/yahboom_rosmaster_navigation/yahboom_rosmaster_navigation/touch posestamped_msg_generator.pyType this code.
#!/usr/bin/env python3
"""
Create a PoseStamped message for ROS 2 navigation.

This script creates a geometry_msgs/PoseStamped message which is commonly used
for robot navigation in ROS 2. It shows how to properly construct a PoseStamped
message with header information and pose data.

:author: Addison Sears-Collins
:date: December 5, 2024
"""

from rclpy.node import Node
from builtin_interfaces.msg import Time
from geometry_msgs.msg import PoseStamped, Pose, Point, Quaternion
from std_msgs.msg import Header


class PoseStampedGenerator(Node):
    """A ROS 2 node that generates PoseStamped messages."""

    def __init__(self, node_name='pose_stamped_generator'):
        """
        Initialize the ROS 2 node.

        :param node_name: Name of the node
        :type node_name: str
        """
        super().__init__(node_name)

    def create_pose_stamped(self, x=0.0, y=0.0, z=0.0,
                            qx=0.0, qy=0.0, qz=0.0, qw=1.0,
                            frame_id='map'):
        """
        Create a PoseStamped message with the specified parameters.

        :param x: x position coordinate
        :type x: float
        :param y: y position coordinate
        :type y: float
        :param z: z position coordinate
        :type z: float
        :param qx: x quaternion component
        :type qx: float
        :param qy: y quaternion component
        :type qy: float
        :param qz: z quaternion component
        :type qz: float
        :param qw: w quaternion component
        :type qw: float
        :param frame_id: reference frame
        :type frame_id: str
        :return: pose stamped message
        :rtype: PoseStamped
        """
        # Create the PoseStamped message object
        pose_stamped = PoseStamped()

        # Create and fill the header with frame_id and timestamp
        header = Header()
        header.frame_id = frame_id

        # Get current ROS time and convert to Time message
        now = self.get_clock().now()
        header.stamp = Time(
            sec=now.seconds_nanoseconds()[0],
            nanosec=now.seconds_nanoseconds()[1]
        )

        # Create and fill the position message with x, y, z coordinates
        position = Point()
        position.x = float(x)
        position.y = float(y)
        position.z = float(z)

        # Create and fill the orientation message with quaternion values
        orientation = Quaternion()
        orientation.x = float(qx)
        orientation.y = float(qy)
        orientation.z = float(qz)
        orientation.w = float(qw)

        # Create Pose message and combine position and orientation
        pose = Pose()
        pose.position = position
        pose.orientation = orientation

        # Combine header and pose into the final PoseStamped message
        pose_stamped.header = header
        pose_stamped.pose = pose

        return pose_stamped
Save the file, and close it.
This script provides a ROS 2 node class PoseStampedGenerator that creates geometry_msgs/PoseStamped messages. The class provides a create_pose_stamped method that takes:
- Position coordinates (x, y, z)
- Orientation as a quaternion (qx, qy, qz, qw)
- Reference frame (defaults to ‘map’)
Create a Go to Goal Pose Script
Now I will show you how to create a script that will send a robot to a single goal location (i.e. “goal pose”). A barebones official example code for sending a single goal is here on the Nav2 GitHub. However, this code is missing some important functionality that you will need for a real-world production mobile robot that needs to navigate in a dynamic environment with people moving around and objects of all shapes and sizes. For this reason, we are going to use that code as a basis and then add additional functionality.
Our navigation script will assume the initial pose of the robot has already been set either via RViz, the command line, or some other method.
To create this script, open a terminal, and navigate to the scripts directory:
cd ~/ros2_ws/src/yahboom_rosmaster_navigation/yahboom_rosmaster_navigation/scriptstouch nav_to_pose.pyAdd this code.
#!/usr/bin/env python3
"""
ROS 2 node for navigating to a goal pose and publishing status updates.

This script creates a ROS 2 node that:
    - Subscribes to a goal pose
    - Navigates the robot to the goal pose
    - Publishes the estimated time of arrival
    - Publishes the goal status
    - Cancels the goal if a stop signal is received

Subscription Topics:
    /goal_pose/goal (geometry_msgs/PoseStamped): The desired goal pose
    /stop/navigation/go_to_goal_pose (std_msgs/Bool): Signal to stop navigation
    /cmd_vel (geometry_msgs/Twist): Velocity command

Publishing Topics:
    /goal_pose/eta (std_msgs/String): Estimated time of arrival in seconds
    /goal_pose/status (std_msgs/String): Goal pose status

:author: Addison Sears-Collins
:date: December 5, 2024
"""

import time
import rclpy
from rclpy.duration import Duration
from rclpy.executors import MultiThreadedExecutor
from rclpy.node import Node
from nav2_simple_commander.robot_navigator import BasicNavigator, TaskResult
from std_msgs.msg import Bool, String
from geometry_msgs.msg import Twist, PoseStamped

# Global flags for navigation state
STOP_NAVIGATION_NOW = False
NAV_IN_PROGRESS = False
MOVING_FORWARD = True

COSTMAP_CLEARING_PERIOD = 0.5


class GoToGoalPose(Node):
    """This class subscribes to the goal pose and publishes the ETA
       and goal status information to ROS 2.
    """

    def __init__(self):
        """Constructor."""
        # Initialize the class using the constructor
        super().__init__('go_to_goal_pose')

        # Create the ROS 2 publishers
        self.publisher_eta = self.create_publisher(String, '/goal_pose/eta', 10)
        self.publisher_status = self.create_publisher(String, '/goal_pose/status', 10)

        # Create a subscriber
        # This node subscribes to messages of type geometry_msgs/PoseStamped
        self.subscription_go_to_goal_pose = self.create_subscription(
            PoseStamped,
            '/goal_pose/goal',
            self.go_to_goal_pose,
            10)

        # Keep track of time for clearing the costmaps
        self.current_time = self.get_clock().now().nanoseconds
        self.last_time = self.current_time
        self.dt = (self.current_time - self.last_time) * 1e-9

        # Clear the costmap every X.X seconds when the robot is not making forward progress
        self.costmap_clearing_period = COSTMAP_CLEARING_PERIOD

        # Launch the ROS 2 Navigation Stack
        self.navigator = BasicNavigator()

        # Wait for navigation to fully activate
        self.navigator.waitUntilNav2Active()

    def go_to_goal_pose(self, msg):
        """Go to goal pose."""
        global NAV_IN_PROGRESS, STOP_NAVIGATION_NOW  # pylint: disable=global-statement

        # Clear all costmaps before sending to a goal
        self.navigator.clearAllCostmaps()

        # Go to the goal pose
        self.navigator.goToPose(msg)

        # As long as the robot is moving to the goal pose
        while rclpy.ok() and not self.navigator.isTaskComplete():
            # Get the feedback message
            feedback = self.navigator.getFeedback()

            if feedback:
                # Publish the estimated time of arrival in seconds
                estimated_time_of_arrival = f"{Duration.from_msg(
                    feedback.estimated_time_remaining).nanoseconds / 1e9:.0f}"
                msg_eta = String()
                msg_eta.data = str(estimated_time_of_arrival)
                self.publisher_eta.publish(msg_eta)

                # Publish the goal status
                msg_status = String()
                msg_status.data = "IN_PROGRESS"
                self.publisher_status.publish(msg_status)
                NAV_IN_PROGRESS = True

                # Clear the costmap at the desired frequency
                # Get the current time
                self.current_time = self.get_clock().now().nanoseconds

                # How much time has passed in seconds since the last costmap clearing
                self.dt = (self.current_time - self.last_time) * 1e-9

                # If we are making no forward progress after X seconds, clear all costmaps
                if not MOVING_FORWARD and self.dt > self.costmap_clearing_period:
                    self.navigator.clearAllCostmaps()
                    self.last_time = self.current_time

            # Stop the robot if necessary
            if STOP_NAVIGATION_NOW:
                self.navigator.cancelTask()
                self.get_logger().info('Navigation cancellation request fulfilled...')

            time.sleep(0.1)

        # Reset the variable values
        STOP_NAVIGATION_NOW = False
        NAV_IN_PROGRESS = False

        # Publish the final goal status
        result = self.navigator.getResult()
        msg_status = String()

        if result == TaskResult.SUCCEEDED:
            self.get_logger().info('Successfully reached the goal!')
            msg_status.data = "SUCCEEDED"
            self.publisher_status.publish(msg_status)

        elif result == TaskResult.CANCELED:
            self.get_logger().info('Goal was canceled!')
            msg_status.data = "CANCELED"
            self.publisher_status.publish(msg_status)

        elif result == TaskResult.FAILED:
            self.get_logger().info('Goal failed!')
            msg_status.data = "FAILED"
            self.publisher_status.publish(msg_status)

        else:
            self.get_logger().info('Goal has an invalid return status!')
            msg_status.data = "INVALID"
            self.publisher_status.publish(msg_status)


class GetStopNavigationSignal(Node):
    """This class subscribes to a Boolean flag that tells the
       robot to stop navigation.
    """

    def __init__(self):
        """Constructor."""
        # Initialize the class using the constructor
        super().__init__('get_stop_navigation_signal')

        # Create a subscriber
        # This node subscribes to messages of type std_msgs/Bool
        self.subscription_stop_navigation = self.create_subscription(
            Bool,
            '/stop/navigation/go_to_goal_pose',
            self.set_stop_navigation,
            10)

    def set_stop_navigation(self, msg):
        """Determine if the robot needs to stop, and adjust the variable value accordingly."""
        global STOP_NAVIGATION_NOW  # pylint: disable=global-statement

        if NAV_IN_PROGRESS and msg.data:
            STOP_NAVIGATION_NOW = msg.data
            self.get_logger().info('Navigation cancellation request received by ROS 2...')


class GetCurrentVelocity(Node):
    """This class subscribes to the current velocity and determines if the robot
       is making forward progress.
    """

    def __init__(self):
        """Constructor."""
        # Initialize the class using the constructor
        super().__init__('get_current_velocity')

        # Create a subscriber
        # This node subscribes to messages of type geometry_msgs/Twist
        self.subscription_current_velocity = self.create_subscription(
            Twist,
            '/cmd_vel',
            self.get_current_velocity,
            1)

    def get_current_velocity(self, msg):
        """Get the current velocity, and determine if the robot is making forward progress."""
        global MOVING_FORWARD  # pylint: disable=global-statement

        linear_x_value = msg.linear.x

        if linear_x_value <= 0.0:
            MOVING_FORWARD = False
        else:
            MOVING_FORWARD = True


def main(args=None):
    """Main function to initialize and run the ROS 2 nodes."""
    # Initialize the rclpy library
    rclpy.init(args=args)

    try:
        # Create the nodes
        go_to_goal_pose = GoToGoalPose()
        get_stop_navigation_signal = GetStopNavigationSignal()
        get_current_velocity = GetCurrentVelocity()

        # Set up multithreading
        executor = MultiThreadedExecutor()
        executor.add_node(go_to_goal_pose)
        executor.add_node(get_stop_navigation_signal)
        executor.add_node(get_current_velocity)

        try:
            # Spin the nodes to execute the callbacks
            executor.spin()
        finally:
            # Shutdown the nodes
            executor.shutdown()
            go_to_goal_pose.destroy_node()
            get_stop_navigation_signal.destroy_node()
            get_current_velocity.destroy_node()

    finally:
        # Shutdown the ROS client library for Python
        rclpy.shutdown()


if __name__ == '__main__':
    main()
Save the code, and close it.
Our navigation script, nav_to_pose.py, works as follows:
It sets up three ROS 2 nodes.
The GoToGoalPose node:
- Subscribes to goal poses and initiates navigation.
- Publishes estimated time of arrival (ETA) and navigation status.
- Handles navigation feedback and result processing.
- Implements costmap clearing to handle dynamic obstacles.
The GetStopNavigationSignal node allows external cancellation of navigation tasks.
The GetCurrentVelocity node monitors if the robot is moving forward, which is used for costmap clearing decisions.
The script uses a multithreaded executor to run all nodes concurrently.
It implements error handling and proper shutdown procedures.
Key features include:
- Dynamic obstacle handling through costmap clearing.
- Real-time status and ETA updates.
- Ability to cancel navigation tasks.
- Robust error handling and graceful shutdown.
Once we area ready to test the navigation, we will send a goal pose from the command line:
ros2 topic pub /goal_pose/goal geometry_msgs/PoseStamped "{header: {stamp: {sec: 0, nanosec: 0}, frame_id: 'map'}, pose: {position: {x: 2.0, y: 2.0, z: 0.0}, orientation: {x: 0.0, y: 0.0, z: 0.7071068, w: 0.7071068}}}" --onceAlternatively, we can use a script to send the goal. Let’s create a script called test_nav_to_pose.py:
In the same directory, create and open the file:
touch test_nav_to_pose.pyAdd this code.
#!/usr/bin/env python3
"""
ROS 2 node for sending a robot to different tables based on user input.

This script creates a ROS 2 node that continuously prompts the user to select a table
number (1-5) in the cafe world and publishes the corresponding goal pose for the
robot to navigate to. The script will keep running until the user enters 'q' or presses Ctrl+C.

Publishing Topics:
    /goal_pose/goal (geometry_msgs/PoseStamped): The desired goal pose for the robot

:author: Addison Sears-Collins
:date: December 5, 2024
"""

import rclpy
from rclpy.node import Node
from geometry_msgs.msg import PoseStamped
from yahboom_rosmaster_navigation.posestamped_msg_generator import PoseStampedGenerator


class GoalPublisher(Node):
    """
    ROS 2 node for publishing goal poses to different tables.

    This node allows users to input table numbers and publishes the corresponding
    goal poses for robot navigation.

    Attributes:
        publisher: Publisher object for goal poses
        locations (dict): Dictionary containing x,y coordinates for each table
        pose_generator: Generator for PoseStamped messages
    """

    def __init__(self):
        """
        Initialize the GoalPublisher node.

        Sets up the publisher for goal poses and defines the table locations.
        """
        super().__init__('goal_publisher')

        # Create a publisher that will send goal poses to the robot
        self.publisher = self.create_publisher(PoseStamped, '/goal_pose/goal', 10)
        self.get_logger().info('Goal Publisher node has been initialized')

        # Initialize the PoseStamped message generator
        self.pose_generator = PoseStampedGenerator('pose_generator')

        # Dictionary storing the x,y coordinates for each table
        self.locations = {
            '1': {'x': -0.96, 'y': -0.92},   # Table 1 location
            '2': {'x': 1.16, 'y': -4.23},    # Table 2 location
            '3': {'x': 0.792, 'y': -8.27},   # Table 3 location
            '4': {'x': -3.12, 'y': -7.495},  # Table 4 location
            '5': {'x': -2.45, 'y': -3.55}    # Table 5 location
        }

    def publish_goal(self, table_number):
        """
        Publish a goal pose for the selected table.

        Creates and publishes a PoseStamped message with the coordinates
        corresponding to the selected table number.

        Args:
            table_number (str): The selected table number ('1' through '5')
        """
        # Get the coordinates for the selected table
        x = self.locations[table_number]['x']
        y = self.locations[table_number]['y']

        # Create the PoseStamped message using the generator
        # Using default orientation (facing forward) and z=0.0
        pose_msg = self.pose_generator.create_pose_stamped(
            x=x,
            y=y,
            z=0.0,
            qx=0.0,
            qy=0.0,
            qz=0.0,
            qw=1.0,
            frame_id='map'
        )

        # Publish the goal pose
        self.publisher.publish(pose_msg)
        self.get_logger().info(f'Goal pose published for table {table_number}')

    def run_interface(self):
        """
        Run the user interface for table selection.

        Continuously prompts the user to select a table number and publishes
        the corresponding goal pose. Exits when user enters 'q' or Ctrl+C.
        """
        while True:
            # Display available tables
            print("\nAVAILABLE TABLES:")
            for table in self.locations:
                print(f"Table {table}")

            # Get user input
            user_input = input('\nEnter table number (1-5) or "q" to quit: ').strip()

            # Check if user wants to quit
            if user_input.lower() == 'q':
                break

            # Validate and process user input
            if user_input in self.locations:
                self.publish_goal(user_input)
            else:
                print("Invalid table number! Please enter a number between 1 and 5.")


def main(args=None):
    """
    Main function to initialize and run the ROS 2 node.

    Args:
        args: Command-line arguments (default: None)
    """
    # Initialize ROS 2
    rclpy.init(args=args)

    # Create and run the node
    goal_publisher = GoalPublisher()

    try:
        goal_publisher.run_interface()
    except KeyboardInterrupt:
        print("\nShutting down...")
    finally:
        # Clean up
        goal_publisher.destroy_node()
        rclpy.shutdown()


if __name__ == '__main__':
    main()
Save the code, and close it.
This Python script creates a ROS 2 node that lets you send a robot to different predefined table locations in a cafe environment by entering table numbers (1-5) through a command-line interface. When you select a table number, the code generates and publishes a PoseStamped message containing the x,y coordinates for that table location, which tells the robot where to go. The program runs in a continuous loop asking for your table selections until you quit by entering ‘q’ or pressing Ctrl+C, allowing you to send the robot to multiple locations in sequence.
How to Determine Coordinates for Goals
To determine coordinates for goal locations, open a fresh terminal window, and type:
ros2 topic echo /clicked_pointAt the top of RViz, click the “Publish Point” button.
Click near the first table, and record the coordinates of that point, which will appear in the terminal window.
- table_1: (x=-0.96, y=-0.92)
Now do the same for the other four tables. I will go in a clockwise direction:
- table_2: (x=1.16, y=-4.23)
- table_3: (x=0.792, y=-8.27)
- table_4: (x=-3.12, y=-7.495)
- table_5: (x=-2.45, y=-3.55)
Press CTRL + C when you are done determining the goal locations.
Create an Assisted Teleoperation Script
In this section, we will create an Assisted Teleoperation script for our robot. Assisted Teleoperation allows manual control of the robot while automatically stopping it when obstacles are detected. This feature helps prevent collisions when you are manually sending velocity commands to steer the robot..
You can find a bare-bones example of assisted teleoperation here on the Nav2 GitHub, but we will go beyond that script to make it useful for a real-world environment.
We’ll begin by creating a Python script that implements this functionality:
Open a terminal and navigate to the scripts folder:
cd ~/ros2_ws/src/yahboom_rosmaster/yahboom_rosmaster_navigation/scriptsCreate a new file for assisted teleoperation:
touch assisted_teleoperation.pyAdd the provided code to this file.
#!/usr/bin/env python3
"""
Assisted Teleop Node for ROS 2 Navigation

This script implements an Assisted Teleop node that interfaces with the Nav2 stack.
It manages the lifecycle of the AssistedTeleop action, handles cancellation requests,
and periodically clears costmaps to remove temporary obstacles.

Subscription Topics:
    /cmd_vel_teleop (geometry_msgs/Twist): Velocity commands for assisted teleop
    /cancel_assisted_teleop (std_msgs/Bool): Cancellation requests for assisted teleop

Parameters:
    ~/costmap_clear_frequency (double): Frequency in Hz for costmap clearing. Default: 2.0

:author: Addison Sears-Collins
:date: December 5, 2024
"""

import rclpy
from rclpy.node import Node
from rclpy.exceptions import ROSInterruptException
from geometry_msgs.msg import Twist
from std_msgs.msg import Bool
from nav2_simple_commander.robot_navigator import BasicNavigator
from rcl_interfaces.msg import ParameterDescriptor


class AssistedTeleopNode(Node):
    """
    A ROS 2 node for managing Assisted Teleop functionality.
    """

    def __init__(self):
        """Initialize the AssistedTeleopNode."""
        super().__init__('assisted_teleop_node')

        # Declare and get parameters
        self.declare_parameter(
            'costmap_clear_frequency',
            2.0,
            ParameterDescriptor(description='Frequency in Hz for costmap clearing')
        )
        clear_frequency = self.get_parameter('costmap_clear_frequency').value

        # Initialize the BasicNavigator for interfacing with Nav2
        self.navigator = BasicNavigator('assisted_teleop_navigator')

        # Create subscribers for velocity commands and cancellation requests
        self.cmd_vel_sub = self.create_subscription(
            Twist, '/cmd_vel_teleop', self.cmd_vel_callback, 10)
        self.cancel_sub = self.create_subscription(
            Bool, '/cancel_assisted_teleop', self.cancel_callback, 10)

        # Initialize state variables
        self.assisted_teleop_active = False
        self.cancellation_requested = False

        # Create a timer for periodic costmap clearing with configurable frequency
        period = 1.0 / clear_frequency
        self.clear_costmaps_timer = self.create_timer(period, self.clear_costmaps_callback)

        self.get_logger().info(
            f'Assisted Teleop Node initialized with costmap clearing frequency: {
                clear_frequency} Hz')

        # Wait for navigation to fully activate.
        self.navigator.waitUntilNav2Active()

    def cmd_vel_callback(self, twist_msg: Twist) -> None:
        """Process incoming velocity commands and activate assisted teleop if needed."""
        # Reset cancellation flag when new velocity commands are received
        if (abs(twist_msg.linear.x) > 0.0 or
            abs(twist_msg.linear.y) > 0.0 or
                abs(twist_msg.angular.z) > 0.0):
            self.cancellation_requested = False

        if not self.assisted_teleop_active and not self.cancellation_requested:
            if (abs(twist_msg.linear.x) > 0.0 or
                abs(twist_msg.linear.y) > 0.0 or
                    abs(twist_msg.angular.z) > 0.0):
                self.start_assisted_teleop()

    def start_assisted_teleop(self) -> None:
        """Start the Assisted Teleop action with indefinite duration."""
        self.assisted_teleop_active = True
        self.cancellation_requested = False
        self.navigator.assistedTeleop(time_allowance=0)  # 0 means indefinite duration
        self.get_logger().info('AssistedTeleop activated with indefinite duration')

    def cancel_callback(self, msg: Bool) -> None:
        """Handle cancellation requests for assisted teleop."""
        if msg.data and self.assisted_teleop_active and not self.cancellation_requested:
            self.cancel_assisted_teleop()

    def cancel_assisted_teleop(self) -> None:
        """Cancel the currently running Assisted Teleop action."""
        if self.assisted_teleop_active:
            self.navigator.cancelTask()
            self.assisted_teleop_active = False
            self.cancellation_requested = True
            self.get_logger().info('AssistedTeleop cancelled')

    def clear_costmaps_callback(self) -> None:
        """Periodically clear all costmaps to remove temporary obstacles."""
        if not self.assisted_teleop_active:
            return

        self.navigator.clearAllCostmaps()
        self.get_logger().debug('Costmaps cleared')


def main():
    """Initialize and run the AssistedTeleopNode."""
    rclpy.init()
    node = None

    try:
        node = AssistedTeleopNode()
        rclpy.spin(node)

    except KeyboardInterrupt:
        if node:
            node.get_logger().info('Node shutting down due to keyboard interrupt')
    except ROSInterruptException:
        if node:
            node.get_logger().info('Node shutting down due to ROS interrupt')
    finally:
        if node:
            node.cancel_assisted_teleop()
            node.navigator.lifecycleShutdown()
        rclpy.shutdown()


if __name__ == '__main__':
    main()
This script:
- Subscribes to the /cmd_vel_teleop topic to receive velocity commands from the user.
- Manages the Assisted Teleoperation action in the Nav2 stack.
- Handles cancellation requests for Assisted Teleoperation.
- Periodically clears costmaps to remove temporary obstacles.
- The Nav2 stack processes these commands and publishes the resulting safe velocity commands to the /cmd_vel topic.
It’s important to note that /cmd_vel_teleop is the input topic for user commands, while /cmd_vel is the output topic that sends commands to the robot after processing for obstacle avoidance.
Save and close the file.
Add the Go to Goal Pose and Assisted Teleop Scripts to the Bringup Launch File
Open a terminal window, and type:
cd ~/ros2_ws/src/yahboom_rosmaster/yahboom_rosmaster_bringup/launchOpen rosmaster_x3_navigation.launch.py.
Add our two new nodes:
   start_nav_to_pose_cmd = Node(
        package='yahboom_rosmaster_navigation',
        executable='nav_to_pose.py',
        output='screen',
        parameters=[{'use_sim_time': use_sim_time}]
    )

   start_assisted_teleop_cmd = Node(
        package='yahboom_rosmaster_navigation',
        executable='assisted_teleoperation.py',
        output='screen',
        parameters=[{'use_sim_time': use_sim_time}]
    )

….

   ld.add_action(start_assisted_teleop_cmd)
   ld.add_action(start_nav_to_pose_cmd)
Edit package.xml
To ensure our package has all the necessary dependencies, we need to edit the package.xml file:
Navigate to the package directory:
cd ~/ros2_ws/src/yahboom_rosmaster/yahboom_rosmaster_navigation/Make sure your package.xml looks like this:
<?xml version="1.0"?>
<?xml-model href="http://download.ros.org/schema/package_format3.xsd" schematypens="http://www.w3.org/2001/XMLSchema"?>
<package format="3">
  <name>yahboom_rosmaster_navigation</name>
  <version>0.0.0</version>
  <description>Navigation package for ROSMASTER series robots by Yahboom</description>
  <maintainer email="automaticaddison@todo.com">ubuntu</maintainer>
  <license>BSD-3-Clause</license>

  <buildtool_depend>ament_cmake</buildtool_depend>
  <buildtool_depend>ament_cmake_python</buildtool_depend>

  <depend>rclcpp</depend>
  <depend>rclpy</depend>
  <depend>builtin_interfaces</depend>
  <depend>geometry_msgs</depend>
  <depend>navigation2</depend>
  <depend>nav2_bringup</depend>
  <depend>nav2_simple_commander</depend>
  <depend>slam_toolbox</depend>
  <depend>std_msgs</depend>
  <depend>tf2_ros</depend>
  <depend>tf_transformations</depend>


  <test_depend>ament_lint_auto</test_depend>
  <test_depend>ament_lint_common</test_depend>

  <export>
    <build_type>ament_cmake</build_type>
  </export>
</package>
These dependencies are required for the Assisted Teleoperation functionality to work properly with the Nav2 stack.
Save and close the file.
Edit CMakeLists.txt
To properly build and install all our Python scripts, including the new Assisted Teleoperation script, we need to update the CMakeLists.txt file:
Navigate to the package directory if you’re not already there:
cd ~/ros2_ws/src/yahboom_rosmaster/yahboom_rosmaster_navigation/Open the CMakeLists.txt file:
cmake_minimum_required(VERSION 3.8)
project(yahboom_rosmaster_navigation)

if(CMAKE_COMPILER_IS_GNUCXX OR CMAKE_CXX_COMPILER_ID MATCHES "Clang")
  add_compile_options(-Wall -Wextra -Wpedantic)
endif()

# find dependencies
find_package(ament_cmake REQUIRED)
find_package(ament_cmake_python REQUIRED)
find_package(geometry_msgs REQUIRED)
find_package(navigation2 REQUIRED)
find_package(nav2_bringup REQUIRED)
find_package(rclcpp REQUIRED)
find_package(rclpy REQUIRED)
find_package(slam_toolbox REQUIRED)
find_package(std_msgs REQUIRED)
find_package(tf2_ros REQUIRED)

add_executable(cmd_vel_relay src/cmd_vel_relay_node.cpp)
ament_target_dependencies(cmd_vel_relay
  rclcpp
  geometry_msgs
)

install(TARGETS
  cmd_vel_relay
  DESTINATION lib/${PROJECT_NAME}
)

install (
  DIRECTORY config maps rviz
  DESTINATION share/${PROJECT_NAME}
)

# Install Python modules
ament_python_install_package(${PROJECT_NAME})

# Install Python executables
install(PROGRAMS
  scripts/assisted_teleoperation.py
  scripts/nav_to_pose.py
  scripts/test_nav_to_pose.py
  DESTINATION lib/${PROJECT_NAME}
)

if(BUILD_TESTING)
  find_package(ament_lint_auto REQUIRED)
  # the following line skips the linter which checks for copyrights
  # comment the line when a copyright and license is added to all source files
  set(ament_cmake_copyright_FOUND TRUE)
  # the following line skips cpplint (only works in a git repo)
  # comment the line when this package is in a git repo and when
  # a copyright and license is added to all source files
  set(ament_cmake_cpplint_FOUND TRUE)
  ament_lint_auto_find_test_dependencies()
endif()

ament_package()
Make sure it looks like this.
These changes to CMakeLists.txt will ensure that all our scripts, including the new Assisted Teleoperation script, are properly included when building and installing the package.
Build the Package
Now that we’ve created our scripts and updated the necessary configuration files, it’s time to build our package to incorporate all these changes. This process compiles our code and makes it ready for use in the ROS 2 environment.
Open a terminal window, and type:
cd ~/ros2_wsrosdep install --from-paths src --ignore-src -y -rcolcon build source ~/.bashrcLaunch the Robot
Open a new terminal window, and type the following command to launch the robot. Wait until Gazebo and RViz come fully up, which can take up to 30 seconds:
navor
bash ~/ros2_ws/src/yahboom_rosmaster/yahboom_rosmaster_bringup/scripts/rosmaster_x3_navigation.sh Run Each Script
Let’s test each of the navigation scripts we’ve created. I recommend rerunning the navigation launch file for each script you test below.
You might run into this error from time to time:
[RTPS_TRANSPORT_SHM Error] Failed init_port fastrtps_port7000: open_and_lock_file failed -> Function open_port_internal
This error typically occurs when nodes didn’t close cleanly after you pressed CTRL + C. To fix this, I have an aggressive cleanup command that you can run:
sudo pkill -9 -f "ros2|gazebo|gz|nav2|amcl|bt_navigator|nav_to_pose|rviz2|python3|assisted_teleop|cmd_vel_relay|robot_state_publisher|joint_state_publisher|move_to_free|mqtt|autodock|cliff_detection|moveit|move_group|basic_navigator"You can also run it without sudo:
pkill -9 -f "ros2|gazebo|gz|nav2|amcl|bt_navigator|nav_to_pose|rviz2|python3|assisted_teleop|cmd_vel_relay|robot_state_publisher|joint_state_publisher|move_to_free|mqtt|autodock|cliff_detection|moveit|move_group|basic_navigator"If that doesn’t work, this command will guarantee to terminate all zombie nodes and processes.
sudo rebootGo to Goal Pose
Af the the robot and its controllers come fully up, run these commands in separate terminal windows:
ros2 topic echo /goal_pose/etaros2 topic echo /goal_pose/statusIn another terminal, publish a goal pose:
ros2 topic pub /goal_pose/goal geometry_msgs/PoseStamped "{header: {stamp: {sec: 0, nanosec: 0}, frame_id: 'map'}, pose: {position: {x: 2.0, y: 2.0, z: 0.0}, orientation: {x: 0.0, y: 0.0, z: 0.7071068, w: 0.7071068}}}" Press CTRL + C when the robot starts moving.
You will see the robot move to the (x=2.0, y=2.0) position.
Alternatively, you can send the robot to different tables in the cafe world using our test script:
ros2 run yahboom_rosmaster_navigation test_nav_to_pose.py --ros-args -p use_sim_time:=true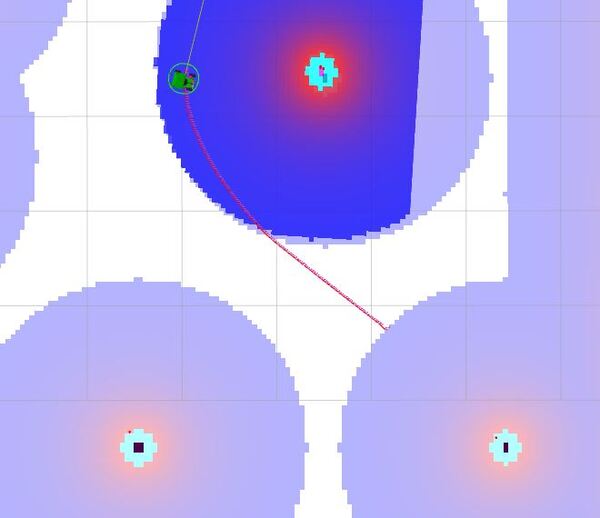
Deending on your CPU, you may have to send commands more than once. I had some issues where some messages simply didn’t get sent the first time I sent a table number.
If you want to cancel an ongoing goal, just type:
ros2 topic pub /stop/navigation/go_to_goal_pose std_msgs/msg/Bool "data: true"Then press CTRL + C.
Press CTRL + C to close these nodes when you are done.
Assisted Teleoperation
Launch teleoperation in another terminal window.
rqt_robot_steeringIn the rqt_robot_steering window, set the topic to /cmd_vel_teleop. Use the sliders to control the robot’s movement. Watch what happens when you teleoperate the robot towards an obstacle like a wall. You will notice the robot stops just before the obstacle.
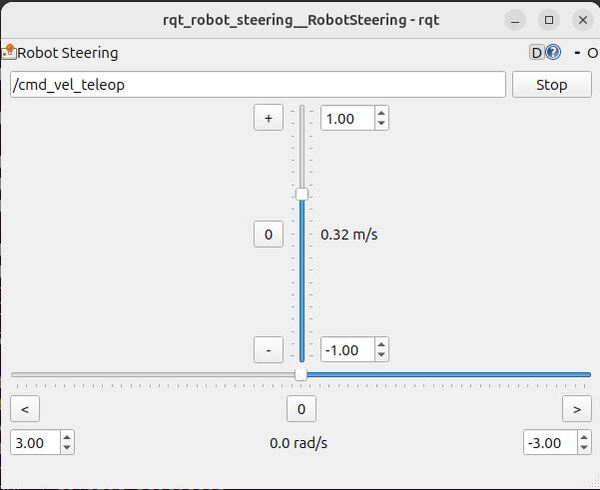
Stop the robot, by clicking the Stop button.
Close the rqt_robot_steering tool by pressing CTRL + C.
Cancel Assisted Teleoperation
To cancel assisted teleoperation, publish a cancellation message:
ros2 topic pub /cancel_assisted_teleop std_msgs/Bool "data: true" --onceTo restart assisted teleoperation, launch the rqt_robot_steering tool again, and move the sliders:
rqt_robot_steeringPress CTRL + C to close these nodes when you are done.
In this tutorial, we explored the Nav2 Simple Commander API and implemented various navigation functionalities for our robot, including basic goal navigation, predefined locations, and assisted teleoperation. You can find other code examples here at the Nav2 GitHub.
These implementations demonstrate the versatility of Nav2, combining autonomous navigation with user input for flexible control in various scenarios. The skills you’ve gained form a strong foundation for developing more complex robotic systems, applicable to real-world robots with minimal modifications.

