In this tutorial, we will learn how to use the Standard Template Library (STL) in C++.
Prerequisites
Working with Double-Ended Queues (Deques)
Let’s explore how to use deques in C++ for managing sensor data streams and other robotics applications. Deques are particularly useful when you need to process data from both ends of a collection efficiently.
Open a terminal window, and type this:
cd ~/Documents/cpp_tutorial
code .
Now, let’s create a new C++ file and name it sensor_data_handling.cpp.
Type the following code into the editor:
#include <iostream>
#include <deque>

int main() {
    // Simulating a stream of sensor data
    std::deque<float> sensor_data;

    // Adding new readings at the back
    sensor_data.push_back(2.5);
    sensor_data.push_back(3.1);
    sensor_data.push_back(4.7);

    // Processing new reading at the front
    std::cout << "Processing sensor reading: " << sensor_data.front() << std::endl;
    sensor_data.pop_front();

    // More readings are added
    sensor_data.push_back(5.5);
    sensor_data.push_back(6.8);

    // Processing another reading
    std::cout << "Processing sensor reading: " << sensor_data.front() << std::endl;
    sensor_data.pop_front();

    // Display remaining data
    std::cout << "Remaining sensor data:";
    for (float reading : sensor_data) {
        std::cout << ' ' << reading;
    }
    std::cout << std::endl;

    return 0;
}
Run the code.
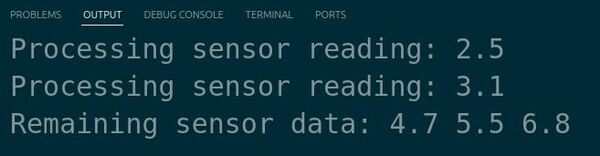
You should see how the sensor readings are processed and the status of the queue after each operation.
This example demonstrates how deques can be effectively used in robotics to handle data streams where the newest data might need immediate processing and older data needs to be cleared after handling. This is important for maintaining real-time performance in systems like autonomous vehicles or robotic sensors.
Employing Iterators
Let’s explore how to employ iterators in C++ for robotics applications. Iterators provide a flexible way to traverse and manipulate elements in containers, such as vectors and arrays, which are commonly used in robotics to store and process data.
Let’s start by creating a new C++ file and naming it iterator_example.cpp.
Type the following code into the editor:
#include <iostream>
#include <vector>

int main() {
    std::vector<int> sensor_data = {10, 20, 30, 40, 50};

    // Using iterators to traverse and print the vector
    for (auto it = sensor_data.begin(); it != sensor_data.end(); ++it) {
        std::cout << *it << " ";
    }
    std::cout << std::endl;

    // Using iterators to modify elements in the vector
    for (auto it = sensor_data.begin(); it != sensor_data.end(); ++it) {
        *it *= 2;
    }

    // Printing the modified vector
    for (const auto& value : sensor_data) {
        std::cout << value << " ";
    }
    std::cout << std::endl;

    return 0;
}
In this code, we include the necessary headers: iostream for input/output operations and vector for the vector container.
In the main function, we create a vector named sensor_data to represent a collection of sensor readings. We initialize it with some sample values.
We use iterators to traverse and print the elements of the vector. We create an iterator it and initialize it to sensor_data.begin(), which points to the first element.
We iterate until it reaches sensor_data.end(), which is the position after the last element. Inside the loop, we dereference the iterator using *it to access the value at the current position and print it.
Next, we use iterators to modify the elements in the vector. We create another iterator it and iterate over the vector as before. This time, we dereference the iterator and multiply the value by 2, effectively doubling each element.
Finally, we print the modified vector using a range-based for loop, which automatically uses iterators under the hood to traverse the vector.
Run the code.
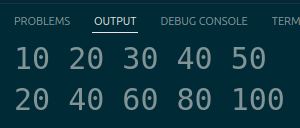
You should see the original vector printed, followed by the modified vector with each element doubled.
Working with Deques, Lists, and Forward lists
Let’s explore how to work with deques, lists, and forward lists in C++ for robotics applications. These container types offer different characteristics and are useful in various scenarios when dealing with robotic data and algorithms.
Let’s start by creating a new C++ file and naming it container_example.cpp.
Type the following code into the editor:
#include <iostream>
#include <deque>
#include <list>
#include <forward_list>

int main() {
    // Working with deques
    std::deque<int> robot_positions = {10, 20, 30};
    robot_positions.push_front(5);
    robot_positions.push_back(40);
    std::cout << "Deque: ";
    for (const auto& pos : robot_positions) {
        std::cout << pos << " ";
    }
    std::cout << std::endl;

    // Working with lists
    std::list<std::string> robot_actions = {"move", "rotate", "scan"};
    robot_actions.push_back("grasp");
    robot_actions.push_front("initialize");
    std::cout << "List: ";
    for (const auto& action : robot_actions) {
        std::cout << action << " ";
    }
    std::cout << std::endl;

    // Working with forward lists
    std::forward_list<double> sensor_readings = {1.5, 2.7, 3.2};
    sensor_readings.push_front(0.8);
    std::cout << "Forward List: ";
    for (const auto& reading : sensor_readings) {
        std::cout << reading << " ";
    }
    std::cout << std::endl;

    return 0;
}
In this code, we include the necessary headers: iostream for input/output operations, deque for the deque container, list for the list container, and forward_list for the forward list container.
In the main function, we demonstrate working with each container type:
- Deque: We create a deque named robot_positions to store integer positions. We use push_front() to add an element at the front and push_back() to add an element at the back. We then print the contents of the deque using a range-based for loop.
- List: We create a list named robot_actions to store string actions. We use push_back() to add an element at the back and push_front() to add an element at the front. We print the contents of the list using a range-based for loop.
- Forward List: We create a forward list named sensor_readings to store double readings. We use push_front() to add an element at the front. We print the contents of the forward list using a range-based for loop.
Run the code.
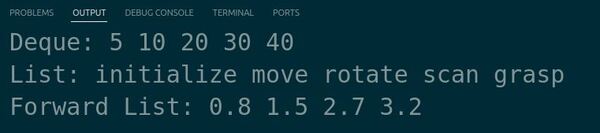
You will see the contents of each container printed in the terminal.
Deques allow efficient insertion and deletion at both ends, lists provide constant-time insertion and deletion anywhere in the container, and forward lists offer a singly-linked list with efficient insertion and deletion at the front.
Handling Sets and Multisets
Let’s explore how to handle sets and multisets in C++ for robotics applications. Sets and multisets are associative containers that store unique and duplicate elements, respectively, and they can be useful for managing distinct or repeated data in robotic systems.
Let’s start by creating a new C++ file and naming it set_example.cpp.
Type the following code into the editor:
#include <iostream>
#include <set>

int main() {
    // Handling sets
    std::set<int> unique_landmarks = {10, 20, 30, 20, 40, 30};
    std::cout << "Unique Landmarks: ";
    for (const auto& landmark : unique_landmarks) {
        std::cout << landmark << " ";
    }
    std::cout << std::endl;

    // Handling multisets
    std::multiset<std::string> repeated_commands = {"move", "rotate", "scan", "move", "grasp"};
    std::cout << "Repeated Commands: ";
    for (const auto& command : repeated_commands) {
        std::cout << command << " ";
    }
    std::cout << std::endl;

    return 0;
}
In this code, we include the necessary headers: iostream for input/output operations and set for the set and multiset containers.
In the main function, we demonstrate handling sets and multisets:
- Set: We create a set named unique_landmarks to store unique integer landmarks. We initialize it with some values, including duplicates. The set automatically removes the duplicate elements and stores only the unique values. We print the contents of the set using a range-based for loop.
- Multiset: We create a multiset named repeated_commands to store repeated string commands. We initialize it with some values, including duplicates. The multiset allows duplicate elements and stores all the occurrences. We print the contents of the multiset using a range-based for loop.
Run the code.
You will see the unique landmarks printed from the set and the repeated commands printed from the multiset.
Sets are useful when you need to store and efficiently retrieve unique elements, such as distinct landmarks or sensor readings. Multisets, on the other hand, allow you to store and manage duplicate elements, which can be helpful for tracking repeated commands or measurements in robotic systems.
Using Map and Multimaps
Let’s explore how to use map and multimap in C++ for robotics applications. Map and multimap are associative containers that store key-value pairs, allowing efficient lookup and retrieval of values based on their associated keys.
Let’s start by creating a new C++ file and naming it map_example.cpp.
Type the following code into the editor:
#include <iostream>
#include <map>
#include <string>

int main() {
    // Using map
    std::map<std::string, int> sensor_readings;
    sensor_readings["temperature"] = 25;
    sensor_readings["humidity"] = 60;
    sensor_readings["pressure"] = 1013;

    for (const auto& reading : sensor_readings) {
        std::cout << reading.first << ": " << reading.second << std::endl;
    }

    // Using multimap
    std::multimap<std::string, std::string> robot_commands;
    robot_commands.insert({"move", "forward"});
    robot_commands.insert({"move", "backward"});
    robot_commands.insert({"rotate", "left"});
    robot_commands.insert({"rotate", "right"});

    for (const auto& command : robot_commands) {
        std::cout << command.first << ": " << command.second << std::endl;
    }

    return 0;
}
In this code, we include the necessary headers: iostream for input/output operations, map for the map and multimap containers, and string for string manipulation.
In the main function, we first demonstrate the usage of map. We create a map named sensor_readings that associates sensor names (keys) with their corresponding values. We insert key-value pairs into the map using the [] operator. We then iterate over the map using a range-based for loop and print each key-value pair.
Next, we demonstrate the usage of multimap. We create a multimap named robot_commands that associates command types (keys) with their corresponding parameters (values). We insert key-value pairs into the multimap using the insert() function.
Multimap allows duplicate keys, so we can have multiple entries with the same command type. We iterate over the multimap using a range-based for loop and print each key-value pair.
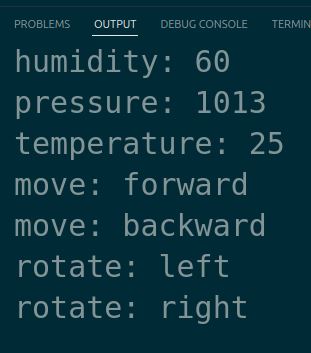
Run the code.
You will see the sensor readings and robot commands printed in the terminal, demonstrating the usage of map and multimap.
Map is useful when you need to associate unique keys with their corresponding values, such as storing sensor readings or configuration parameters.
Multimap allows duplicate keys and is helpful when you need to store multiple values for the same key, such as mapping command types to their parameters.
Manipulating Stack and Queue
Let’s explore how to manipulate stacks and queues in C++, essential data structures for various robotics applications.
Create a new C++ file called stack_queue_example.cpp.
Type the following code into the editor:
#include <iostream>
#include <stack>
#include <queue>

int main() {
    // Stack example
    std::stack<int> my_stack;
    my_stack.push(10);
    my_stack.push(20);
    my_stack.push(30);

    std::cout << "Top element of the stack: " << my_stack.top() << std::endl;
    my_stack.pop(); // Removes the top element (30)

    std::cout << "Updated top element: " << my_stack.top() << std::endl;

    // Queue example
    std::queue<std::string> my_queue;
    my_queue.push("Sensor data");
    my_queue.push("Robot command");
    my_queue.push("Navigation goal");

    std::cout << "Front element of the queue: " << my_queue.front() << std::endl;
    my_queue.pop(); // Removes the front element ("Sensor data")

    std::cout << "Updated front element: " << my_queue.front() << std::endl;

    return 0;
}
First, we create a stack my_stack to store integers. We push the values 10, 20, and 30 onto the stack using the push method.
We then print the top element of the stack using the top method, which returns 30.
Next, we remove the top element from the stack using the pop method.
Finally, we print the updated top element, which is now 20.
For the queue example, we create a queue my_queue to store strings.
We add the strings “Sensor data”, “Robot command”, and “Navigation goal” using the push method.
We then print the front element of the queue using the front method, which returns “Sensor data”.
Next, we dequeue (pronounced as “dee-queue”) the front element using the pop method.
Finally, we print the updated front element, which is now “Robot command”.
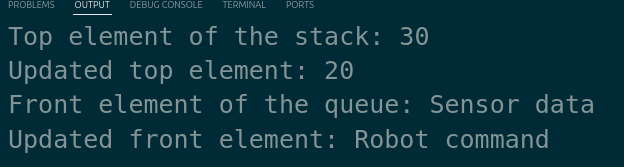
Run the code.
You will see the top and front elements of the stack and queue, respectively, printed in the terminal.
Implementing Priority Queues
Let’s explore how priority queues can be utilized in C++ to manage robotic tasks efficiently.
Priority queues are particularly useful in robotics for scheduling tasks based on their priority level, ensuring that critical operations like obstacle avoidance or emergency stops are handled first.
Let’s begin by creating a new C++ file named robotic_tasks_priority_queue.cpp.
Type the following code into the editor:
#include <iostream>
#include <queue>
#include <vector>
#include <functional>  // For std::greater

struct Task {
    int priority;
    std::string description;

    // Operator overloading for priority comparison
    bool operator<(const Task& other) const {
        return priority < other.priority;  // Higher numbers mean higher priority
    }
};

int main() {
    // Create a priority queue to manage tasks
    std::priority_queue<Task> tasks;

    // Insert tasks
    tasks.push({2, "Navigate to charging station"});
    tasks.push({1, "Send sensor data"});
    tasks.push({3, "Emergency stop"});

    // Execute tasks based on priority
    while (!tasks.empty()) {
        Task task = tasks.top();
        tasks.pop();
        std::cout << "Executing task: " << task.description << std::endl;
    }

    return 0;
}
In this code, we define a Task struct with a priority and description.
We overload the < operator to compare tasks based on their priority.
We then create a priority queue that holds tasks and insert three sample tasks into it.
We simulate the execution of tasks in order of their priority, with the emergency task taking precedence.
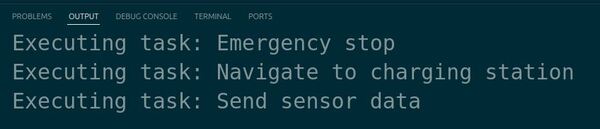
Run the code.
You will see the tasks being executed in order of their priority, with the emergency stop being handled first.
Thanks, and I’ll see you in the next tutorial.
Keep building!