In this tutorial, we will create a ROS 2 workspace.
In ROS 2, a workspace is a folder that is the central location for organizing and developing your robot software. It contains all the code, data files, and configuration scripts related to your specific robot project.
The official instructions for creating a workspace are here, but I will walk you through the entire process, step by step.
Let’s get started!
Prerequisites
- You have a computer that is running Ubuntu (I’m running my Ubuntu Linux inside a virtual machine on Windows).
- You have installed ROS 2.
Directions
If you prefer learning through video rather than text, check out the YouTube video below where I walk you through the entire process step by step. Otherwise, keep reading.
Open a terminal, and type the following command to create your workspace. We can name our workspace anything, but I will name it ros2_ws to stand for ROS 2 workspace.
mkdir -p ~/ros2_ws/srcThe src folder that is inside your ROS 2 workspace is where all your code will go for your robot.
Move to the root of your new workspace using this command:
cd ~/ros2_ws/We don’t have any code inside our workspace source folder yet, but when we do, we will need to run the command below to build the workspace.
colcon buildThis colcon build command needs to be run in the root of your workspace whenever you make additions or changes to the code for the robot.
‘colcon build’ takes all the different pieces of your robot’s software and puts them together. This makes the software ready for the robot to use.
Go ahead and run the colcon build command now.
colcon buildNow type this command:
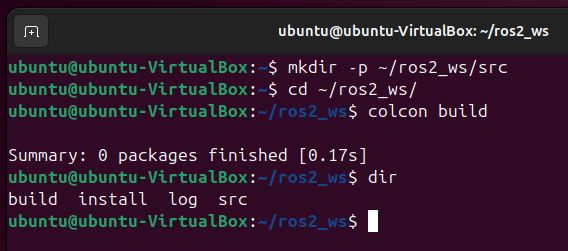
dirHere is what you should see:

There are three folders. These folders are automatically created when you run the colcon build command in your ROS 2 workspace:
- build: This is where ROS 2 temporarily stores files while it’s putting your code together.
- install: This is where the finished, ready-to-use parts of your robot’s software are placed.
- log: This folder keeps track of what happened when you built your code, which is helpful for finding and fixing problems.
Now we need to run the following command to make sure our workspace can be found any time we open a new terminal window.
echo "source ~/ros2_ws/install/setup.bash" >> ~/.bashrcsource ~/.bashrcRemember that ~/.bashrc file is a script that runs whenever a new terminal session is started.
You can see that we have a new entry in the bashrc file right at the bottom.
gedit ~/.bashrc
That’s it! You have now created a ROS 2 workspace. I’ll see you in the next tutorial. Keep building!

