In this tutorial, we will create a ROS 2 package. The official instructions for creating a package are here, but I will walk you through the entire process, step by step.
Follow along with me click by click, keystroke by keystroke.
Prerequisites
- You have completed this tutorial: How to Create a Workspace in ROS 2 Jazzy.
- I am assuming you are using Visual Studio Code, but you can use any code editor.
What is a Package?
In ROS 2, a package is a folder that contains files related to a specific functionality or a component of a robotic system.
This folder includes things like:
- The actual code that makes the package do what it’s supposed to do.
- Files that help define how the code should be started and set up.
- Any special message types or configurations the package needs to work properly.
ROS 2 packages are designed to perform specific jobs. For example, consider a robot that needs to determine its position and orientation within a given environment.
In ROS 2, you could create a package called “localization” to handle this specific task.
The “localization” package would contain:
- The code that processes data from the robot’s sensors (e.g., cameras or LIDAR) and uses algorithms to estimate the robot’s position and orientation.
- A file, known as a README file, that explains the purpose of the package and how to install the code.
- Any custom message the package needs to share localization data with other parts of the robot’s software, such as the estimated position and orientation.
By organizing the localization functionality into its own ROS 2 package, you can focus on developing and refining the algorithms and code specific to localization without worrying about other aspects of the robot’s software.
This modular approach makes it easier to maintain, debug, and improve the localization capabilities of your robot, and allows you to reuse the package across different projects or robots that require similar localization features.
For a real-world robotics project, you will combine multiple packages together to create a complete robotic application that performs various tasks and functions.
Create the Package
Let’s create our first ROS 2 package.
Open a terminal window.
Type the following commands
cd ~/ros2_ws/srcBest practice is to create your ROS 2 packages inside the src directory.
Now let’s run the ros2 command for creating our first package.
ros2 pkg create --build-type ament_cmake --license Apache-2.0 ros2_fundamentals_examplesThis command creates a new ROS 2 package named ros2_fundamentals_examples. We could have called our package any name, but I chose to call it ros2_fundamentals_examples.
- –build-type ament_cmake specifies that the package should use the ament_cmake build system, which is the recommended build system for ROS 2 packages written in C++. Think of it as a set of instructions and tools that help you put together all the pieces of your ROS 2 package, making sure everything is properly compiled, linked, and ready to run.
- –license Apache-2.0 sets the license for the package to Apache License 2.0, which is a license that has minimal restrictions on how others can use, modify, and distribute the software.
Now let’s build our new package. First navigate to the root of the workspace.
cd ~/ros2_wscolcon build 
Let’s see if our new package is recognized by ROS 2.
Either open a new terminal window or source the bashrc file like this:
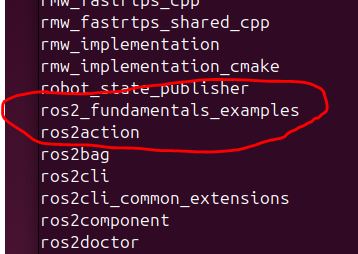
source ~/.bashrcros2 pkg listYou can see the newly created package right there at the top.

Add the “build” Alias to the Bashrc File
Now open a terminal window, and type this:
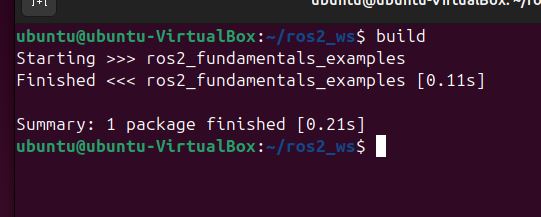
echo "alias build='cd ~/ros2_ws && colcon build'" >> ~/.bashrc && source ~/.bashrcThis single command adds the alias called “build” to your .bashrc file. Anytime you want to build all the packages in your ros2 workspace, all you have to do now is type:
build
To build a specific package, you would type:
colcon build --packages-select ros2_fundamentals_examplesPress Enter to execute the command and build the selected package.

Install Useful Packages (Optional but Recommended)
Let’s install some useful external packages that will help us along the way.
If you don’t have Terminator, install it now. Terminator lets you have multiple terminal windows open within a single interface.
Type the following command:
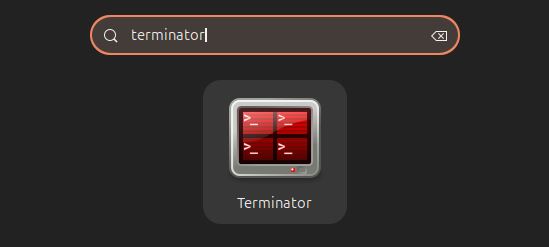
sudo apt-get update -y && sudo apt-get upgrade -y && sudo apt-get install terminator -yTo open terminator, you can either click the ring in the bottom left of your Desktop (i.e. “Show Apps” button) and search for “terminator,” or you can type terminator in a regular terminal window.


You can right-click to split the terminal into different panels.
Let’s install some useful ROS 2 packages. You don’t need to worry about what these packages do for now.
Open a terminal window, and type the following:
sudo curl -sSL https://raw.githubusercontent.com/ros/rosdistro/master/ros.key -o /usr/share/keyrings/ros-archive-keyring.gpgecho "deb [signed-by=/usr/share/keyrings/ros-archive-keyring.gpg] http://packages.ros.org/ros2/ubuntu noble main" | sudo tee /etc/apt/sources.list.d/ros2.listsudo apt updatesudo apt-get install -y ros-${ROS_DISTRO}-ros-gz ros-${ROS_DISTRO}-gz-ros2-control ros-${ROS_DISTRO}-gz-ros2-control-demos ros-${ROS_DISTRO}-joint-state-publisher-gui ros-${ROS_DISTRO}-moveit ros-${ROS_DISTRO}-xacro ros-${ROS_DISTRO}-ros2-control ros-${ROS_DISTRO}-ros2-controllers libserial-dev python3-pipThat’s it! Keep building!

