

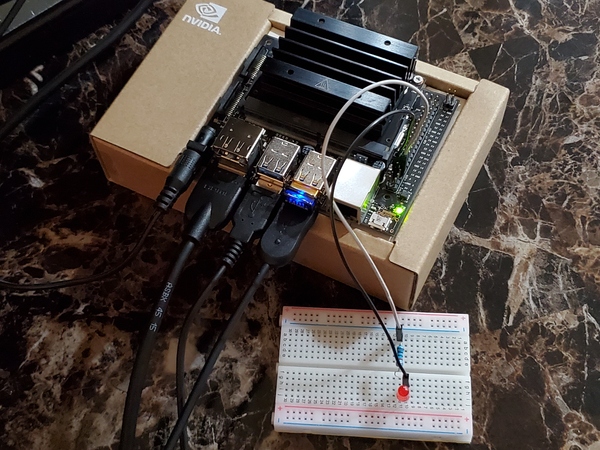
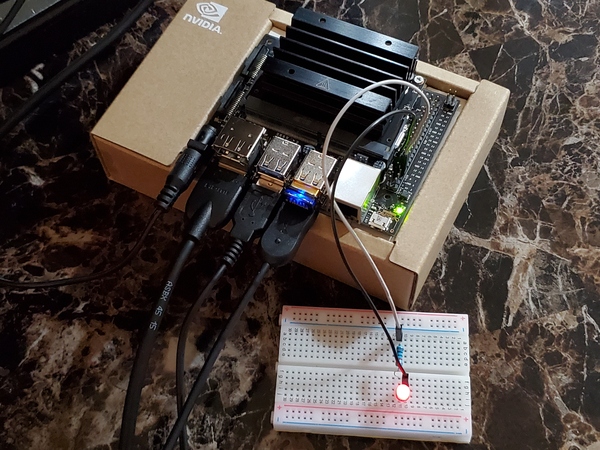
In this tutorial, we will blink an LED using NVIDIA Jetson Nano. I will show you how to use Python to blink an LED, and I will show you how to use C++ to blink an LED. Here is what you will build:
Prerequisites
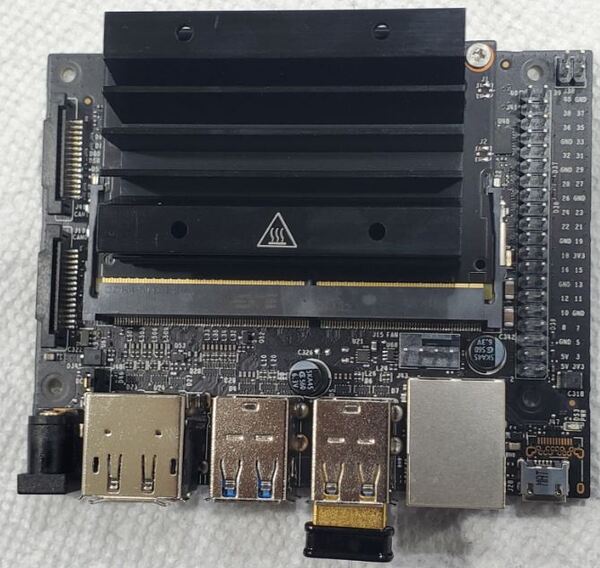
You have already set up your NVIDIA Jetson Nano (4GB, B01).
You Will Need
This section is the complete list of components you will need for this project (#ad).
Disclosure (#ad): As an Amazon Associate I earn from qualifying purchases.
Set Up the Hardware
The first thing we need to do is to set up the hardware.
Gather all of the items from the “You Will Need” section and lay them out on a table.
The NVIDIA Jetson Nano board has 40 general-purpose input/output pins (GPIO). Each pin can either be an input (e.g. connecting the Jetson Nano to a sensor) or an output (e.g. an LED). GPIO pins on the Jetson Nano use 3.3V by default.

In order to get the LED to blink, we need to connect it to one of the 40 GPIO pins. Make sure you set everything up exactly like this image below:
- Connect the 220 Ohm resistor to the positive pin of the LED (i.e. the long leg).
- Connect the other end of this resistor to GPIO pin 7 on the Jetson Nano.
- Connect the negative pin of the LED (i.e. the short leg) to the GND pin on the Jetson Nano.
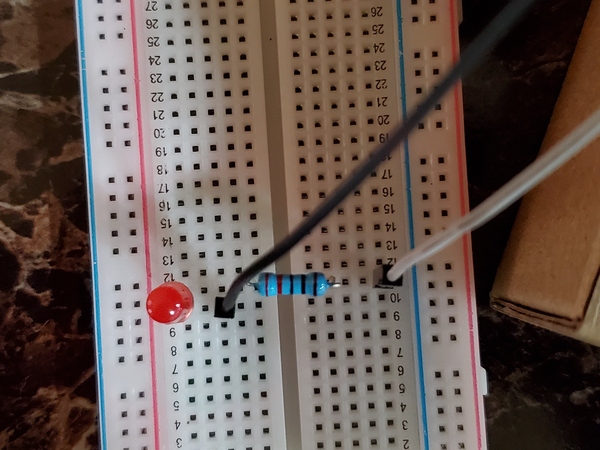

The connections are made using Male-Female jumper wires.
Blink an LED Using Python
Set Up the NVIDIA GPIO Library for Python
Let’s set up NVIDIA Jetson Nano GPIO.
Open a terminal, and type the following command.
sudo pip3 install Jetson.GPIO
If that command above doesn’t work, type the following command:
sudo pip install Jetson.GPIO
When I typed these commands, I got a message which a bunch of warning signs, but at the end of all that the following text was printed to the console:
“Requirement already satisfied…”
This message means that the GPIO library for Python is already installed on my Jetson Nano.
Reconfigure security permissions. Instead of your_user_name, I used automaticaddison, which is my username.
sudo groupadd -f -r gpio
sudo usermod -a -G gpio your_user_name
Reboot the computer.
sudo reboot
Let’s check to see if the library is fully setup.
python3
>>> import Jetson.GPIO as GPIO
>>> GPIO.JETSON_INFO
>>> GPIO.VERSION
Here is what I see:

Write the Code
Create a new folder. Open up a new terminal, and type:
cd Documents
mkdir led_blink
cd led_blink
Let’s create a program to blink the LED.
Create a file named gpiodemo.py.
gedit gpiodemo.py
# GPIO library
import Jetson.GPIO as GPIO

# Handles time
import time

# Pin Definition
led_pin = 7

# Set up the GPIO channel
GPIO.setmode(GPIO.BOARD)
GPIO.setup(led_pin, GPIO.OUT, initial=GPIO.HIGH)

print("Press CTRL+C when you want the LED to stop blinking")

# Blink the LED
while True:
  time.sleep(2)
  GPIO.output(led_pin, GPIO.HIGH)
  print("LED is ON")
  time.sleep(2)
  GPIO.output(led_pin, GPIO.LOW)
  print("LED is OFF")
Run the Code
You can run your program, gpiodemo.py, in the Terminal. Type this command:
python3 gpiodemo.py
If you get any errors due to security issues, you can run the gpiodemo.py file with the sudo command.
sudo python3 gpiodemo.py
You should see the LED blinking.
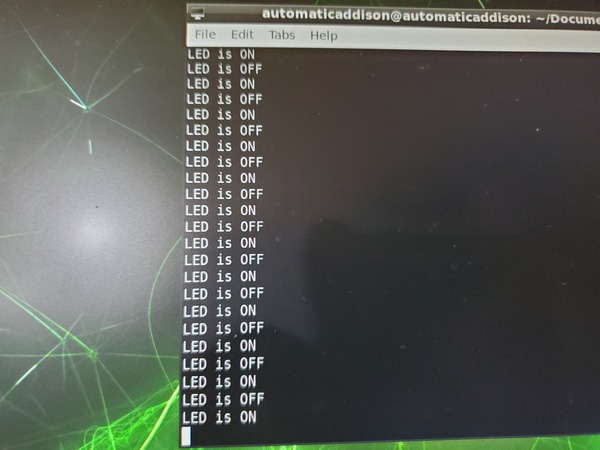
You should also see output in the terminal.
Press CTRL+C when you’re ready to stop the program.
To shutdown your Jetson Nano, you can type:
sudo shutdown -h now
Blink an LED Using C++
Set Up the NVIDIA GPIO Library for C++
Let’s install the C++ Jetson GPIO library, so we can see how to blink an LED using C++.
Make sure you’re connected to the Internet, and open a new terminal window.
git clone https://github.com/pjueon/JetsonGPIO
cd JetsonGPIO/build
make all
sudo make install
Reboot your machine.
sudo reboot
See if the header file for the C++ GPIO Library for Jetson Nano is on your machine. The command below will show the path to the header file.
find /home -name JetsonGPIO.h
Write the Code
Go to the led_blink directory.
cd Documents/led_blink
Open a new C++ program.
gedit led_blink.cpp
Write the following code. We want to blink an LED every 0.5 seconds:
// Handles input and output
#include <iostream>

// For delay function
#include <chrono>

// Handles threads of program execution
#include <thread>

// Signal handling
#include <signal.h>

#include <JetsonGPIO.h>

// Pin Definitions
int led_pin = 7;

// Flag to determine when user wants to end program
bool done = false;

// Function called by Interrupt
void signalHandler (int s){
  done = true;
}

int main() {

  // When CTRL+C pressed, signalHandler will be called
  // to interrupt the programs execution
  signal(SIGINT, signalHandler);

  // Pin Definitions
  GPIO::setmode(GPIO::BOARD);

  // LED pin gets set to high initially
  GPIO::setup(led_pin, GPIO::OUT, GPIO::HIGH);

  std::cout << "Press CTRL+C to stop the LED" << std::endl;

  int curr_value = GPIO::HIGH;

  // Blink LED every 0.5 seconds
  while(!done) {

    std::this_thread::sleep_for(std::chrono::milliseconds(500));

    curr_value = GPIO::HIGH;

    GPIO::output(led_pin, curr_value);

    std::cout << "LED is ON" << std::endl;

    std::this_thread::sleep_for(std::chrono::milliseconds(500));

    curr_value = GPIO::LOW;

    GPIO::output(led_pin, curr_value);

    std::cout << "LED is OFF" << std::endl;
  }

  GPIO::cleanup();

  return 0;
}
Save the file, and close it.
See if your file is in there.
ls
Run the Code
Compile the program.
g++ -o led_blink led_blink.cpp -lJetsonGPIO
(That is a lowercase L in front of Jetson above)
See if the executable is in the current directory.
ls
You should see a new file named led_blink.
If you see an error, check your program to see if it is exactly like I wrote it.
Run the program.
./led_blink
You should see the LED blinking every 0.5 seconds (i.e. 500 milliseconds).


Press CTRL + C when you’re finished.
That’s it. Keep building!