

In this section, we’ll take a quick look at how to get started with Gazebo. Gazebo is a robot simulator that enables you to create realistic simulations of robots in complex indoor and outdoor environments.
If you already have ROS on your system, the stand-alone version of Gazebo is already installed. Let’s check that out now.
Open up a new terminal window, and type the following command. It normally takes a while to launch the first time, so just sit back and relax while Gazebo does its thing:
gazebo
Here is what your screen should look like. You should see an empty world.
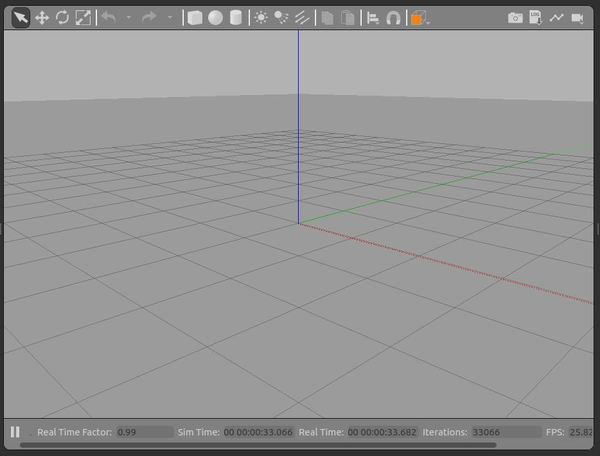
Press CTRL+C in the terminal window to close it.
Gazebo is an independent framework, so what you saw above is the stand-alone version of this program. Since our main framework for robotics development will be ROS, we need to learn how to use Gazebo’s plugins (which we discussed earlier in this tutorial) so that you can access the Gazebo functionality when you’re working with ROS.
There are six types of plugins in Gazebo:
- World
- Model
- Sensor
- System
- Visual
- GUI
Each plugin type is responsible for providing your simulated robot with different functionality. For example, if you want to model sensors (e.g. IMU), you would use the Sensor plugin. The World plugin gives you control over the physics engine and the lighting of the environment the simulated robot is in.
Create a Gazebo Plugin
Let’s develop and load a minimalist “hello world” plugin that is based on the World plugin type mentioned above. This plugin will only consist of a class and a few functions.
We’ll follow the official tutorial here at the Gazebo website.
Let’s install the Gazebo development files. You can see what version of gazebo you have on your system by typing the following command:
apt list --installed
I have Gazebo 11, so we need to install the Gazebo development files for Gazebo 11.

Open a new terminal window, and type the following command (note, it might already be installed):
sudo apt-get install libgazebo11-dev
Now, we need to make a new directory.
mkdir ~/gazebo_plugin_tutorial
Move into that folder.
cd ~/gazebo_plugin_tutorial
Open a new C++ file.
gedit hello_world.cc
Type the following code.
// Includes a core set of basic Gazebo functions
#include <gazebo/gazebo.hh>

// All plugins must be in the gazebo namespace
namespace gazebo
{
  // Each plugin has to inherit from a plugin type.
  // In this case, we are inheriting from the WorldPlugin type.
  class WorldPluginTutorial : public WorldPlugin
  {
    public: WorldPluginTutorial() : WorldPlugin()
            {
              printf("Hello World!\n");
            }

    // This function is mandatory. It receives an element in
	// Simulation Description Format (SDF) that contains the elements
	// and attributes that are specified in the loaded SDF file.
    public: void Load(physics::WorldPtr _world, sdf::ElementPtr _sdf)
            {
            }
  };
  // Register the plugin with the simulator.
  // Note that there are matching register macros for the six types
  // of plugins in Gazebo.
  GZ_REGISTER_WORLD_PLUGIN(WorldPluginTutorial)
}
Save it, and close the editor.
Compile the Plugin
Type the following command:
gedit ~/gazebo_plugin_tutorial/CMakeLists.txt
Add the following to this file.
cmake_minimum_required(VERSION 2.8 FATAL_ERROR)

find_package(gazebo REQUIRED)
include_directories(${GAZEBO_INCLUDE_DIRS})
link_directories(${GAZEBO_LIBRARY_DIRS})
list(APPEND CMAKE_CXX_FLAGS "${GAZEBO_CXX_FLAGS}")

add_library(hello_world SHARED hello_world.cc)
target_link_libraries(hello_world ${GAZEBO_LIBRARIES})

set(CMAKE_CXX_FLAGS "${CMAKE_CXX_FLAGS} ${GAZEBO_CXX_FLAGS}")
Click Save, and close the editor.
Create a new directory called build.
mkdir ~/gazebo_plugin_tutorial/build
cd ~/gazebo_plugin_tutorial/build
Compile the code:
cmake ../
make
You should now see this message:

Now, add your library path to the GAZEBO_PLUGIN_PATH:
export GAZEBO_PLUGIN_PATH=${GAZEBO_PLUGIN_PATH}:~/gazebo_plugin_tutorial/build
So that we don’t have to execute the command above each time we open a new terminal window, let’s add this line to the bottom of our bashrc file.
gedit ~/.bashrc

Click Save, and close the editor.
Use the Plugin
Now that we have our compiled plugin (~/gazebo_plugin_tutorial/build/libhello_world.so), we can attach it to a file in Simulation Description Format. The way it works on startup is as follows:
- Gazebo parses the SDF file
- Gazebo locates the plugin you made
- Gazebo loads the code in the plugin
Let’s create the SDF file.
Type the following command to open up a new file:
gedit ~/gazebo_plugin_tutorial/hello.world
Add the following code:
<?xml version="1.0"?>
<sdf version="1.4">
  <world name="default">
    <plugin name="hello_world" filename="libhello_world.so"/>
  </world>
</sdf>
Click Save, and close the editor.
Lastly, open the file using this command:
gzserver ~/gazebo_plugin_tutorial/hello.world --verbose
Here is the output:
