In this tutorial, we will create a Python subscriber for ROS 2.
In ROS 2 (Robot Operating System 2), a subscriber is a program written that listens for messages being published on a specific topic.
Remember, topics in ROS 2 are channels of communication named according to the type of information they carry, such as “/robot/speed” for speed information or “/camera/image” for vision information.
Each subscriber in ROS 2 declares its interest in a particular topic and is programmed to react or process the messages received on that topic.
The official instructions for creating a subscriber are here, but I will walk you through the entire process, step by step.
We will be following the ROS 2 Python Style Guide.
Follow along with me click by click, keystroke by keystroke.
Let’s get started!
Prerequisites
- You have completed this tutorial: How to Create a ROS 2 C++ Publisher – Jazzy. (recommended)
- I am assuming you are using Visual Studio Code, but you can use any code editor.
Write the Code
Open a terminal, and type these commands to open VS Code.
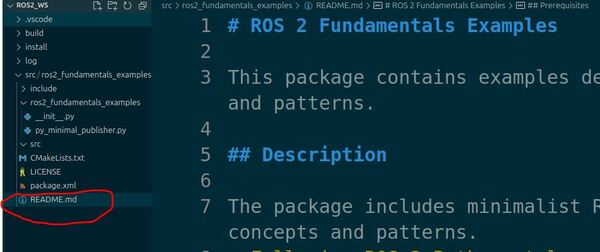
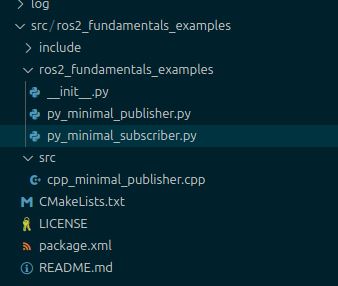
cd ~/ros2_ws && code .Right-click on src/ros2_fundamentals_examples/ros2_fundamentals_examples, and create a new file called “py_minimal_subscriber.py”
Type the following code inside py_minimal_subscriber.py:
#! /usr/bin/env python3

"""
Description:
    This ROS 2 node subscribes to "Hello World" messages on a topic.
    It demonstrates basic ROS concepts such as node creation and subscribing.
-------
Publishing Topics:
    None
-------
Subscription Topics:
    The channel containing the "Hello World" messages
    /py_example_topic - std_msgs/String
-------
Author: Addison Sears-Collins
Date: November 5, 2024
"""

import rclpy  # Import the ROS 2 client library for Python
from rclpy.node import Node  # Import the Node class for creating ROS 2 nodes

from std_msgs.msg import String  # Import the String message type


class MinimalPySubscriber(Node):
    """Create Minimal Subscriber node.

    """

    def __init__(self):
        """ Create a custom node class for subscribing

        """

        # Initialize the node with a name
        super().__init__('minimal_py_subscriber')

        # Creates a subscriber
        self.subscriber_1 = self.create_subscription(
            String,
            '/py_example_topic',
            self.listener_callback,
            10)

    def listener_callback(self, msg):
        """Call this function every time a new message is published on
            the topic.

        """
        # Log a message indicating that the message has been published
        self.get_logger().info(f'I heard: "{msg.data}"')


def main(args=None):
    """Main function to start the ROS 2 node.

    Args:
        args (List, optional): Command-line arguments. Defaults to None.
    """

    # Initialize ROS 2 communication
    rclpy.init(args=args)

    # Create an instance of the MinimalPySubscriber node
    minimal_py_subscriber = MinimalPySubscriber()

    # Keep the node running and processing events.
    rclpy.spin(minimal_py_subscriber)

    # Destroy the node explicitly
    # (optional - otherwise it will be done automatically
    # when the garbage collector destroys the node object)
    minimal_py_subscriber.destroy_node()

    # Shutdown ROS 2 communication
    rclpy.shutdown()


if __name__ == '__main__':
    # Execute the main function if the script is run directly
    main()
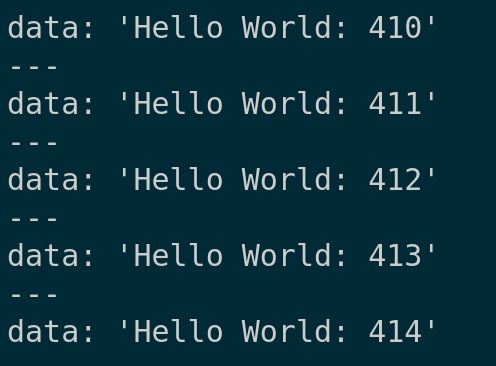
The node we just wrote subscribes to a topic named /py_example_topic that contains String messages.
Configure CMakeLists.txt
Now let’s configure the CMakeLists.txt file. Here is what it should look like:
cmake_minimum_required(VERSION 3.8)
project(ros2_fundamentals_examples)

# Check if the compiler being used is GNU's C++ compiler (g++) or Clang.
# Add compiler flags for all targets that will be defined later in the
# CMakeLists file. These flags enable extra warnings to help catch
# potential issues in the code.
# Add options to the compilation process
if(CMAKE_COMPILER_IS_GNUCXX OR CMAKE_CXX_COMPILER_ID MATCHES "Clang")
  add_compile_options(-Wall -Wextra -Wpedantic)
endif()

# Locate and configure packages required by the project.
find_package(ament_cmake REQUIRED)
find_package(ament_cmake_python REQUIRED)
find_package(rclcpp REQUIRED)
find_package(rclpy REQUIRED)
find_package(std_msgs REQUIRED)

# Define a CMake variable named dependencies that lists all
# ROS 2 packages and other dependencies the project requires.
set(dependencies
  rclcpp
  std_msgs
)

# Add the specified directories to the list of paths that the compiler
# uses to search for header files. This is important for C++
# projects where you have custom header files that are not located
# in the standard system include paths.
include_directories(
  include
)

# Tells CMake to create an executable target named cpp_minimal_publisher
# from the source file src/cpp_minimal_publisher.cpp. Also make sure CMake
# knows about the program's dependencies.
add_executable(cpp_minimal_publisher src/cpp_minimal_publisher.cpp)
ament_target_dependencies(cpp_minimal_publisher ${dependencies})

#add_executable(cpp_minimal_subscriber src/cpp_minimal_subscriber.cpp)
#ament_target_dependencies(cpp_minimal_subscriber ${dependencies})

# Copy necessary files to designated locations in the project
install (
  DIRECTORY ros2_fundamentals_examples
  DESTINATION share/${PROJECT_NAME}
)

install(
  DIRECTORY include/
  DESTINATION include
)

# Install cpp executables
install(
  TARGETS
  cpp_minimal_publisher
#  cpp_minimal_subscriber
  DESTINATION lib/${PROJECT_NAME}
)

# Install Python modules for import
ament_python_install_package(${PROJECT_NAME})

# Add this section to install Python scripts
install(
  PROGRAMS
  ros2_fundamentals_examples/py_minimal_publisher.py
  ros2_fundamentals_examples/py_minimal_subscriber.py
  DESTINATION lib/${PROJECT_NAME}
)

# Automates the process of setting up linting for the package, which
# is the process of running tools that analyze the code for potential
# errors, style issues, and other discrepancies that do not adhere to
# specified coding standards or best practices.
if(BUILD_TESTING)
  find_package(ament_lint_auto REQUIRED)
  # the following line skips the linter which checks for copyrights
  # comment the line when a copyright and license is added to all source files
  set(ament_cmake_copyright_FOUND TRUE)
  # the following line skips cpplint (only works in a git repo)
  # comment the line when this package is in a git repo and when
  # a copyright and license is added to all source files
  set(ament_cmake_cpplint_FOUND TRUE)
  ament_lint_auto_find_test_dependencies()
endif()

# Used to export include directories of a package so that they can be easily
# included by other packages that depend on this package.
ament_export_include_directories(include)

# Generate and install all the necessary CMake and environment hooks that
# allow other packages to find and use this package.
ament_package()
Build the Workspace
To build the workspace, open a terminal window, and type:
build
If this command doesn’t work, type these commands:
echo "alias build='cd ~/ros2_ws/ && colcon build && source ~/.bashrc'" >> ~/.bashrcbuildRun the Node
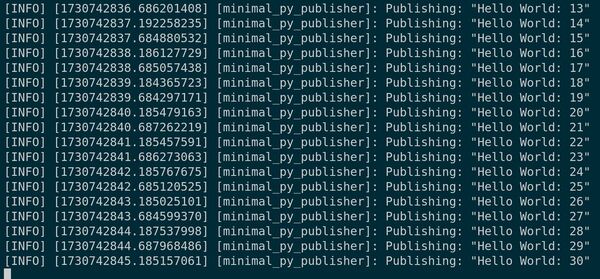
Let’s run our subscriber node.
Open a terminal window, and type the following command to run the publisher node:
ros2 run ros2_fundamentals_examples py_minimal_publisher.pyOpen another terminal window, and type the following command to run the subscriber node:
ros2 run ros2_fundamentals_examples py_minimal_subscriber.pyNow, press Enter.
Open a new terminal window.
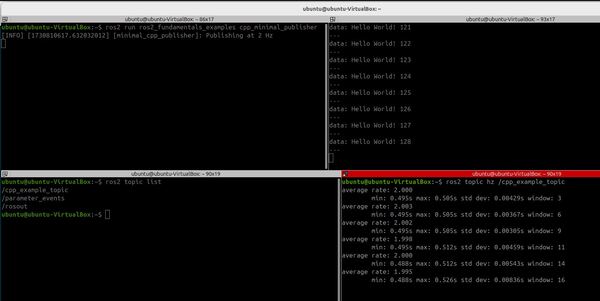
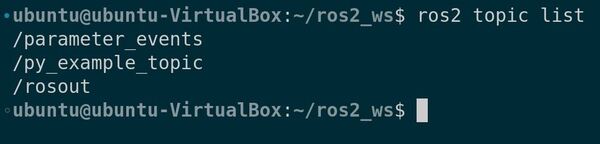
Let’s see a list of all currently active topics.
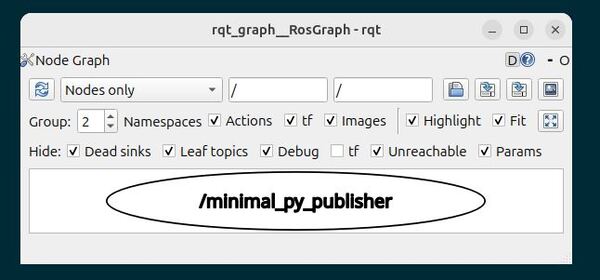
ros2 topic listWhat are the currently active nodes?
ros2 node list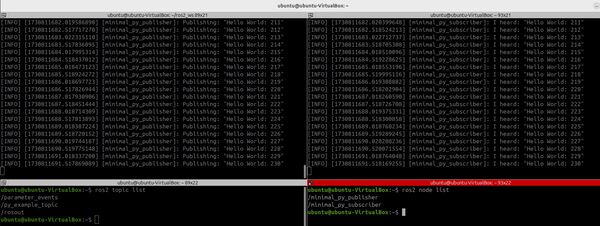
Close the Nodes
Now go back to the terminals where your scripts are running and press CTRL + C to stop the execution.
To clear the terminal window, type:
clearCreating a Bash Script to Launch Nodes in Sequence
Let’s create a bash script to launch the publisher and subscriber nodes in sequence. Launching in this way gives you more control over the order in which your programs launch.
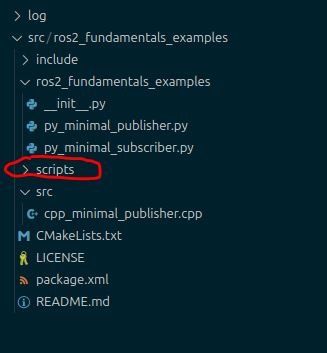
Right-click on src/ros2_fundamentals_examples/ and create a new folder called scripts.
Right-click on src/ros2_fundamentals_examples/scripts, and create a new file called “minimal_pub_sub_launch.sh”
Type the following code inside minimal_pub_sub_launch.sh:
#!/bin/bash
# Launch publisher and subscriber nodes with cleanup handling

cleanup() {
    echo "Restarting ROS 2 daemon to cleanup before shutting down all processes..."
    ros2 daemon stop
    sleep 1
    ros2 daemon start
    echo "Terminating all ROS 2-related processes..."
    kill 0
    exit
}

trap 'cleanup' SIGINT

# Launch the publisher node
ros2 run ros2_fundamentals_examples py_minimal_publisher.py &
sleep 2

# Launch the subscriber node
ros2 run ros2_fundamentals_examples py_minimal_subscriber.py
Save the file and close it.
Go into the terminal, and change the permissions on the file to make it executable:
sudo chmod +x ~/ros2_ws/src/ros2_fundamentals_examples/scripts/minimal_pub_sub_launch.shConfigure CMakeLists.txt
Now let’s configure the CMakeLists.txt file to add the scripts folder. Change this line:
# Copy necessary files to designated locations in the project
install (
  DIRECTORY ros2_fundamentals_examples
  DESTINATION share/${PROJECT_NAME}
)
To this:
# Copy necessary files to designated locations in the project
install (
  DIRECTORY ros2_fundamentals_examples scripts
  DESTINATION share/${PROJECT_NAME}
)
Launch
Build the workspace.
buildNow we launch the nodes.
cd ~/ros2_ws/src/ros2_fundamentals_examples/scripts./minimal_pub_sub_launch.shYou could have also written:
bash minimal_pub_sub_launch.sh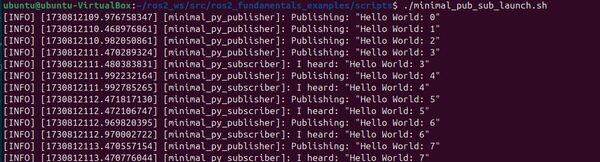
Close the Nodes
Now go back to the terminals where your scripts are running and press CTRL + C to stop the execution.
To clear the terminal window, type:
clearCongratulations! You have written your first subscriber in ROS 2.
In this example, you have written a subscriber to listen to a basic string message. On a real robot, you will write many different subscribers that subscribe to data that gets published by the different components of a robot: strings, LIDAR scan readings, ultrasonic sensor readings, camera frames, 3D point cloud data, integers, float values, battery voltage readings, odometry data, and much more.
The code you wrote serves as a template for creating these more complex subscribers. All subscribers in ROS 2 are based on the basic framework as the subscriber you just wrote, py_minimal_subscriber.py.
In fact, even after over a decade of working with ROS, I still refer back to this template when I am building new subscriber nodes for my robots.
That’s it. Keep building!