Introduction
In the previous tutorial, we learned how to use SLAM (Simultaneous Localization and Mapping) to create a map of the environment while keeping track of the robot’s location. Now that we have a map, it’s time to take things to the next level and make our robot navigate autonomously.
The official autonomous navigation tutorial is here on the Nav2 website.
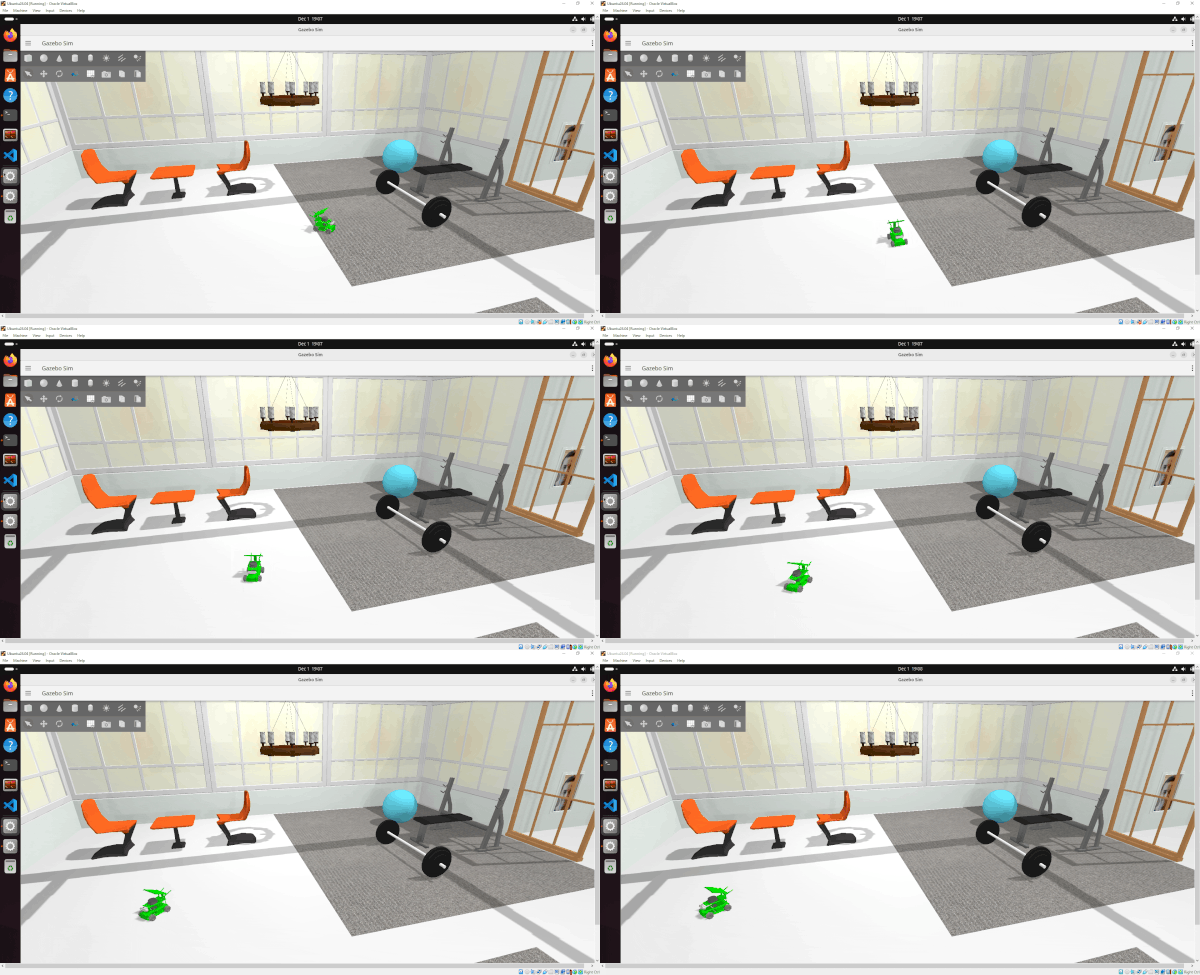
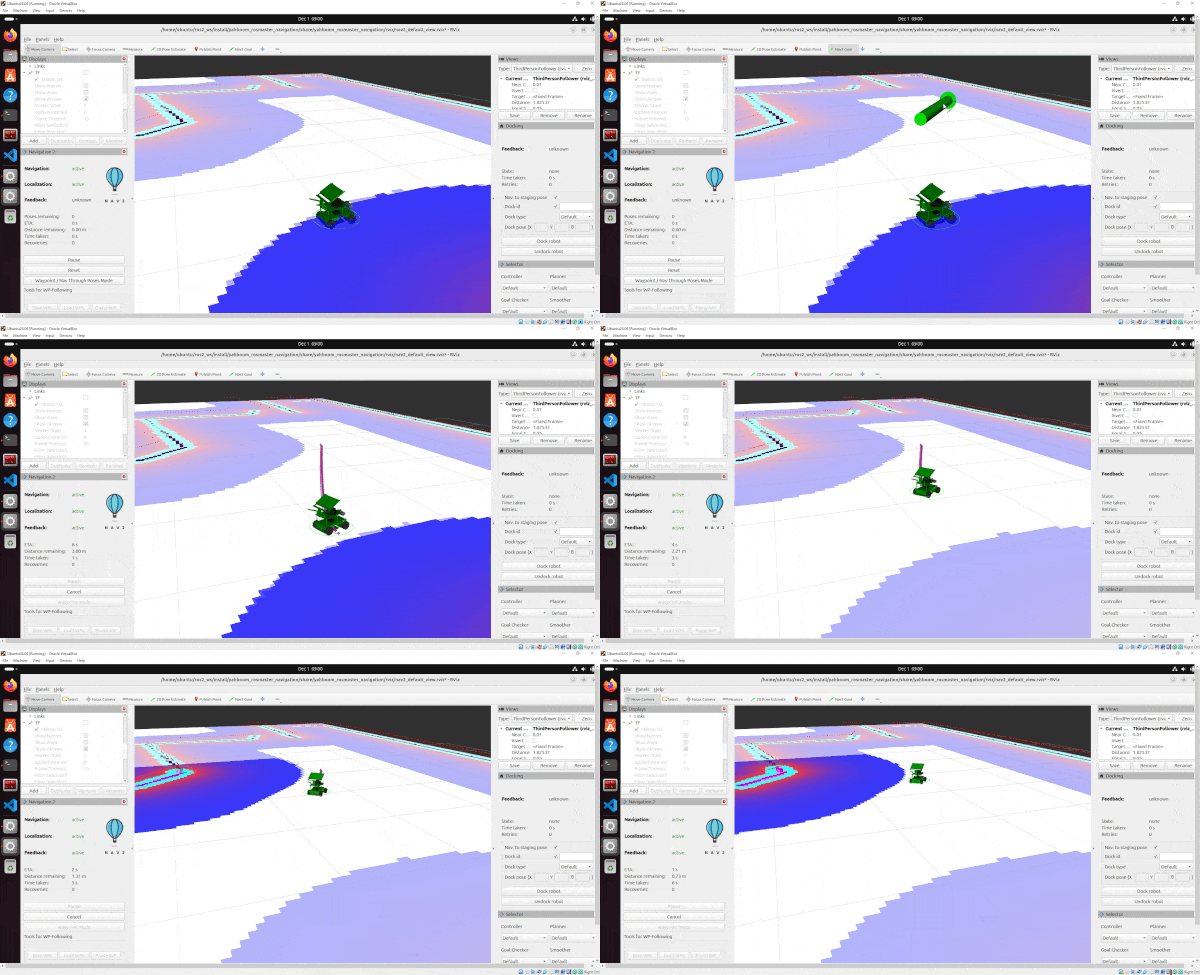
By the end of this tutorial, you’ll have a robot that can independently navigate from point A to point B while avoiding obstacles. Here is what you will make happen in this tutorial:
Real-World Applications
Autonomous navigation has numerous applications in the real world. Here are a few examples of how the concepts you’ll learn in this tutorial can be applied:
- Home service robots: Imagine a robot that can navigate your home to perform tasks like delivering snacks, collecting laundry, or even reminding you to take your medicine. Autonomous navigation enables robots to move around homes safely and efficiently.
- Warehouse automation: In large warehouses, autonomous mobile robots can be used to transport goods from one location to another. They can navigate through the warehouse aisles, avoid obstacles, and deliver items to the correct storage locations or shipping stations.
- Agriculture: Autonomous navigation can be used in agricultural robots that perform tasks such as harvesting, planting, or soil analysis. These robots can navigate through fields, greenhouses, or orchards without human intervention, increasing efficiency and reducing labor costs.
- Hospital and healthcare: In hospitals, autonomous mobile robots can be used to transport medical supplies, medication, or even patients. They can navigate through the hospital corridors and elevators, ensuring timely and safe delivery of essential items.
- Search and rescue: In emergency situations, autonomous robots can be deployed to search for and rescue people in hazardous environments. These robots can navigate through rubble, collapsed buildings, or other challenging terrains to locate and assist victims.
By mastering autonomous navigation, you’ll be opening doors to a wide range of exciting applications that can benefit various industries and improve people’s lives.
If you prefer learning by video, watch the video below, which covers this entire tutorial from start to finish.
Prerequisites
- You have completed this tutorial: Building a Map of the Environment Using SLAM – ROS 2 Jazzy.
All my code for this project is located here on GitHub.
Understanding the Configuration File
First, let’s navigate to the folder where the YAML configuration file is located.
Open a terminal and move to the config folder:
cd ros2_ws/src/yahboom_rosmaster/yahboom_rosmaster_navigation/config/Now, let’s open the YAML file using a text editor.
gedit rosmaster_x3_nav2_default_params.yamlWith the file open, we can now explore and understand the different sections and parameters within the configuration file.
Let’s break down the parts that are most important for autonomous navigation.
amcl (Adaptive Monte Carlo Localization)
AMCL helps the robot determine its location within the map. It uses a particle filter approach, where each particle represents a possible pose (position and orientation) of the robot.
The parameters in the amcl section control how AMCL updates and resamples these particles based on sensor data and the robot’s motion.
Key parameters include the number of particles (max_particles), the frequency of updates (update_min_d and update_min_a), and the noise models for the motion and the LIDAR (robot_model_type, laser_model_type).
bt_navigator (Behavior Tree Navigator)
The Behavior Tree Navigator is responsible for high-level decision making during navigation. It uses a behavior tree structure to define the logic for tasks like following a path, avoiding obstacles, and recovering from stuck situations.
The bt_navigator section specifies the plugins and behaviors used by the navigator, such as the path following algorithm (FollowPath), the obstacle avoidance strategy, and the recovery behaviors.
controller_server
The controller server handles the execution of the robot’s motion commands. It receives the path from the planner and generates velocity commands to follow that path.
The parameters in the controller_server section configure the controller plugins, such as the path tracking algorithm (FollowPath), the goal tolerance (xy_goal_tolerance, yaw_goal_tolerance), and the velocity thresholds (min_x_velocity_threshold, min_theta_velocity_threshold).
It also includes parameters for the progress checker (progress_checker_plugin), which monitors the robot’s progress along the path.
You will notice that we are using the Model Predictive Path Integral Controller. I chose this controller because it works well for mecanum wheeled robots.
You can find a high-level description of the other controllers on this page.
velocity_smoother
The velocity smoother takes the velocity commands from the controller and smooths them to ensure smooth and stable robot motion. It helps to reduce sudden changes in velocity and acceleration.
The velocity_smoother section controls the smoothing algorithm, such as the smoothing frequency (smoothing_frequency), velocity limits (max_velocity, min_velocity), and acceleration limits (max_accel, max_decel).
planner_server
The planner server is responsible for generating paths from the robot’s current position to the goal location. It uses the global costmap to find the optimal path while avoiding obstacles. The planner_server section specifies the planner plugin (GridBased) and its associated parameters, such as the tolerance for the path search (tolerance) and the use of A* algorithm (use_astar).
smoother_server
The smoother server is responsible for optimizing and smoothing the global path generated by the planner before it’s sent to the controller. This helps create more natural and efficient robot trajectories.
behavior_server
The behavior server handles recovery behaviors when the robot gets stuck or encounters an error during navigation. It includes plugins for actions like spinning in place (Spin), backing up (BackUp), or waiting (Wait).
These sections work together to provide a comprehensive configuration for the robot’s autonomous navigation system. By adjusting these parameters in the YAML file, you can fine-tune the robot’s behavior to suit your specific requirements and environment.
collision_monitor
The collision monitor is a safety system that continuously checks for potential collisions and can trigger emergency behaviors when obstacles are detected.
Launch Autonomous Navigation
Let’s start navigating. Open a terminal window, and use this command to launch the robot:
nav or
bash ~/ros2_ws/src/yahboom_rosmaster/yahboom_rosmaster_bringup/scripts/rosmaster_x3_navigation.sh In the bash script, you can change cafe -> house everywhere you see it in the file in case you want to autonomously navigate your robot in the house world.
#!/bin/bash
# Single script to launch the Yahboom ROSMASTERX3 with Gazebo, Nav2 and ROS 2 Controllers

cleanup() {
    echo "Cleaning up..."
    sleep 5.0
    pkill -9 -f "ros2|gazebo|gz|nav2|amcl|bt_navigator|nav_to_pose|rviz2|assisted_teleop|cmd_vel_relay|robot_state_publisher|joint_state_publisher|move_to_free|mqtt|autodock|cliff_detection|moveit|move_group|basic_navigator"

}

# Set up cleanup trap
trap 'cleanup' SIGINT SIGTERM

# Check if SLAM argument is provided
if [ "$1" = "slam" ]; then
    SLAM_ARG="slam:=True"
else
    SLAM_ARG="slam:=False"
fi

# For cafe.world -> z:=0.20
# For house.world -> z:=0.05
# To change Gazebo camera pose: gz service -s /gui/move_to/pose --reqtype gz.msgs.GUICamera --reptype gz.msgs.Boolean --timeout 2000 --req "pose: {position: {x: 0.0, y: -2.0, z: 2.0} orientation: {x: -0.2706, y: 0.2706, z: 0.6533, w: 0.6533}}"

echo "Launching Gazebo simulation with Nav2..."
ros2 launch yahboom_rosmaster_bringup rosmaster_x3_navigation_launch.py \
   enable_odom_tf:=false \
   headless:=False \
   load_controllers:=true \
   world_file:=cafe.world \
   use_rviz:=true \
   use_robot_state_pub:=true \
   use_sim_time:=true \
   x:=0.0 \
   y:=0.0 \
   z:=0.20 \
   roll:=0.0 \
   pitch:=0.0 \
   yaw:=0.0 \
   "$SLAM_ARG" \
   map:=/home/ubuntu/ros2_ws/src/yahboom_rosmaster/yahboom_rosmaster_navigation/maps/cafe_world_map.yaml &

echo "Waiting 25 seconds for simulation to initialize..."
sleep 25
echo "Adjusting camera position..."
gz service -s /gui/move_to/pose --reqtype gz.msgs.GUICamera --reptype gz.msgs.Boolean --timeout 2000 --req "pose: {position: {x: 0.0, y: -2.0, z: 2.0} orientation: {x: -0.2706, y: 0.2706, z: 0.6533, w: 0.6533}}"

# Keep the script running until Ctrl+C
wait
Running the bash script will launch the Gazebo simulator with the Yahboom ROSMASTER X3 robot and the necessary navigation nodes.
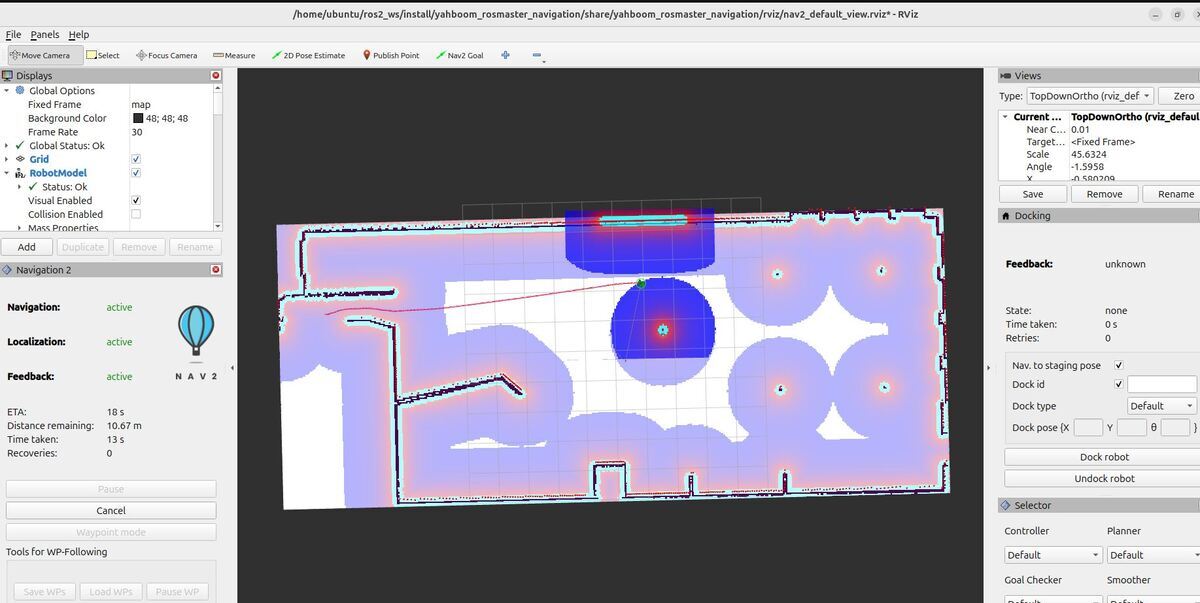
You should see Gazebo and RViz windows open up. In Gazebo, you will see the simulated environment with the robot. RViz will display the robot’s sensor data, the map, and the navigation-related visualizations.
Wait for all the nodes to initialize and for the robot to be spawned in the Gazebo environment. You can check the terminal output for any error messages or warnings.
Once everything is up and running, you will see the robot in the simulated environment, ready to navigate autonomously.
Initialize the Location of the Robot Using the 2D Pose Estimate Button in RViz
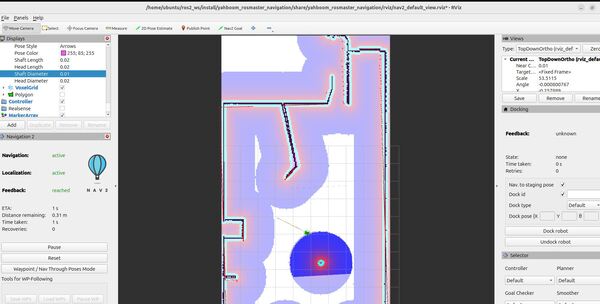
Before the robot can start navigating autonomously, it needs to know its initial position and orientation (“initial pose”) within the map. This process is known as localization. In this section, we will learn how to set the initial pose of the robot using the “2D Pose Estimate” button in RViz.
1. In the RViz window, locate the “2D Pose Estimate” button in the toolbar at the top.
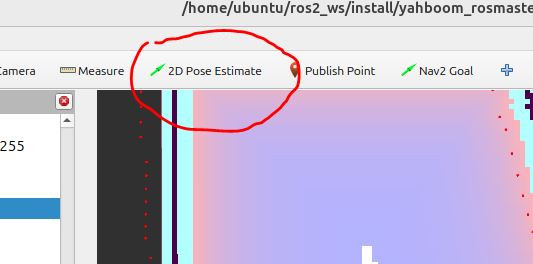
2. Click on the “2D Pose Estimate” button to activate the pose estimation tool.
3. Move your mouse cursor to the location on the map where you want to set the initial pose of the robot. This should be the robot’s actual starting position in the simulated environment.
4. Click and hold the left mouse button at the desired location on the map.
5. While holding the left mouse button, drag the mouse in the direction that represents the robot’s initial orientation. The arrow will follow your mouse movement, indicating the direction the robot is facing.
6. Release the left mouse button to set the initial pose of the robot.
7. The robot’s localization system (AMCL) will now use this initial pose as a starting point and continuously update its estimated position and orientation based on sensor data and movement commands.
Setting the initial pose is important because it gives the robot a reference point to start localizing itself within the map. Without an accurate initial pose, the robot may have difficulty determining its precise location and orientation, which can lead to navigation issues.
Remember to set the initial pose whenever you restart the autonomous navigation system or if you manually relocate the robot in the simulated environment.
By the way, for a real-world application, the initial pose can be set automatically using the NVIDIA Isaac ROS Map Localization package. This package uses LIDAR scans and deep learning to automatically estimate the robot’s pose within a pre-built map. It provides a more automated and accurate way of initializing the robot’s location compared to manually setting the pose in RViz.
Send a Goal Pose
Once the robot’s initial pose is set, you can command it to navigate autonomously to a specific goal location on the map. RViz provides an intuitive way to send navigation goals using the “2D Nav Goal” button. Follow these steps to send a goal pose to the robot:
1. In the RViz window, locate the “Nav2 Goal” button in the toolbar at the top.
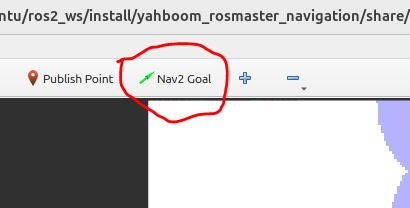
2. Click on the “Nav2 Goal” button to activate the goal setting tool.
3. Move your mouse cursor to the location on the map where you want the robot to navigate. This will be the goal position.
4. Click and hold the left mouse button at the desired goal location on the map.
5. While holding the left mouse button, drag the mouse in the direction that represents the desired orientation of the robot at the goal position. An arrow will appear, indicating the goal pose.
6. Release the left mouse button to set the goal pose.
7. The robot will now plan a path from its current position to the goal pose, taking into account the obstacles in the map and the configured navigation parameters.
8. Once the path is planned, the robot will start navigating towards the goal pose, following the planned trajectory.
9. As the robot moves, you will see its position and orientation updating in real-time on the map in RViz.
10. The robot will continue navigating until it reaches the goal pose or until it encounters an obstacle that prevents it from reaching the goal.
You can send multiple goal poses to the robot by repeating the above steps. Each time you set a new goal pose, the robot will replan its path and navigate towards the new goal.
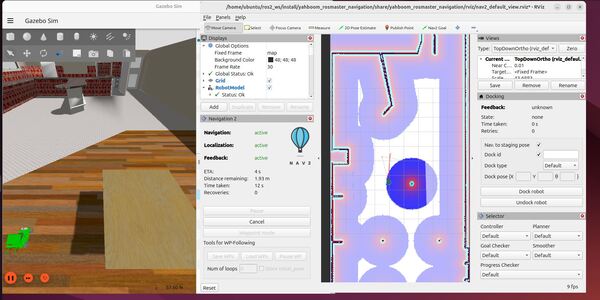
Keep in mind that the robot’s ability to reach the goal pose depends on various factors, such as the accuracy of the map, the presence of obstacles, and the configuration of the navigation stack. If the robot is unable to reach the goal pose, it may attempt to replan or abort the navigation task based on the configured behavior.
During autonomous navigation, you can monitor the robot’s progress, path planning, and other relevant information through the RViz visualizations. The navigation stack provides feedback on the robot’s status, including any errors or warnings.
By sending goal poses, you can test the robot’s autonomous navigation capabilities and observe how it handles different scenarios in the simulated environment.
Send Waypoints
In addition to sending a single goal pose, you can also command the robot to navigate through a sequence of waypoints. Waypoints are intermediate goal positions that the robot should pass through before reaching its final destination. This is useful when you want the robot to follow a specific path or perform tasks at different locations.
Here’s how to do it…
Set the initial pose of the robot by clicking the “2D Pose Estimate” on top of the RViz2 screen.
Then click on the map in the estimated position where the robot is in Gazebo.
Now click the “Waypoint/Nav Through Poses” mode button in the bottom left corner of RViz. Clicking this button puts the system in waypoint follower mode.
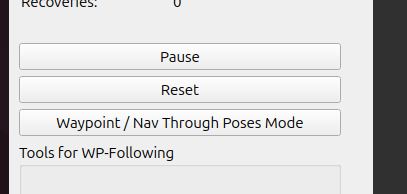
Click the “Nav2 Goal” button, and click on areas of the map where you would like your robot to go (i.e. select your waypoints).
Click the Nav2 Goal button, set a waypoint. Click it again, and set another waypoint. Select as many waypoints as you want.
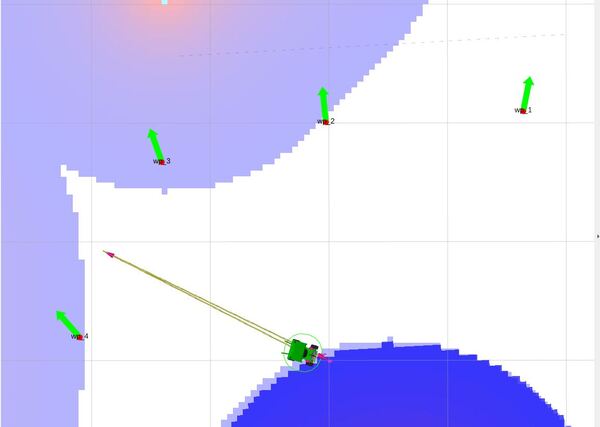
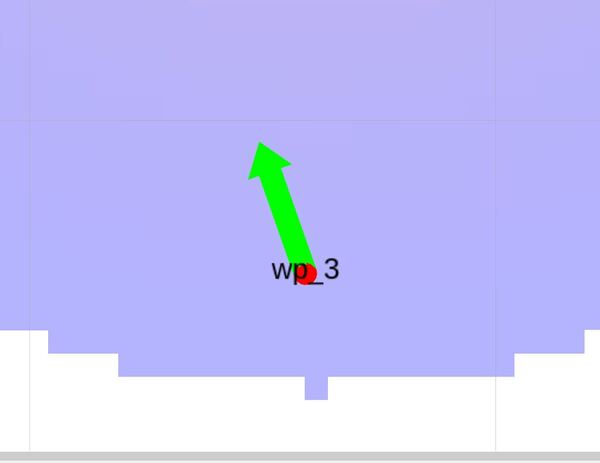
Each waypoint is labeled wp_#, where # is the number of the waypoint.
When you’re ready for the robot to follow the waypoints, click the Start Waypoint Following button.
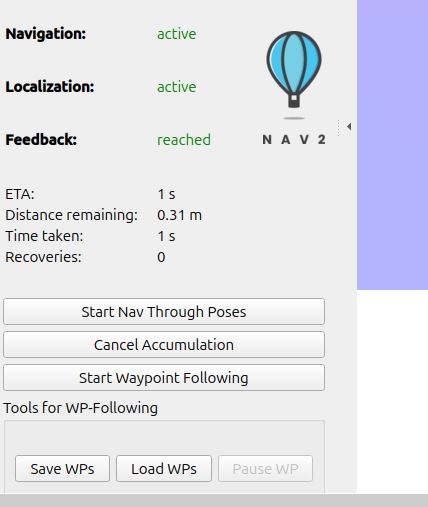
If you want the robot to visit each location without stopping, click the Start Nav Through Poses button.
You should see your robot autonomously navigate to all the waypoints.
Check the CPU and Memory Usage
I often like to check the CPU and memory usage. In general, I want to see usage less than 50%. When you get over 80%, that is when you really start to run into real performance issues.
sudo apt install htophtopMy CPU usage isn’t great. You can see it is quite high.
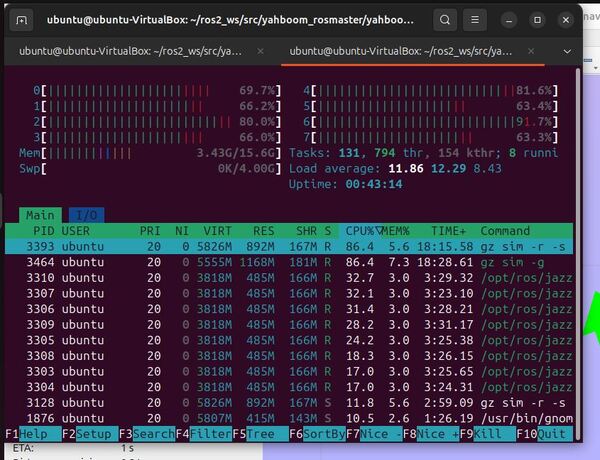
Let’s close the RViz window, and see what we get:
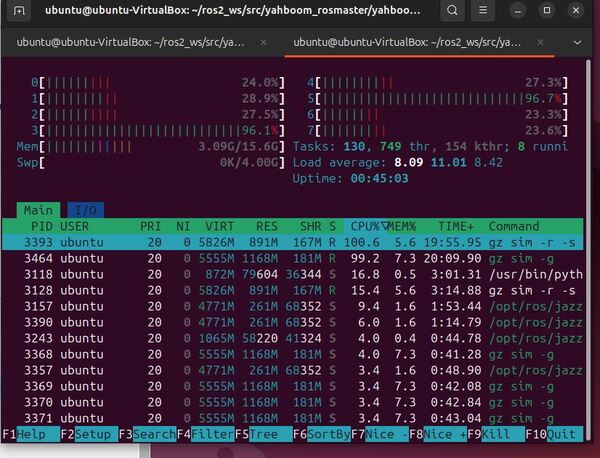
Looks much better.
You can see how RViz really is a resource hog. For this reason, for the robots I develop professionally, I do not run RViz in a production environment. I only use it during development and for debugging.
That’s it! Keep building.

