ROS 2 has three main ways nodes (i.e. the individual C++ or Python programs that make up the robotics system you’re building) can communicate with each other.
Below I will detail the circumstances when you should use each of these communication methods.
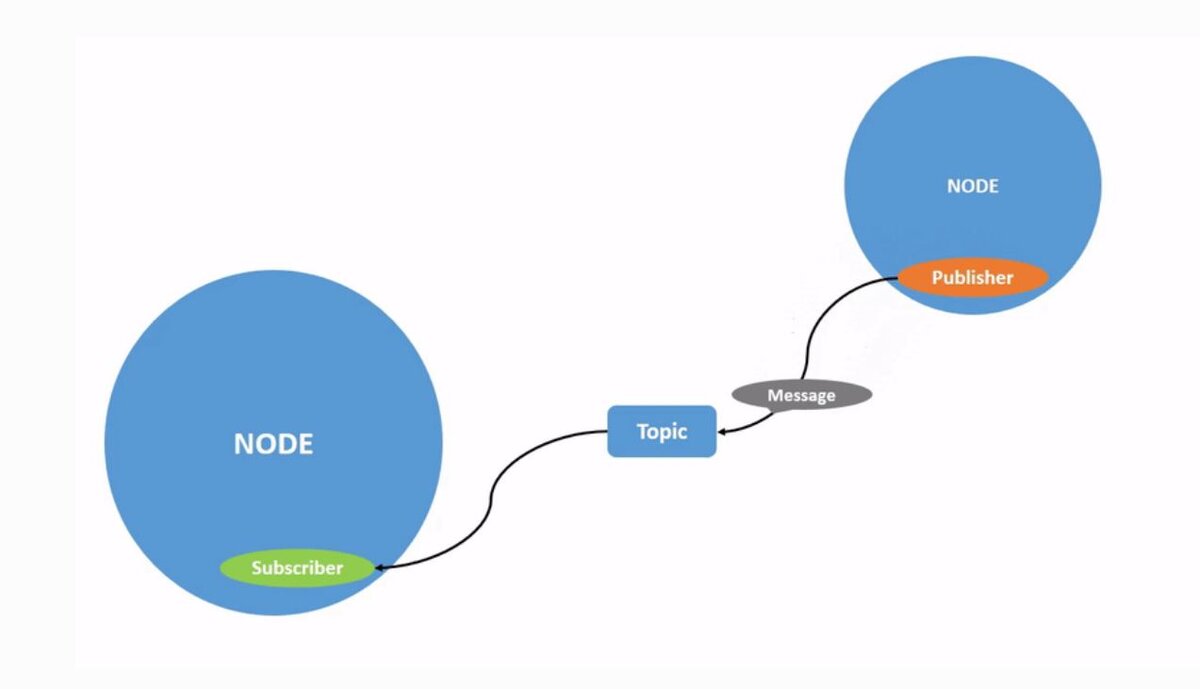
Use Topics for Continuous Data Streams
Use topics when you have continuous data streams (e.g. sensor data, robot state, etc.).
An example of a continuous data stream is laser scan data generated by LIDAR. Data will be continuously published on the topic as long as the robot is up and running.
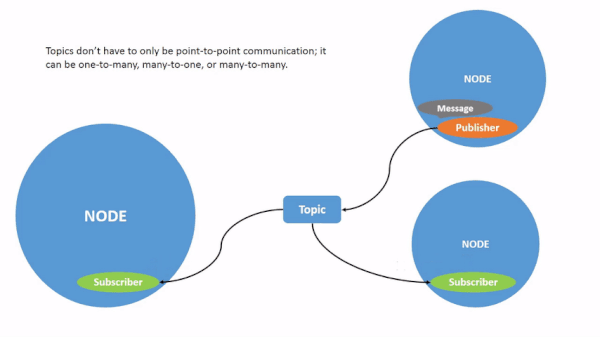
The data types used in topic-based communication are known as messages. Nodes publish messages via topics, and nodes subscribe to messages via topics.
You can use standard ROS 2 message data types, or you can create your own custom message data types.
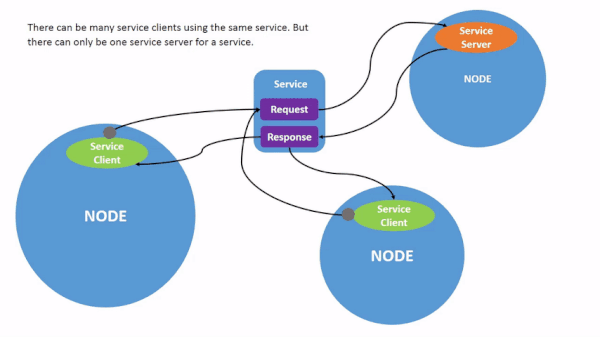
Use Services for Quick Request/Response Communication
Services should be used for fast request/response communication. A Service Client node sends a request (typically for some data) to a Service Server node. The Service Server node then replies to that request with a response.
An example of a service is in this post where I call a service to load a new map once a robot has reached a new floor of a building.
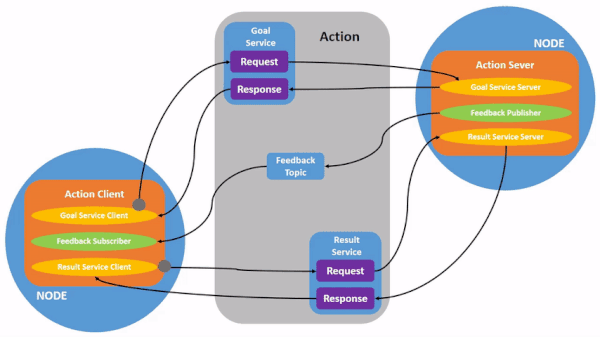
Use Actions for Long-Running Tasks That Have a Clear Beginning and End
Actions should be used for long running processes that have a clear beginning and end. An action is made up of a goal, interim feedback (to keep you updated on the progress being made to reach the goal), and a result.
An Action Client node sends a request (i.e. a Goal) to an ActionServer. The goal might be, for example, for the robot to move to a particular location in the environment.
The Action Server node gives the Action Client feedback on the progress it is making towards the execution of that goal (e.g. the robot’s most recent position along the path towards the goal location).
When the Action Server completes the goal, it sends a result message to the ActionClient.
That’s it! Keep building!