In this tutorial, we will explore advanced object-oriented programming in C++.
Prerequisites
- You have completed this tutorial: How to Generate Doxygen Comments for C++ Code.
Using Getters and Setters
Let’s explore the use of getter and setter functions in C++ and how they can be applied to robotics projects.
Getter and setter functions, also known as accessor and mutator functions, are used to control access to the private data members of a class.
Setter functions allow you to modify the values of private data members, while getter functions allow you to retrieve their values.
Let’s create an example to demonstrate the use of setter and getter functions in a robotics context.
Open a terminal window, and type this:
cd ~/Documents/cpp_tutorialcode .Create a new C++ file and name it setter_getter_example.cpp.
Type the following code into the editor:
#include <iostream>

class RobotArm {
public:
    void set_position(int x, int y, int z) {
        x_ = x;
        y_ = y;
        z_ = z;
    }

    int get_x() const {
        return x_;
    }

    int get_y() const {
        return y_;
    }

    int get_z() const {
        return z_;
    }

private:
    int x_, y_, z_;
};

int main() {
    RobotArm arm;
    arm.set_position(10, 20, 30);
    std::cout << "Robot arm position: ("
              << arm.get_x() << ", "
              << arm.get_y() << ", "
              << arm.get_z() << ")" << std::endl;
    return 0;
}
In this code, we define a RobotArm class with private data members x_, y_, and z_ representing the position of the robot arm in 3D space.
We provide a setter function set_position() that allows us to set the values of x_, y_, and z_ simultaneously.
We also provide getter functions get_x(), get_y(), and get_z() that allow us to retrieve the individual values of x_, y_, and z_, respectively. These getter functions are marked as const to indicate that they do not modify the object’s state.
In the main() function, we create a RobotArm object named arm, set its position using the set_position() function, and then retrieve and print the position using the getter functions.
Run the code.

You should see the robot arm’s position printed in the terminal, demonstrating the use of setter and getter functions.
This example illustrates how setter and getter functions can be used in robotics projects to control access to the private data members of a class. By providing setter and getter functions, you can ensure that the object’s state is modified and accessed in a controlled manner, maintaining the integrity of your robotics system.
Employing Static Methods
Let’s learn about static methods in C++ and how they can be employed in robotics projects.
Static methods, also known as class methods, are functions that belong to the class itself rather than any specific instance of the class. They can be called directly on the class without the need to create an object of the class.
Static methods are “static” because they are initialized and loaded into memory when the class itself is loaded, remaining fixed at the class level rather than being created with each object instance.
Unlike instance methods which are initialized separately for each object instance, static methods stay in one fixed memory location that’s shared across all instances of the class.
Create a new C++ file and name it static_method_example.cpp.
Type the following code into the editor:
#include <iostream>
#include <cmath>

class RobotUtils {
public:
    static double calculate_distance(double x1, double y1, double x2, double y2) {
        double dx = x2 - x1;
        double dy = y2 - y1;
        return std::sqrt(dx * dx + dy * dy);
    }
};

int main() {
    double robot1_x = 0.0, robot1_y = 0.0;
    double robot2_x = 3.0, robot2_y = 4.0;

    double distance = RobotUtils::calculate_distance(robot1_x, robot1_y, robot2_x, robot2_y);
    std::cout << "Distance between robots: " << distance << std::endl;

    return 0;
}
In this code, we define a RobotUtils class with a static method calculate_distance(). This method takes four parameters representing the x and y coordinates of two points and calculates the Euclidean distance between them.
The calculate_distance() method is marked as static, which means it can be called directly on the RobotUtils class without the need to create an instance of the class.
In the main() function, we define the coordinates of two robots, robot1 and robot2. We then call the calculate_distance() method directly on the RobotUtils class, passing the coordinates of the two robots as arguments.
Finally, we print the calculated distance.
Run the code.
You should see the distance between the two robots printed in the terminal.

By using static methods, you can organize your code more effectively and make certain functions accessible without the need to create objects, leading to cleaner and more maintainable code in your robotics projects.
Implementing Virtual Functions
Let’s explore virtual functions in C++ and how they can be implemented in robotics projects.
Virtual functions are a key concept in object-oriented programming that enables polymorphism. They allow derived classes to provide their own implementation of a function that is already defined in the base class.
Create a new C++ file and name it virtual_function_example.cpp.
Type the following code into the editor:
#include <iostream>

class Robot {
public:
    virtual void move() {
        std::cout << "Robot is moving" << std::endl;
    }
};

class WheeledRobot : public Robot {
public:
    void move() override {
        std::cout << "Wheeled robot is rolling" << std::endl;
    }
};

class LeggedRobot : public Robot {
public:
    void move() override {
        std::cout << "Legged robot is walking" << std::endl;
    }
};

int main() {
    Robot* robot1 = new WheeledRobot();
    Robot* robot2 = new LeggedRobot();

    robot1->move();
    robot2->move();

    delete robot1;
    delete robot2;

    return 0;
}
In this code, we define a base class Robot with a virtual function move(). The move() function in the Robot class provides a default implementation that prints “Robot is moving”.
We then define two derived classes, WheeledRobot and LeggedRobot, which inherit from the Robot class. Both derived classes override the move() function to provide their own specific implementation.
The WheeledRobot class prints “Wheeled robot is rolling”, while the LeggedRobot class prints “Legged robot is walking”.
In the main() function, we create pointers to the base class Robot, but we assign them objects of the derived classes WheeledRobot and LeggedRobot. We then call the move() function using these pointers.
Run the code.
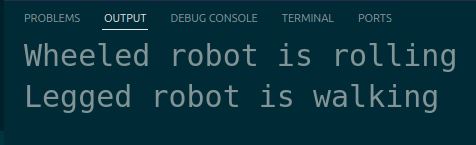
You will see the output of the move() function for each robot, demonstrating polymorphism through virtual functions.
Virtual functions are particularly useful when working with different types of robots or robot components that share a common interface but have varying behaviors. They allow you to write more modular and extensible code, making your robotics projects easier to maintain and expand.
Understanding this Pointer
Let’s dive into understanding the “this” pointer in C++, which is important for managing object-oriented programming in robotics applications. The this pointer is an implicit parameter to all nonstatic member functions, giving a method access to the invoking object’s address.
Let’s start by creating an example that demonstrates how the “this” pointer can be used to access object members and ensure clarity in the code, especially when parameter names are the same as data member names.
Let’s create a new C++ file and name it robot_coordinates.cpp.
Type the following code into the editor:
#include <iostream>

class Robot {
public:
    int x, y;
    Robot(int x, int y) {
        this->x = x;
        this->y = y;
    }
    void print_coordinates() {
        std::cout << "Coordinates: (" << this->x << ", " << this->y << ")" << std::endl;
    }
};

int main() {
    Robot my_robot(3, 7);
    my_robot.print_coordinates();
    return 0;
}
In this code, we define a class Robot with two integer data members x and y.
The constructor takes two parameters with the same names as the data members. We use this->x and this->y to assign the value of the parameters to the object’s data members, making it clear which variables are being referenced.
Run the code.
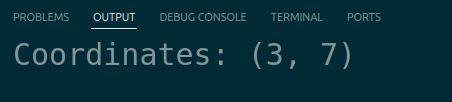
You should see the output “Coordinates: (3, 7)” in the terminal.
This simple example illustrates how the this pointer helps in referring to the calling object’s members, especially in scenarios where local variables or parameters may shadow member names. This is particularly useful in larger robotics projects where such conflicts might arise more frequently.
Using Pointer Operators
Let’s cover the basics of using pointer operators in C++. Understanding pointers is essential for developing efficient robotics applications, where you often need to manipulate memory directly for performance and flexibility.
Let’s get started by creating a practical example that demonstrates the use of pointer operators to handle data effectively.
Create a new C++ file and name it sensor_data_pointers.cpp.
Type the following code into the editor:
#include <iostream>

int main() {
    int sensor_value = 100;
    int* ptr = &sensor_value;

    std::cout << "Sensor Value: " << *ptr << std::endl;  // Dereferencing ptr to get the value of sensor_value
    std::cout << "Memory Address: " << ptr << std::endl; // Displaying the memory address stored in ptr

    *ptr = 200; // Changing the value of sensor_value using the pointer
    std::cout << "Updated Sensor Value: " << sensor_value << std::endl;

    return 0;
}
In this code, we define an integer sensor_value and a pointer ptr which holds the address of sensor_value.
We use the dereference operator * to access and modify the value stored at the memory address the pointer is pointing to.
Run the code.
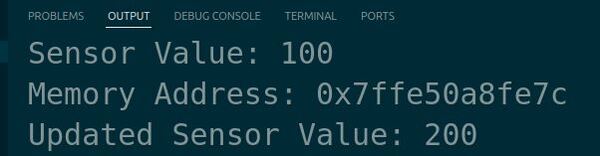
You should see the initial sensor value, its memory address, and the updated sensor value displayed in the terminal.
A pointer is like giving multiple parts of your program a map to where a single piece of data lives in memory, instead of making copies – imagine copying a huge video feed multiple times versus just pointing to where it exists once.
This is important in robotics where you’re often working with massive amounts of real-time data (like video feeds, sensor arrays, or 3D maps) and need to be efficient with your limited RAM, especially on embedded systems that don’t have much memory to begin with.
Demonstrating Polymorphism
Let’s explore polymorphism in C++, a core concept in object-oriented programming that is important for building flexible and scalable robotic systems. Polymorphism enables us to interact with different types of objects through a common interface, allowing for more generalized and reusable code.
Create a new C++ file and name it robot_actuators.cpp.
Type the following code into the editor:
#include <iostream>

// Base class
class Actuator {
public:
    virtual void activate() = 0; // Pure virtual function making Actuator an abstract class
};

// Derived class
class Motor : public Actuator {
public:
    void activate() override {
        std::cout << "Motor is running." << std::endl;
    }
};

// Another derived class
class Servo : public Actuator {
public:
    void activate() override {
        std::cout << "Servo is adjusting position." << std::endl;
    }
};

// Function that demonstrates polymorphism
void test_actuator(Actuator& actuator) {
    actuator.activate(); // Calling the activate function polymorphically
}

int main() {
    Motor motor;
    Servo servo;

    test_actuator(motor);
    test_actuator(servo);

    return 0;
}
Here, the test_actuator function takes a reference (Actuator&) to an Actuator object. Using a reference ensures that no copying of the object occurs, which enhances efficiency by saving memory and processing time. It also guarantees that the passed object is valid since references cannot be null, adding a layer of safety to our function.
Run the code.
You should see “Motor is running.” followed by “Servo is adjusting position.” in the terminal, demonstrating polymorphic behavior.
By using polymorphism, you can manage various types of robotic components through a unified interface, simplifying complex software architectures.
Thanks, and I’ll see you in the next tutorial.
Keep building!