In this tutorial, we will explore lambda expressions and file I/O using C++.
Prerequisites
- You have completed this tutorial: How to Use Structs and Operator Overloading in C++.
- I am assuming you are using Visual Studio Code, but you can use any code editor.
Using Lambda Expressions
Let’s explore lambda expressions in C++ and how they can be used in robotics projects.
Lambda expressions allow us to define anonymous functions inline, which is particularly useful for operations like sorting sensor data or defining quick callback functions.
Open a terminal window, and type this:
cd ~/Documents/cpp_tutorialcode .Create a new C++ file and name it lambda_sensors.cpp.
Type the following code into the editor:
#include <iostream>
#include <vector>
#include <algorithm>  // Include for std::sort

int main() {
    // Example list of sensor readings (could be temperatures, distances, etc.)
    std::vector<int> sensorReadings = {90, 85, 60, 75, 100};

    // Print original readings
    std::cout << "Original readings: ";
    for (int reading : sensorReadings) {
        std::cout << reading << " ";
    }
    std::cout << std::endl;

    // Using a lambda expression to sort the readings in descending order
    std::sort(sensorReadings.begin(), sensorReadings.end(), [](int a, int b) {
        return a > b;  // Comparison criterion defined inline
    });

    // Print sorted readings
    std::cout << "Sorted readings (desc): ";
    for (int reading : sensorReadings) {
        std::cout << reading << " ";
    }
    std::cout << std::endl;

    return 0;
}
In this code, we start with a vector of integers representing sensor readings. The lambda expression is used within the std::sort function. Here, the lambda (int a, int b) { return a > b; } defines an inline function that tells std::sort how to compare two elements, specifying that we want to sort in descending order without the need for a separate function.
Run the code.

You should see the original and sorted readings displayed, showcasing how lambda expressions facilitate custom sorting in a concise manner.
This example highlights the utility of lambda expressions in C++, allowing for immediate definition of small scope functions directly within the code where they are needed.
Iterating with for_each Loop
Let’s explore how to use the for_each loop in C++. The for_each loop is part of the C++ Standard Library and provides a clear, concise way to perform operations on every element in a range, such as an array or a container like a vector. This is particularly useful in robotics for tasks like processing sensor data, where you need to apply the same operation to a series of values.
Let’s demonstrate the use of the for_each loop with an example where we’ll process a list of distances recorded by a robot’s sensors.
Create a new C++ file and name it for_each_loop.cpp.
Type the following code into the editor:
#include <iostream>
#include <vector>
#include <algorithm>  // Include for std::for_each

int main() {
    // Example list of distances measured by sensors (in meters)
    std::vector<int> distances = {5, 10, 3, 7, 9};

    // Print original distances
    std::cout << "Original distances: ";
    for (int distance : distances) {
        std::cout << distance << " ";
    }
    std::cout << std::endl;

    // Using a lambda expression with std::for_each to increment each distance by 1
    std::for_each(distances.begin(), distances.end(), [](int &d) {
        d += 1;  // Increment each element by 1
    });

    // Print updated distances
    std::cout << "Updated distances: ";
    for (int distance : distances) {
        std::cout << distance << " ";
    }
    std::cout << std::endl;

    return 0;
}
In this example, we begin with a vector of integers representing distances recorded by a robot. We use std::for_each along with a lambda expression that increments each element in the vector. The lambda (int &d) { d += 1; } directly modifies each element by adding 1, demonstrating an efficient way to process and update data in-place.
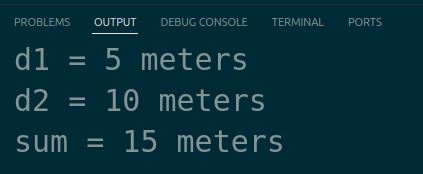
Run the code.
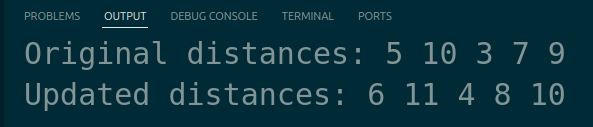
You should see both the original and updated distances displayed, showing the practical application of the for_each loop in modifying elements directly.
Handling File Input and output
Let’s explore how to handle file input and output in C++ and its applications in robotics projects.
File input and output are essential operations in many programs, including robotics applications. In C++, the <fstream> library provides classes for reading from and writing to files. The ifstream class is used for reading from files, while the ofstream class is used for writing to files.
Let’s create a new C++ file named file_io_example.cpp to demonstrate file input and output.
Type the following code into the editor:
#include <iostream>
#include <fstream>
#include <string>

int main() {
    std::string filename = "robot_data.txt";
    std::ofstream output_file(filename);

    if (output_file.is_open()) {
        output_file << "Sensor1: 10.5\n";
        output_file << "Sensor2: 20.7\n";
        output_file << "Sensor3: 15.2\n";
        output_file.close();
        std::cout << "Data written to file: " << filename << std::endl;
    } else {
        std::cout << "Unable to open file for writing." << std::endl;
    }

    std::ifstream input_file(filename);
    std::string line;

    if (input_file.is_open()) {
        while (std::getline(input_file, line)) {
            std::cout << line << std::endl;
        }
        input_file.close();
    } else {
        std::cout << "Unable to open file for reading." << std::endl;
    }

    return 0;
}
In this code, we first create a file named “robot_data.txt” using an ofstream object. We check if the file is successfully opened using the is_open() function. If the file is open, we write some sensor data to the file using the << operator and then close the file.
Next, we read the data from the same file using an ifstream object. We check if the file is successfully opened for reading. If the file is open, we read the file line by line using getline() and print each line to the console. After reading, we close the file.
Run the code.
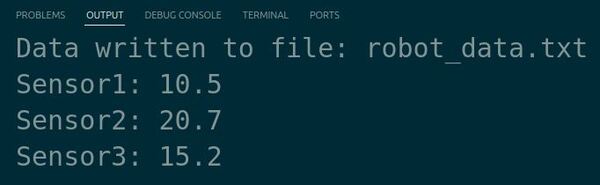
The output confirms that the data was written to the file and then displays the contents of the file.
In robotics projects, file I/O can be used for various purposes, such as saving sensor data, reading configuration files, or storing robot states for analysis or debugging.
Thanks, and I’ll see you in the next tutorial.
Keep building!