In this tutorial, we will explore multithreading and time functions in C++.
Prerequisites
- You have completed this tutorial: How to Use Memory Management and Smart Pointers in C++.
- I am assuming you are using Visual Studio Code, but you can use any code editor.
Implementing Threads
Let’s explore how to implement threads in C++ for robotics projects. Threads allow multiple tasks to run simultaneously, which is essential for parallel processing in robotics applications.
Open a terminal window, and type this:
cd ~/Documents/cpp_tutorial code . Create a new C++ file and name it threads.cpp.
Type the following code into the editor:
#include <iostream>
#include <thread>
#include <chrono>

void sensorTask(const std::string& sensorName, int duration) {
    std::cout << "Sensor task started: " << sensorName << std::endl;
    std::this_thread::sleep_for(std::chrono::seconds(duration));
    std::cout << "Sensor task completed: " << sensorName << std::endl;
}

void controlTask(const std::string& controllerName, int duration) {
    std::cout << "Control task started: " << controllerName << std::endl;
    std::this_thread::sleep_for(std::chrono::seconds(duration));
    std::cout << "Control task completed: " << controllerName << std::endl;
}

int main() {
    std::cout << "Main thread started" << std::endl;

    // Create threads for sensor tasks
    std::thread sensorThread1(sensorTask, "TemperatureSensor", 2);
    std::thread sensorThread2(sensorTask, "HumiditySensor", 3);

    // Create a thread for control task
    std::thread controlThread(controlTask, "MotionController", 4);

    // Wait for the threads to finish
    sensorThread1.join();
    sensorThread2.join();
    controlThread.join();

    std::cout << "Main thread completed" << std::endl;

    return 0;
}
In this code, we define two functions: sensorTask() and controlTask(). These functions simulate tasks performed by sensors and controllers in a robotics system. Each task prints a message when it starts and completes, and sleeps for a specified duration using std::this_thread::sleep_for().
In the main() function, we create three threads:
- Two threads for sensor tasks: sensorThread1 and sensorThread2. These threads execute the sensorTask() function with different sensor names and durations.
- One thread for the control task: controlThread. This thread executes the controlTask() function with a controller name and duration.
After creating the threads, we use join() to wait for each thread to finish before proceeding further in the main thread.
Run the code.
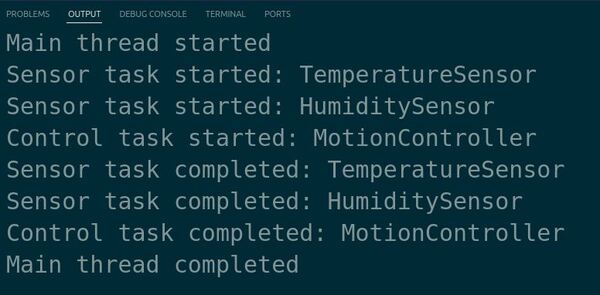
The output displays the messages from each thread, indicating when they start and complete. The threads execute concurrently, and the main thread waits for all the threads to finish before completing.
Using Time Functions
Let’s explore how to use time functions in C++ to enhance your robotics projects. Time functions are essential for tasks such as measuring elapsed time, creating delays, and synchronizing actions in robotic systems.
We will use the chrono library, which provides a set of convenient functions to work with time in C++.
Create a new C++ file and name it time_example.cpp.
Type the following code into the editor:
#include <iostream>
#include <chrono>
#include <thread>

int main() {
    auto start_time = std::chrono::steady_clock::now();

    std::this_thread::sleep_for(std::chrono::seconds(2));

    auto end_time = std::chrono::steady_clock::now();
    std::chrono::duration<double> elapsed_seconds = end_time - start_time;

    std::cout << "Elapsed time: " << elapsed_seconds.count() << " seconds\n";
    return 0;
}
In this code, we include the necessary headers: iostream for input/output operations, chrono for time functions, and thread for creating delays.
Then, in the main function, we capture the start time using std::chrono::steady_clock::now().
Next, we create a 2-second delay using std::this_thread::sleep_for(std::chrono::seconds(2)).
Finally, we capture the end time and calculate the elapsed time by subtracting start_time from end_time. We then print the elapsed time using std::cout.
Run the code.

You should see the elapsed time printed in the terminal.
Thanks, and I’ll see you in the next tutorial.
Keep building!