

In this tutorial, we are going to learn how to use if-else statements in Python to make decisions. This is a core concept in robotics, where your robot needs to decide its actions based on sensor inputs and internal states.
Prerequisites
- You have completed this tutorial: How to Create Basic Programs Using Python.
Working with if-else Statements
Let’s get started by opening your code editor and creating a new file named robot_decision_making.py inside the following folder: ~/Documents/python_tutorial.
Type the following code:
# if-else statement for robot movement
obstacle_detected = True

if obstacle_detected:
    print("Stop or change direction.")
else:
    print("Continue moving forward.")
In this script, our robot checks if there’s an obstacle. If obstacle_detected is True, the robot will stop or change direction. Otherwise, it will keep moving forward.

Now, let’s simulate more complex decision-making with an elif statement, useful for handling different types of sensors.
# Using elif for sensor-based conditions
sensor_reading = 'low_battery'

if sensor_reading == 'obstacle':
    print("Avoid obstacle.")
elif sensor_reading == 'low_battery':
    print("Return to charging station.")
else:
    print("Normal operation.")
This script helps a robot decide actions based on its sensor readings, whether to avoid obstacles, recharge, or proceed with normal tasks.

We can also nest if-else statements to handle hierarchical decisions.
# Nested if-else for more detailed decision-making
if sensor_reading == 'obstacle':
    distance = 5  # distance to obstacle in meters
    if distance < 1:
        print("Immediate stop.")
    else:
        print("Prepare to change direction.")
else:
    print("Continue exploration.")
This approach lets our robot make more nuanced decisions based on the distance to an obstacle.

To manage multiple conditions simultaneously, like combining sensor checks and operational states, we use logical operators.
# Logical operators for complex conditions
battery_level = 20  # percentage
if sensor_reading == 'obstacle' and battery_level > 50:
    print("Navigate around the obstacle.")
elif sensor_reading == 'obstacle' and battery_level <= 50:
    print("Return to base for recharge.")
else:
    print("Continue on current path.")
This script demonstrates how our robot can decide whether to navigate around obstacles or return to base for a recharge based on its battery level.

Working with if-elif Statements
In this tutorial, we’re going to dive deeper into using if-elif statements in Python to handle multiple conditions more efficiently. This is important for making your programs smarter and more responsive to a range of inputs.
Let’s start by creating a new file called robot_decision_system.py inside the following folder: ~/Documents/python_tutorial.
If-elif statements allow our robots to evaluate multiple conditions and react appropriately, which is important for tasks like navigation and interaction.
Here is an example with a robot deciding how to move based on sensor data.
# Robot movement decision system
obstacle_type = 'wall'

if obstacle_type == 'wall':
    print("Turn around")
elif obstacle_type == 'small object':
    print("Go over")
elif obstacle_type == 'gap':
    print("Stop and find another path")
else:
    print("Clear path, continue moving")
In this script, the robot checks the type of obstacle and decides its action. The if-elif chain stops checking after it finds a true condition.

To add more complexity, we’ll integrate a power check.
# Power-aware robot decision system
battery_level = 20  # percentage

if obstacle_type == 'wall' and battery_level > 20:
    print("Turn around")
elif obstacle_type == 'small object' and battery_level > 10:
    print("Go over")
elif obstacle_type == 'gap':
    print("Stop and find another path")
else:
    print("Low power: Return to base")
You can see how the robot’s decision-making adjusts based on the obstacle type and battery level. This method is efficient for guiding a robot’s actions.

Implementing Comparison Operators
Let’s open your code editor and create a new file named comparison_operators.py inside the following folder: ~/Documents/python_tutorial.
Comparison operators compare two values and return a Boolean value, either True or False. They’re useful for directing the flow of logic in programs, particularly in if statements.
Let’s take a look at each of the primary comparison operators.
# Equal to
print("10 == 10:", 10 == 10)  # Outputs True

# Equal to
print("10 == 5:", 10 == 5)  # Outputs False

# Not equal to
print("10 != 5:", 10 != 5)    # Outputs True

# Less than
print("5 < 10:", 5 < 10)      # Outputs True

# Greater than
print("10 > 5:", 10 > 5)      # Outputs True

# Less than or equal to
print("5 <= 5:", 5 <= 5)      # Outputs True

# Greater than or equal to
print("10 >= 5:", 10 >= 5)    # Outputs True
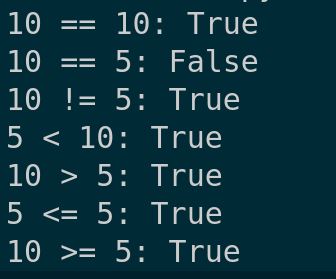
These examples show how we can evaluate basic numerical comparisons.
Let’s apply these in a practical scenario, like a robotic sensor reading that determines if an action is needed.
# Robot sensor threshold check
sensor_threshold = 10
sensor_reading = 12

if sensor_reading >= sensor_threshold:
    print("Sensor threshold exceeded, take action.")
else:
    print("Sensor levels normal, no action required.")
In this script, we check if a sensor reading exceeds a set threshold, a common task in robotic programming.

Comparison operators aren’t limited to numbers. Let’s look at how they work with strings.
# String comparison
print("'abc' < 'def':", 'abc' < 'def')  # Outputs True

This example demonstrates that ‘abc’ is less than ‘def’ based on alphabetical order, similar to how words are ordered in a dictionary.
That’s it! Keep building!