How Robots Help Us Explore Extreme Environments

Robots are now being used to explore some of the most dangerous and inhospitable places on Earth, and even beyond.

In this blog post, we will cover some of the ways that robots are helping to explore the unknown. We will also take a look at some of the challenges that need to be overcome in order to develop robots that can safely and effectively explore even the most extreme environments.

Robots in Space

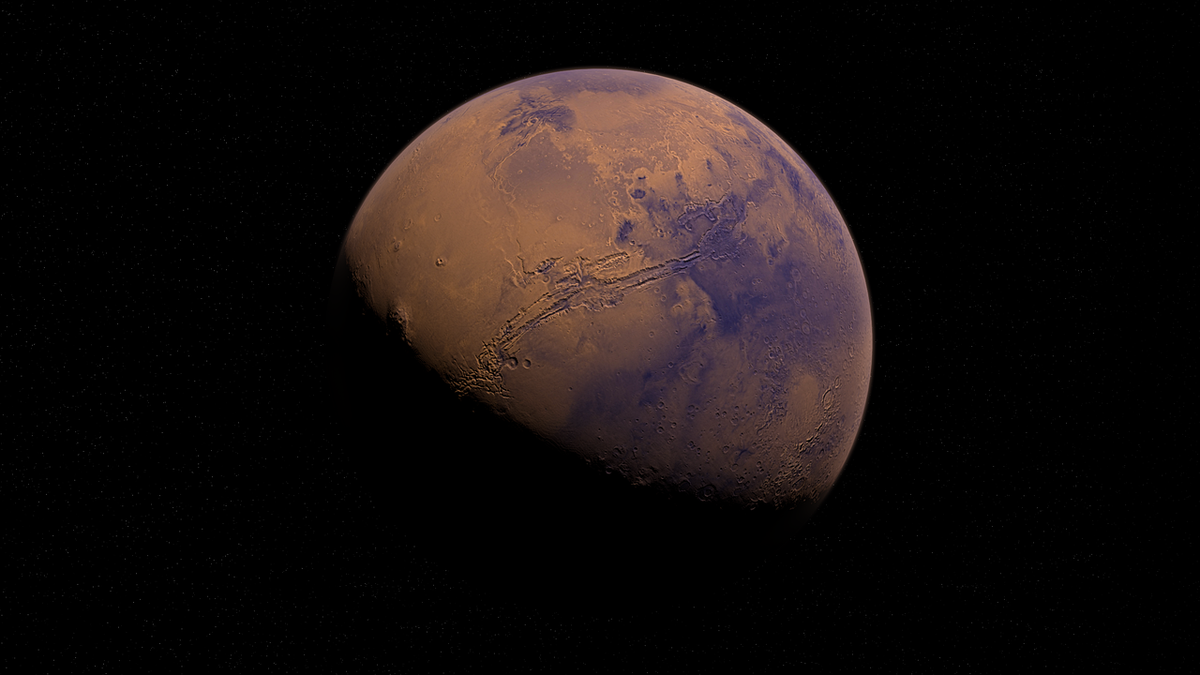
One of the most exciting areas of robotic exploration is space. Robots have been used to explore the Moon, Mars, and other planets in our solar system. They have also been used to repair and service satellites in orbit.

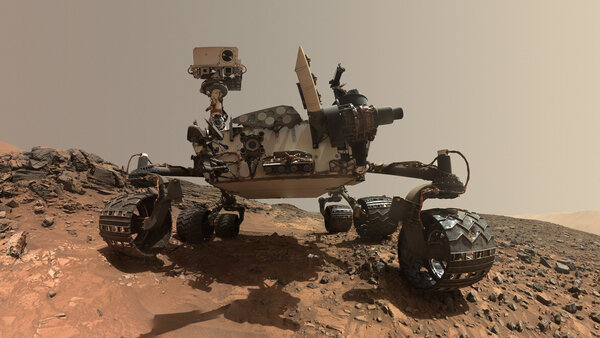
One of the most famous robotic space explorers is the Curiosity rover, which landed on Mars in 2012. Curiosity has been exploring the Gale Crater on Mars for over a decade, and has made many important discoveries about the planet’s past and present environment.

curiosity_rover_mars

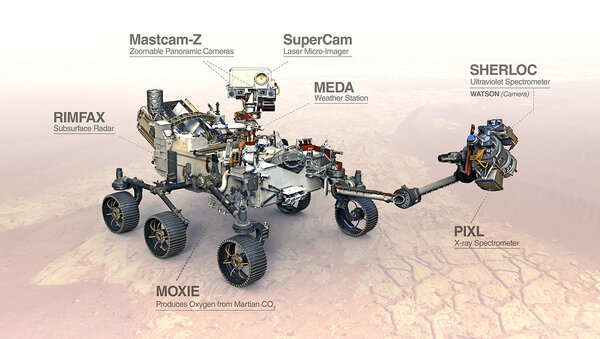
Another notable robotic space explorer is the Perseverance rover, which landed on Mars in 2021. Perseverance is tasked with collecting samples from Mars that will be returned to Earth for analysis. This could help us to learn even more about the Red Planet and its potential for habitability.

perseverance_mars_rover

Robots in the Deep Sea

Robots are also being used to explore the deep sea. The deep sea is one of the least explored places on Earth, and robots are helping us to learn more about its unique ecosystems and biodiversity.

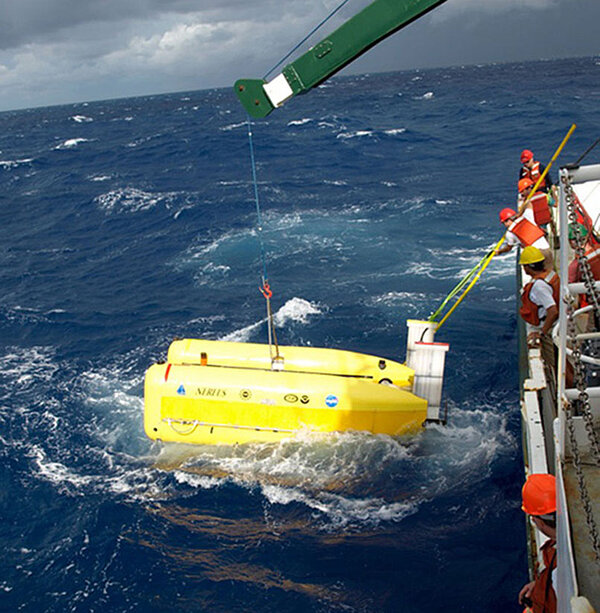
One example of a robotic deep sea explorer is the remotely operated vehicle (ROV) Nereus. Nereus is capable of diving to depths of over 10,000 meters, and has been used to explore the Mariana Trench, the deepest point in the ocean.

nereus_underwater_vehicle

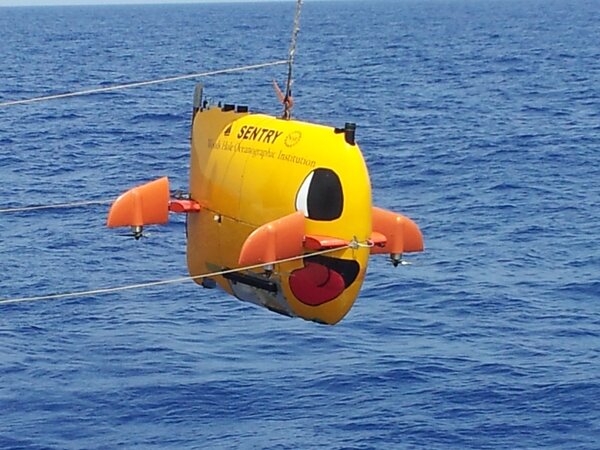
Another example of a robotic deep sea explorer is the autonomous underwater vehicle (AUV) Sentry. Sentry is capable of operating independently for months at a time, and has been used to map the seafloor and collect data on marine life.

sentry

Robots in Other Extreme Environments

Robots are also being used to explore other extreme environments on Earth, such as volcanoes, caves, and glaciers. These environments can be dangerous for humans to explore, but robots can safely navigate them and collect data.

One example of a robotic extreme environment explorer is the robot submarine Nereid Under Ice (NUI). NUI is a hybrid remotely operated vehicle (ROV) developed by the Woods Hole Oceanographic Institution (WHOI). It is designed to explore and sample under-ice environments, which are difficult to access using traditional methods.

drift-ice-3048163_640

NUI is equipped with a high-definition video camera, a 7-function electro-hydraulic manipulator arm, and a range of acoustic, chemical, and biological sensors. It can operate in water depths of up to 4,000 meters and can be deployed from icebreakers or research vessels.

Challenges and Future Directions

There are still a number of challenges that need to be overcome in order to develop robots that can safely and effectively explore even the most extreme environments.

One challenge is developing robots that are powered by long-lasting batteries. This is especially important for robots that need to operate in remote or inaccessible areas.

Another challenge is developing robots that can withstand harsh environmental conditions. For example, robots that explore volcanoes need to be able to withstand high temperatures and toxic gases.

kilauea-3088675_640

Finally, robots need to be equipped with sensors and artificial intelligence (AI) that allow them to perceive their surroundings and make decisions autonomously. This is especially important for robots that need to operate in dangerous or unpredictable environments.

Additional Thoughts

Here are some additional thoughts on how robots are helping us to explore the unknown:

  • Robots are being used to explore the human body. For example, robotic surgical systems allow surgeons to perform complex procedures with greater precision and accuracy than would be possible with traditional methods.
  • Robots are being used to explore the past. For example, archaeologists are using robots to excavate ancient ruins and search for lost artifacts.

The possibilities for robotic exploration are endless. As robots become more capable and sophisticated, we can expect them to help us to learn more about the world around us.

Keep building!

Calculate Pulses per Revolution for a DC Motor With Encoder

In this tutorial, we will learn how to calculate the number of pulses per 360 degree revolution for a DC motor with a built-in encoder. The motor that we will work with looks like the following image, however you can use any motor that looks similar to it:

1_dc_motor_encoder_wheels

Real-World Applications

When we know the number of pulses that an encoder outputs for each 360-degree turn of a motor, we can use that information to calculate the angular velocity of the wheels (in radians per second). 

When we know the angular velocity of the wheels on a robot and the radius of the wheels, we can calculate how fast the robot is moving (i.e. speed) as well as the distance a robot has traveled in a given unit of time. This information is important for helping us determine where a robot is in a particular environment.

Prerequisites

  • You have the Arduino IDE (Integrated Development Environment) installed on either your PC (Windows, MacOS, or Linux).

You Will Need

This section is the complete list of components you will need for this project (#ad).

OR

  • Self-Balancing Car Kit (which includes everything above and more…Elegoo and Osoyoo are good brands you can find on Amazon.com)

Disclosure (#ad): As an Amazon Associate I earn from qualifying purchases.

What is a Pulse?

When a motor with a built-in encoder rotates, it generates pulses, which are alternating electrical signals of high voltage and low voltage. Each time the signal goes from low to high (i.e. rising), we count that as a single pulse.

time-intervalJPG

Our goal is to take our motor and measure the number of encoder pulses (often referred to as “ticks”) it generates in a single 360 degree turn of the motor.

Set Up the Hardware

The first thing we need to do is set up the hardware.

Here is the wiring diagram:

jgb37_dc_motor_with_encoder-1
  • The Ground pin of the motor connects to GND of the Arduino.
  • Encoder A (sometimes labeled C1) of the motor connects to pin 2 of the Arduino. Pin 2 of the Arduino will record every time there is a rising digital signal from Encoder A.
  • Encoder B (sometimes labeled C2) of the motor connects to pin 4 of the Arduino. The signal that is read off pin 4 on the Arduino will determine if the motor is moving forward or in reverse. We’re not going to use this pin in this tutorial, but we will use it in a future tutorial.
  • The VCC pin of the motor connects to the 5V pin of the Arduino. This pin is responsible for providing power to the encoder.
  • For this project, you don’t need to connect the motor pins (+ and – terminals) to anything since you will be turning the motor manually with your hand.

Write and Load the Code

Now we’re ready to calculate the number of encoder pulses per revolution. Open the Arduino IDE, and write the following program. The name of my program is pulses_per_revolution_counter.ino.

/*
 * Author: Automatic Addison
 * Website: https://automaticaddison.com
 * Description: Count the number of encoder pulses per revolution.  
 */

// Encoder output to Arduino Interrupt pin. Tracks the pulse count.
#define ENC_IN_RIGHT_A 2

// Keep track of the number of right wheel pulses
volatile long right_wheel_pulse_count = 0;

void setup() {

  // Open the serial port at 9600 bps
  Serial.begin(9600); 

  // Set pin states of the encoder
  pinMode(ENC_IN_RIGHT_A , INPUT_PULLUP);

  // Every time the pin goes high, this is a pulse
  attachInterrupt(digitalPinToInterrupt(ENC_IN_RIGHT_A), right_wheel_pulse, RISING);
  
}

void loop() {
 
    Serial.print(" Pulses: ");
    Serial.println(right_wheel_pulse_count);  
}

// Increment the number of pulses by 1
void right_wheel_pulse() {
  right_wheel_pulse_count++;
}

Compile the code by clicking the green checkmark in the upper-left of the IDE window.

Connect the Arduino board to your personal computer using the USB cord.

Load the code we just wrote to your Arduino board.

Now, follow the following steps in the image below.

open-serial-monitorJPG

When you open the Serial Monitor, the pulse count should be 0.

2_starting_pulses

Using your hand, rotate the motor a complete 360-degree turn.

Here is the output. We can see that there were 620 pulses generated. 

3-ending-pulses

Thus, this motor generates 620 pulses per revolution.

That’s it. Keep building!

How To Install Ubuntu and Raspbian on Your Raspberry Pi 4

In this tutorial, we will set up a Raspberry Pi 4 with both the Ubuntu 20.04 and Raspbian operating systems.

You Will Need

2020-08-29-150822

This section is the complete list of components you will need for this project.

Install Ubuntu

Prepare the SD Card

Grab the USB MicroSD Card Reader.

2020-08-29-151538

Take off the cap of the USB MicroSD Card Reader.

2020-08-29-151621

Stick the MicroSD card inside the Card Reader.

Stick the Card Reader into the USB drive on your computer.

Download the Raspberry Pi Imager for your operating system. I’m using Windows, so I will download Raspberry Pi Imager for Windows.

Open the Raspberry Pi Imager. Follow the instructions to install it on your computer.

When the installation is complete, click Finish.

Open the CHOOSE OS menu.

Scroll down, and click “Ubuntu”.

Select the Ubuntu 20.04 download (32-bit server).

Click CHOOSE SD. 

Select the microSD card you inserted. 

Click WRITE, and wait for the operating system to write to the card. It will take a while so be patient.

While you’re waiting, grab your Raspberry Pi 4 and the bag of heat sinks.

2020-08-29-154338
2020-08-29-154824

Peel off the backup of the heat sinks, and attach them to the corresponding chips on top of the Raspberry Pi.

2020-08-29-154344

Grab the cooling fan.

2020-08-29-155325

Connect the black wire to header pin 6 of the Raspberry Pi. Connect the red wire to header pin 1 of the Raspberry Pi.

2020-08-29-155750

Install the Raspberry Pi inside the case.

2020-08-29-155840

Connect the PiSwitch to the USB-C Power Supply. It should snap into place.

2020-08-29-160447

Once the installation of the operating system is complete, remove the microSD card reader from your laptop.

Set Up Wi-Fi

Reinsert the microSD card into your computer.

2020-08-29-161429

Open your File Manager, and find the network-config file. Mine is located on the F drive in Windows.

Open that file using Notepad or another plain text editor.

Uncomment (remove the “#” at the beginning) and edit the following lines to add your Wi-Fi credentials (don’t touch any of the other lines):

wifis:
  wlan0:
  dhcp4: true
  optional: true
  access-points:
    <wifi network name>:
      password: "<wifi password>"

For example:

wifis:
  wlan0:
  dhcp4: true
  optional: true
  access-points:
    "home network":
      password: "123456789"

Make sure the network name and password are inside quotes.

Save the file.

Set Up the Raspberry Pi

Safely remove the microSD Card Reader from your laptop.

Remove the microSD card from the card reader.

Insert the microSD card into the bottom of the Raspberry Pi.

Connect a keyboard and a mouse to the USB 3.0 ports of the Raspberry Pi.

2020-08-29-165525

Connect an HDMI monitor to the Raspberry Pi using the Micro HDMI cable connected to the Main MIcro HDMI port (which is labeled HDMI 0).

Connect the 3A USB-C Power Supply to the Raspberry Pi. You should see the computer boot.

Log in using “ubuntu” as both the password and login ID. You will have to do this multiple times.

You will then be asked to change your password.

Type:

sudo reboot

Type the command: 

hostname -I 

You will see the IP address of your Raspberry Pi. Mine is 192.168.254.68. Write this number down on a piece of paper because you will need it later.

Now update and upgrade the packages.

sudo apt update
sudo apt upgrade

Now, install a desktop.

sudo apt install xubuntu-desktop

Installing the desktop should take around 20-30 minutes or so.

Once that is done, it will ask you what you want as your default display manager. I’m going to use gdm3.

Wait for that to download.

Reboot your computer.

sudo reboot

Your desktop should show up.

Type in your password and press ENTER.

Click on Activities in the upper left corner of the screen to find applications.

If you want to see a Windows-like desktop, type the following commands:

cd ~/.cache/sessions/

Remove any files in there.

Type:

rm 

Then press the Tab key and press Enter.

Now type:

xfdesktop

Connect to Raspberry Pi from Your Personal Computer

Follow the steps for Putty under step 9b at this link to connect to your Raspberry Pi from your personal computer.

Install Raspbian

Now, we will install the Raspbian operating system. Turn off the Raspberry Pi, and remove the microSD card.

Insert the default microSD card that came with the kit.

Turn on the Raspberry Pi.

You should see an option to select “Raspbian Full [RECOMMENDED]”. Click the checkbox beside that.

Change the language to your desired language.

Click Wifi networks, and type in the password of your network.

Click Install.

Click Yes to confirm.

Wait while the operating system installs.

You’ll get a message that the operating system installed successfully.

Now follow all the steps from Step 7 of this tutorial. All the software updates at the initial startup take a really long time, so be patient. You can even go and grab lunch and return. It might not look like the progress bar is moving, but it is.

2020-08-29-212546

Keep building!